
Update: May 2020
This article was originally created in 2018 and completely updated in May 2020. I will not be updating it going forward.
This is part of my Introduction to Hosting WordPress on Amazon Web Services (AWS) tutorial.
SSH, or secure shell, is a protocol that allows a user to remotely connect to another computer, such as a server. SSH provides an encrypted connection from the local machine that you are using (like your laptop) to another computer, or “host,” in this case, an AWS EC2 virtual machine in the cloud. Although SSH does have a password option, in practice the Public Key Infrastructure (PKI) is used to enforce stricter security: a public key is stored on the machine that you are SSH’ing into, and you use a private key on your local machine to authenticate.
In this tutorial I will review the steps needed to connect to the AWS EC2 instance that I created in WordPress on Amazon EC2: Launch an EC2 Instance to Create a WordPress Site over Secure Shell (SSH) using the command line. In my case I am using the macOS Terminal, which is Unix-based, but the commands will generally be the same as long as the command-line interface you are using is on a Linux-based or Unix-based system. If you are using Windows, you will need to install an application like PuTTY, or install Bash on Windows 10.
- Connect to an EC2 Instance Using SSH
- Connect to phpMyAdmin on an EC2 Instance Using SSH
- Connect to an EC2 Instance Using SSH and use the Bitnami Helper Tool
If you’ve never used the command-line before, this article will also serve as an introduction to basic command-line usage.
The details in the instructions below, such as usernames, file names, file paths, etc., are all values that I used on my own computer and are for demonstration purposes only.
Connect to an EC2 Instance Using SSH
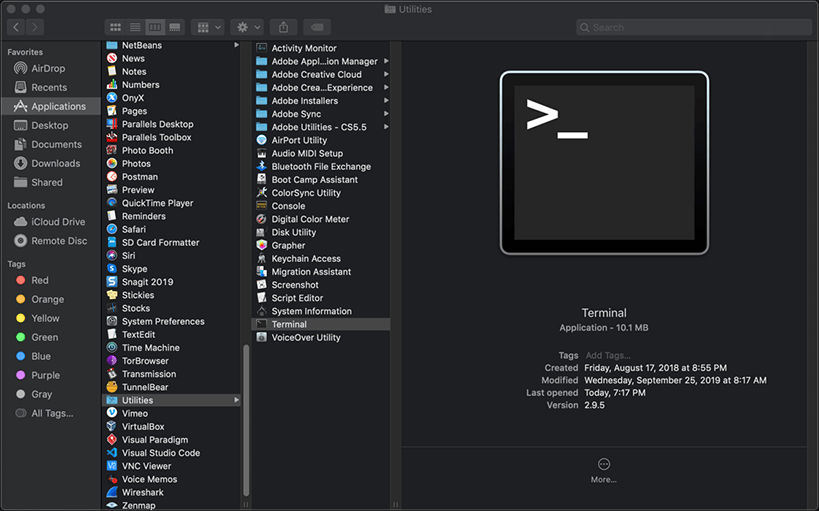
- Launch macOS X Terminal, found in Applications > Utilities.
- You start with a blank screen and the command prompt. To find out where you are, type
pwdfor present working directory (or folder). In this example, the output is/Users/techwriter. This is the “home” directory for the techwriter user account. The list command,ls, is used to list the contents of directories and may be the command you use the most. Here I uselswith the optionsaandl:- The
aoption displays “hidden” files and directories that begin with a dot (.) so that you can see all of the contents of the directory. - The
loption displays details of each item in the long format, including permissions, ownership, and other metadata. Typels -aland pressEnter.
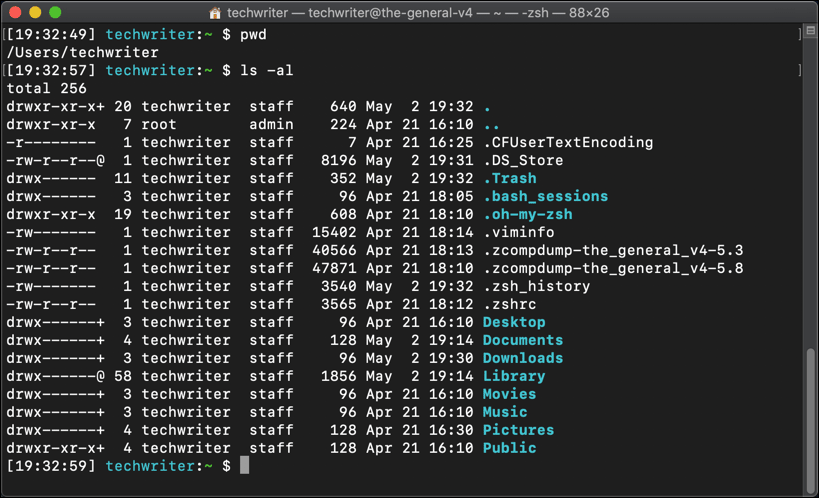
- The
- Keys are typically stored in the
.sshdirectory within the user’s home directory. Sometimes the.sshdirectory has already been created. Here there is no.sshdirectory, so we create it with themkdir(make directory) command and then list the contents of the directory again to make sure the.sshdirectory was created:mkdir .sshls -al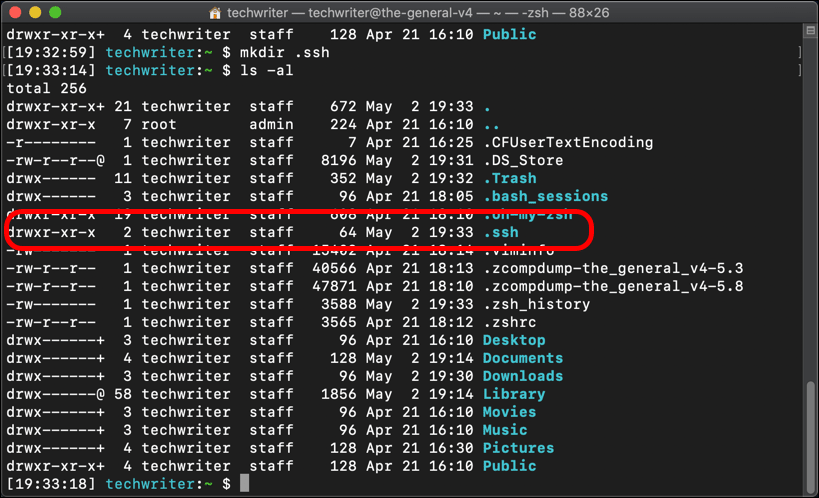
- Do you remember in the first section when I downloaded the key pair and said that private key needed to be safely kept? We’re going to use that private key now. In this tutorial the name of the private key is
test_234.pemand it is in theDownloadsdirectory. Use themvcommand to move it to the new.sshdirectory:mv /Users/techwriter/Downloads/test_234.pem /Users/techwriter/.ssh/test_234.pem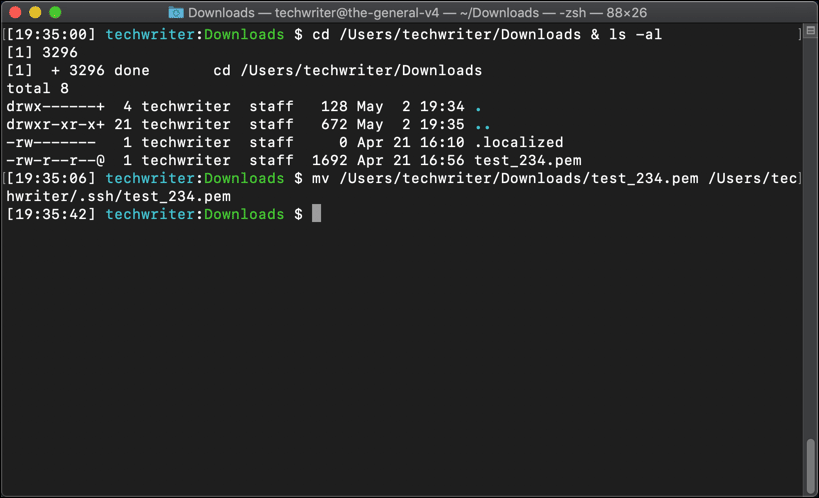
- Navigate into the
.sshdirectory:cd /.ssh - Use the
chmodcommand to change the permissions on the private key so that it cannot be modified by other users:chmod 0600 test_234.pem - List the file permissions for the directory again with
ls -aland look at the ownership and permissions fortest_234.pem. The permissions-rw-------@means that the owner can read and write to the file, but that no other users can read, write, or execute it.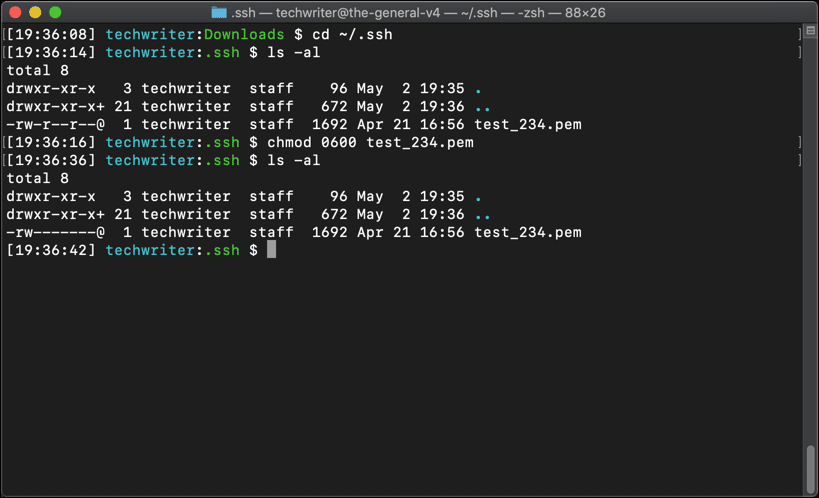
- Note: If you make any edits to your private key, you will corrupt it, and without a copy of the original, you will lose your ability to connect to your EC2 instance. Do not edit your private key. Some users may even use the
chmodcommand with the0400option, so that even the file’s owner can only read it.
- Note: If you make any edits to your private key, you will corrupt it, and without a copy of the original, you will lose your ability to connect to your EC2 instance. Do not edit your private key. Some users may even use the
- Now we have secured the private key’s permissions, we need to add it to the computer’s SSH user agent:
ssh-add test_234.pem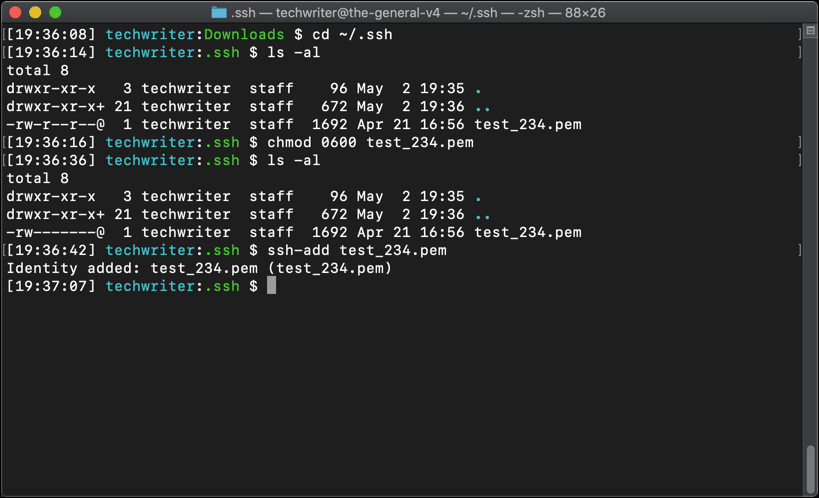
- Use the
sshcommand to connect to the EC2 instance:ssh -i "test-234.pem" bitnami@ec2-15-223-95-15.ca-central-1.computer.amazon.comssh: The SSH command.-i: The identity-file, in this case the private key. I used-i "test_234.pem". Since we were are currently in the same directory (.ssh) as the private key, we do not need the file path. If you wanted to use this command from a different directory, you would need to use the complete file path to the private key (in this example,/Users/techwriter/.ssh/test_234.pemor~/.ssh/test_234.pem).bitnami@ec2-15-223-95-15.ca-central-1.computer.amazon.com: The username (bitnami) and host address (ec2-15-223-95-15.ca-central-1.computer.amazon.com) of the EC2 instance we are connecting to. I got this information from Bitnami’s own documentation. We went over where to get the IP address for the EC2 instance in WordPress on Amazon EC2: Launch an EC2 Instance to Create a WordPress Site and in WordPress on Amazon EC2: IP and Domain-Name Addressing.
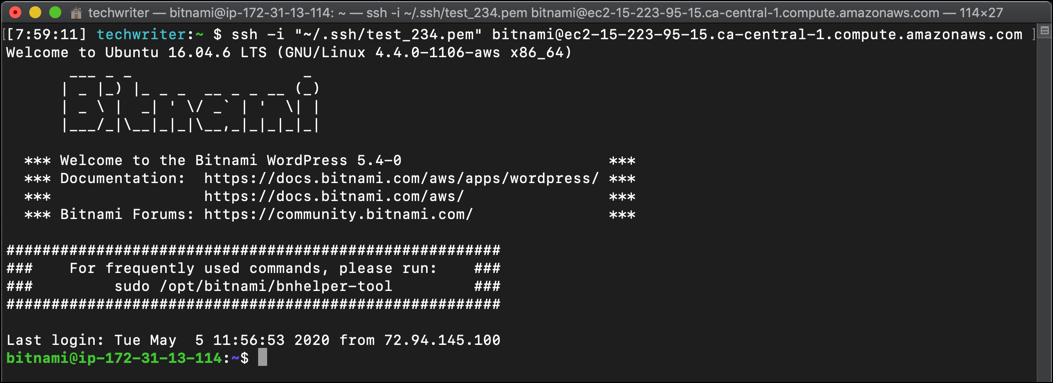
- If this is your first time connecting to the EC2 instance (or any other computer on the internet) over SSH, you will see a message like this:
The authenticity of host 'ec2-15-223-95-15.ca-central-1.computer.amazon.com (15.223.95.15)' can't be established.ECDSA key fingerprint is [...]
The fingerprint is not recognized because it is your first time connecting to the EC2 instance. Typeyesand press enter.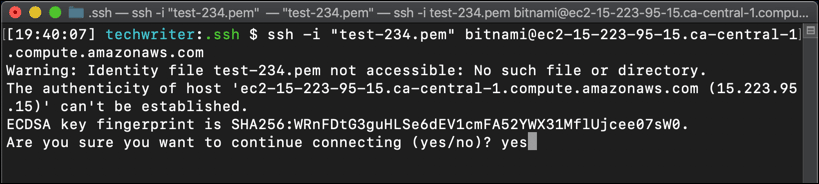
- You know you are connected to the server because the command line displays a text design (this one spells out
Bitnami) along with system information. This block of text is known as an MOTD (message of the day).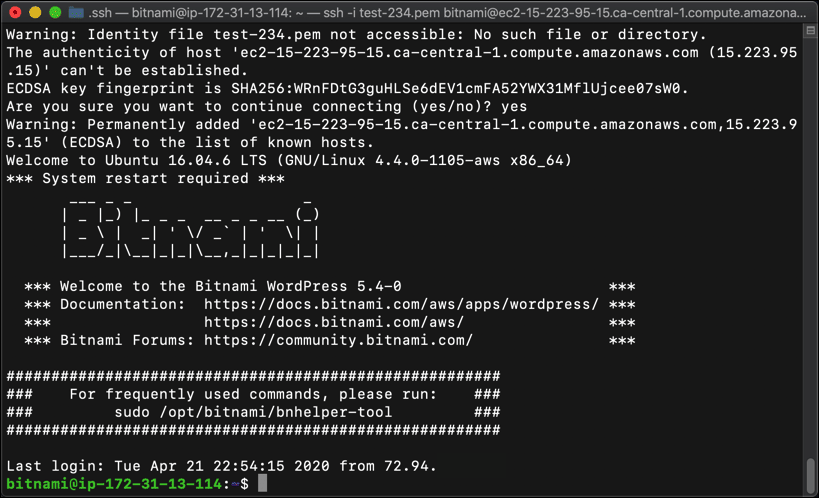
- Now you are logged in to the EC2 instance, you can look around. Type
pwdto see where you are. The command-line displays/home/bitnami, meaning that you are in the home directory for the bitnami user.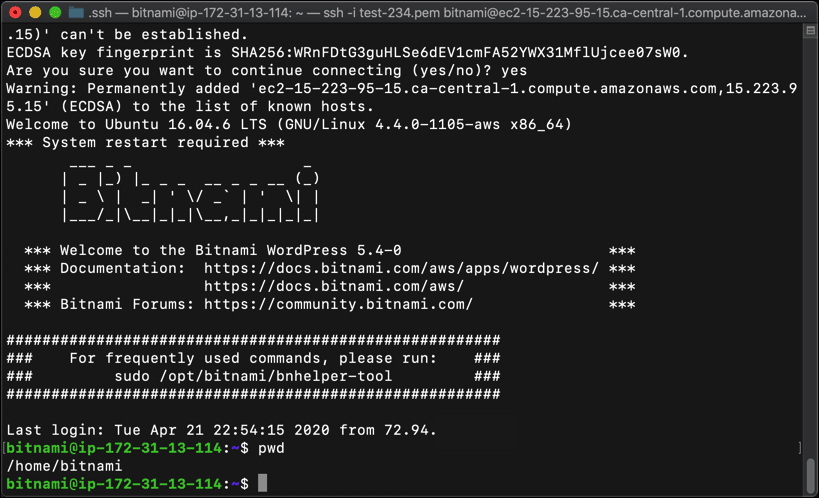
- I want to navigate to the EC2 instance’s top-level or “root” directory (denoted in Linux by a
/) and list its contents. To do so I use two commands that we’ve already used, but I can enter both on one line, and separate them with two ampersands before I press enter:cd / && ls -al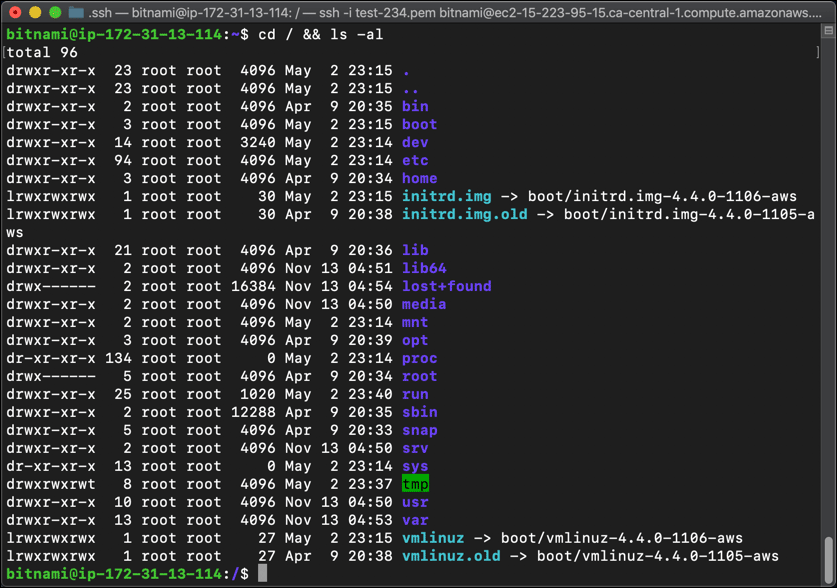
- I already know where the WordPress installation is, so I navigate there and list its contents using that double ampersand shortcut:
cd /opt/bitnami/apps/wordpress/htdocs && ls -al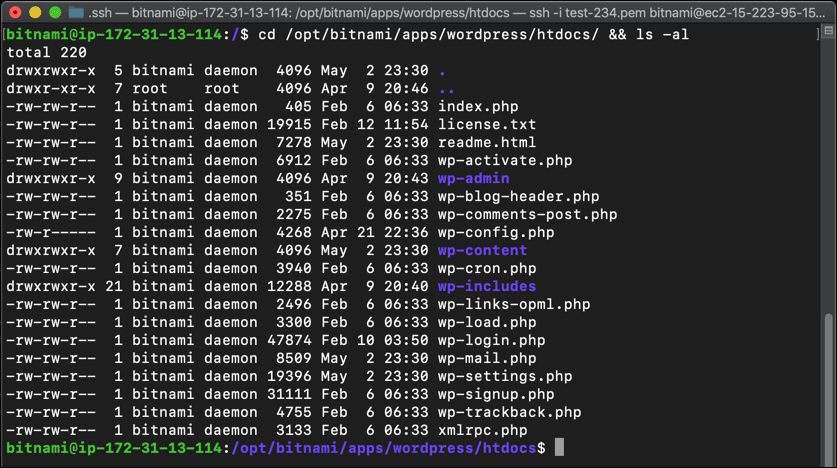
- One of the files you may recognize is
wp-config.php. This may be the most important file in your WordPress installation. It tells WordPress what database to connect to, with what credentials, and more. One of the uses of SSH is to access files likewp-config.phpand make changes to them using text editors installed on the virtual machine. One of the more commonly available text editors you may encounter is Nano. To open a file and edit in Nano, enter:nano wp-config.php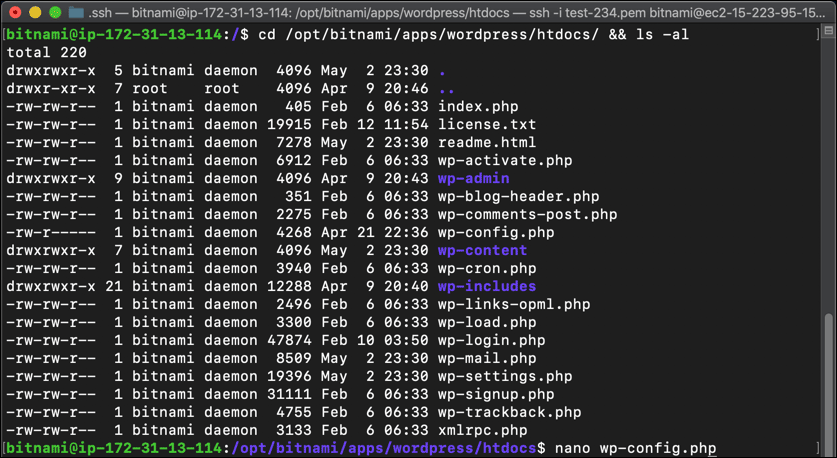
- The wp-config file loads.
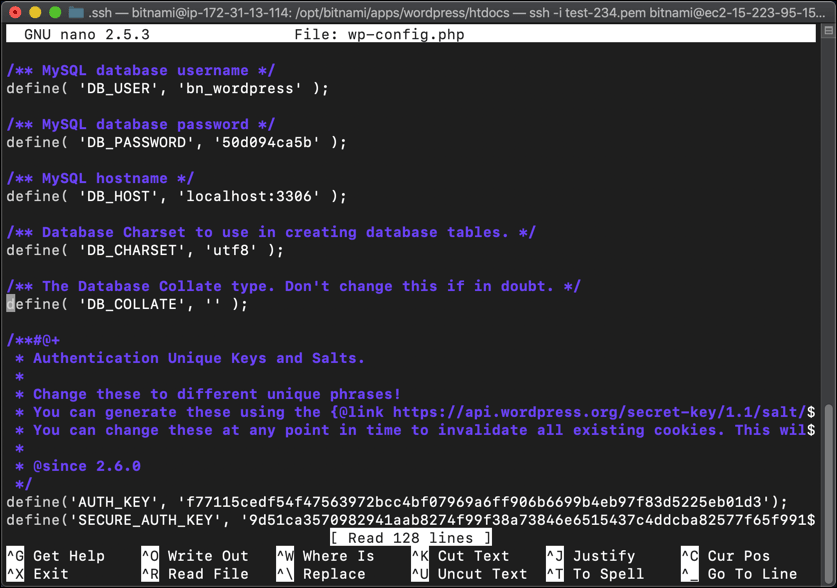
- If you make any changes, press
Control+Oto “Write Out” or save any changes.
- Press
Enterto save the file with the same file name.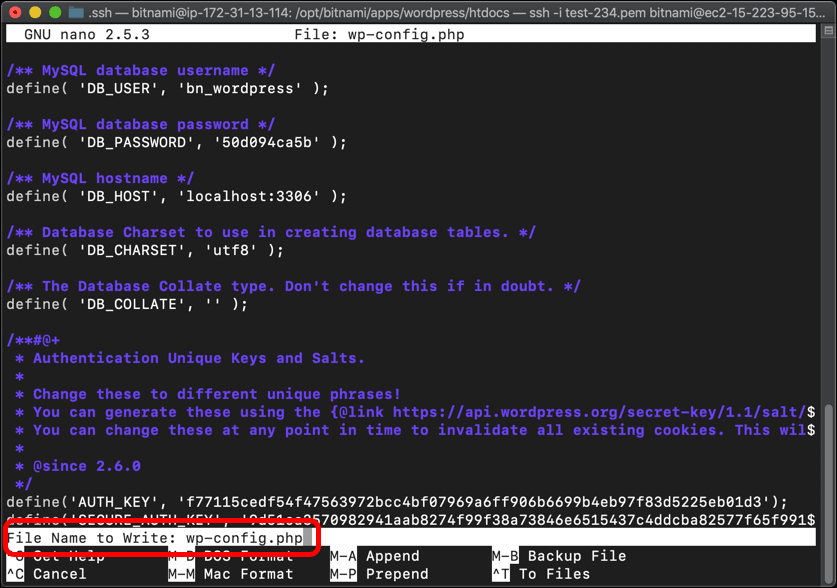
- Press
Control+Xto exit the wp-config file.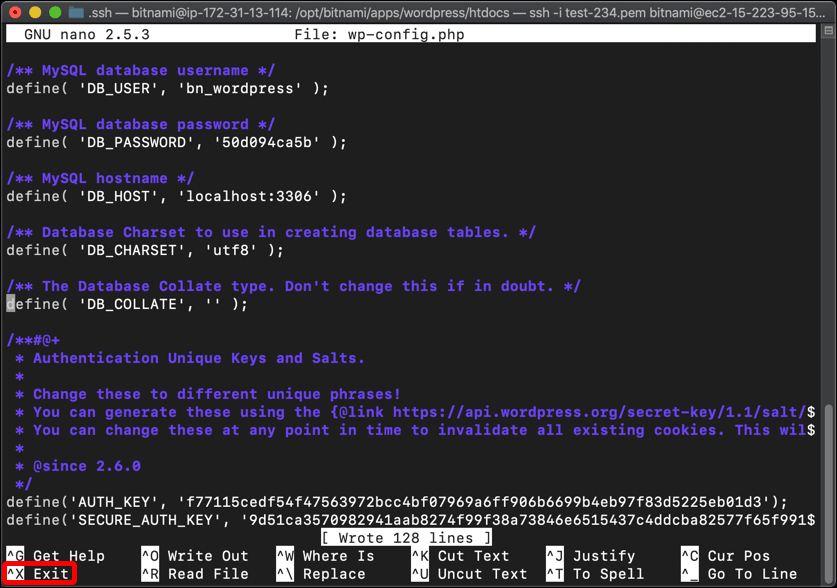
- Depending on your own knowledge and preferences, and what is installed on the EC2 instance, you can use another text editor, like vi:
vi wp-config.php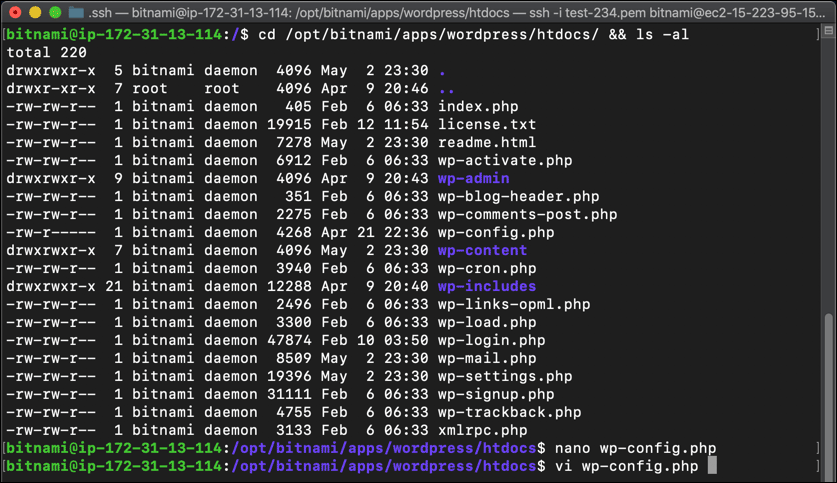
- Make your changes and save by typing a colon, then w and q (
:+w+q).
- Or quit vi and close the file without making changes by typing a colon, then q and ! (
:+q+!).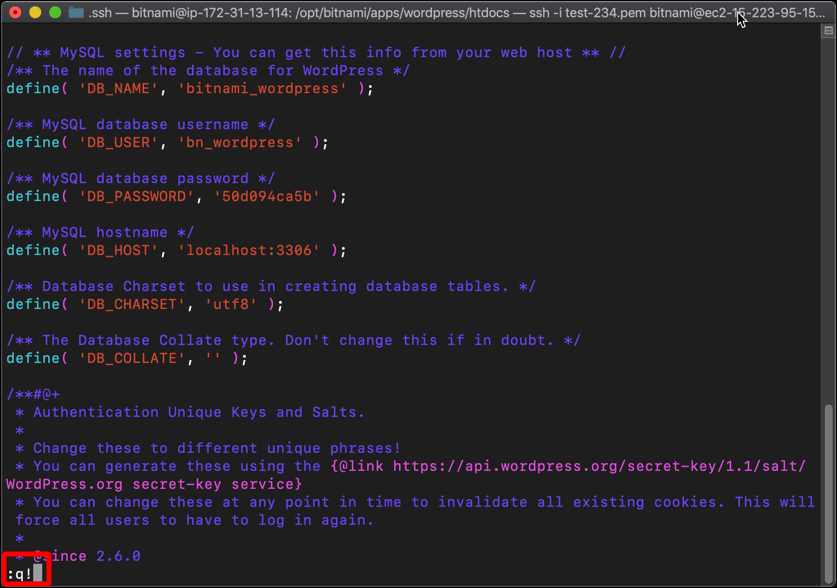
- That’s the introduction to SSH and how to use it with an AWS EC2 instance like WordPress Certified by Bitnami and Automattic. When you are done with your SSH session, type
exitto disconnect.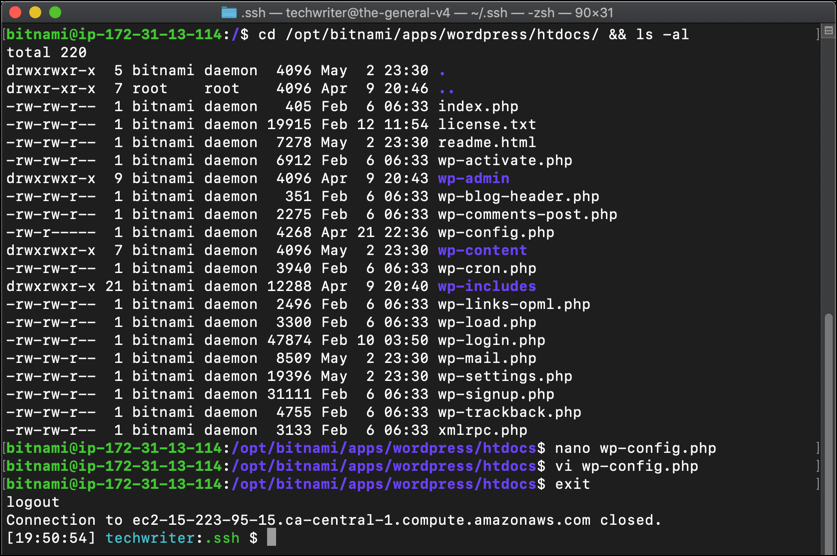
Connect to phpMyAdmin on an EC2 Instance Using SSH
The phpMyAdmin application provides users with a web interface with which they can access and work on the MySQL database that provides the content for their WordPress site. I am not going to go into detail about how to use phpMyAdmin, but I will show you how to access it and log in when you are using the EC2 instance provided by the WordPress Certified by Bitnami and Automattic AMI.
- Use a variant of the
sshcommand to connect to the phpMyAdmin installation for your EC2 instance:
ssh: The SSH command.-N: A command used with port forwarding.-L 8888:127.0.0.1:80: The -L option denotes port forwarding from the local socket, port 8888, to the remote socket, port 80 on our EC2 instance. We are using the local host IP address of the EC2 instance, 127.0.0.1.- Note: If you have already configured your EC2 instance to use HTTPS, replace
80with443.
- Note: If you have already configured your EC2 instance to use HTTPS, replace
-i: The identity-file, in this case the private key. I used the complete file path to the private key:-i "~/.ssh/test_234.pem".bitnami@ec2-15-223-95-15.ca-central-1.computer.amazon.com: The same username and host address (ec2-15-223-95-15.ca-central-1.computer.amazon.com) that we used to connect to the EC2 instance in the first example.
- When you press
Enterto execute the command, Terminal will not display any output. The cursor will just kind of hang. There is a clue that it is executing the command in the top of the shell window. Leave this window alone while you are using phpMyAdmin.
- The SSH connection we created allows you to access the EC2 instance’s phpMyAdmin installation remotely. Go to your web browser and enter the following URL:
http://127.0.0.1:8888/phpmyadmin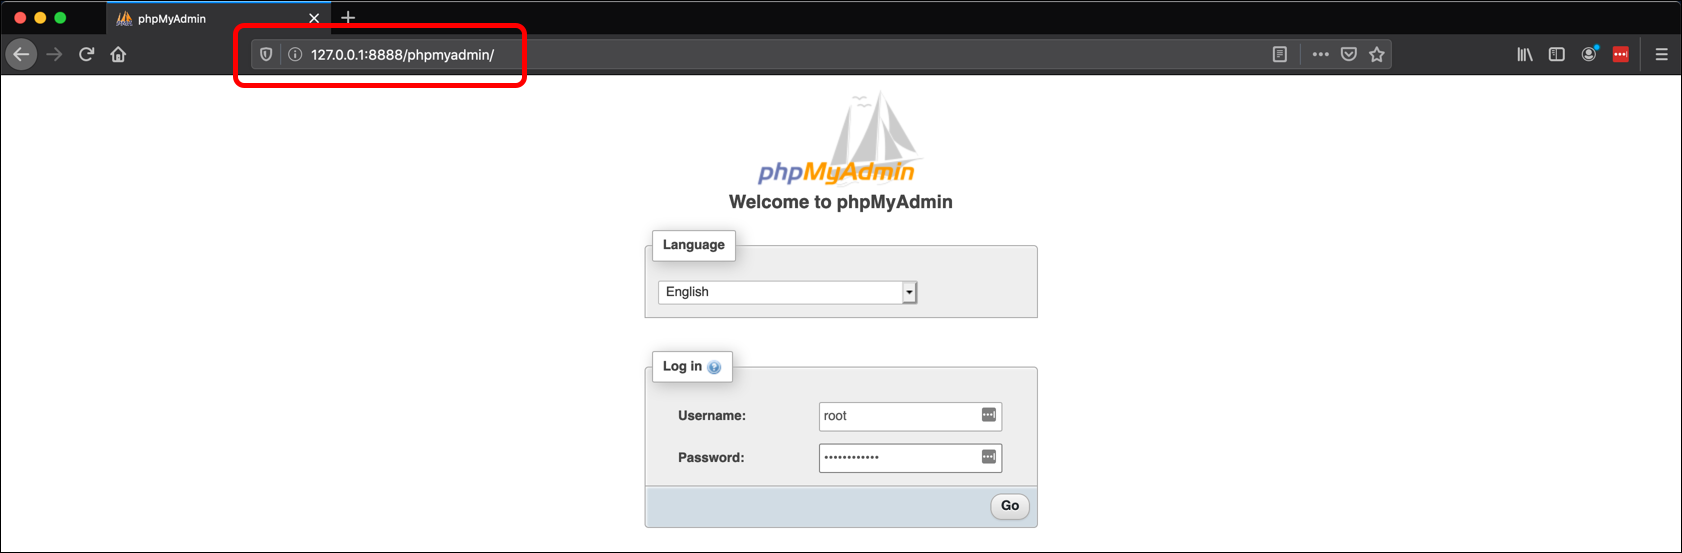
- The phpMyAdmin login page loads. Enter
rootas the Username. The Password is the same password from the System Log of your EC2 instance. (See WordPress on Amazon EC2: Launch an EC2 Instance to Create a WordPress Site for more information.)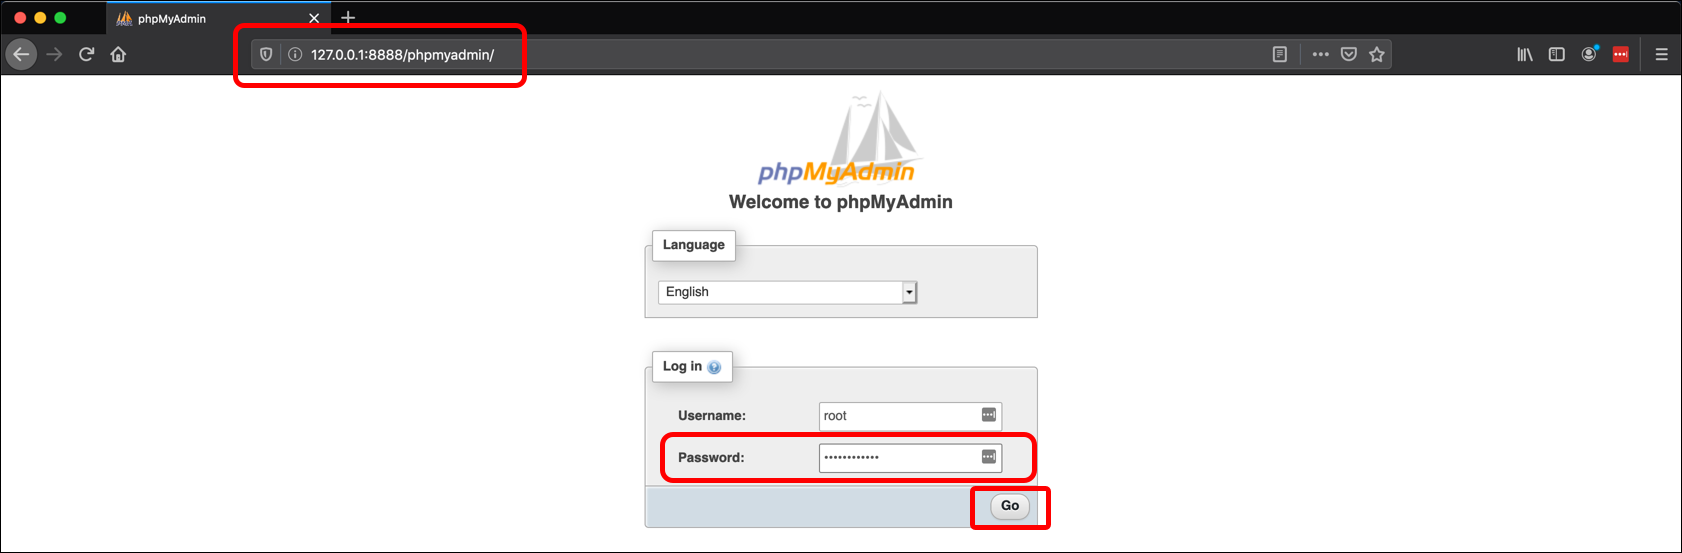
- On the phpMyAdmin login page,
- Password for the root account from the EC2 System Log:

- Password for the root account from the EC2 System Log:
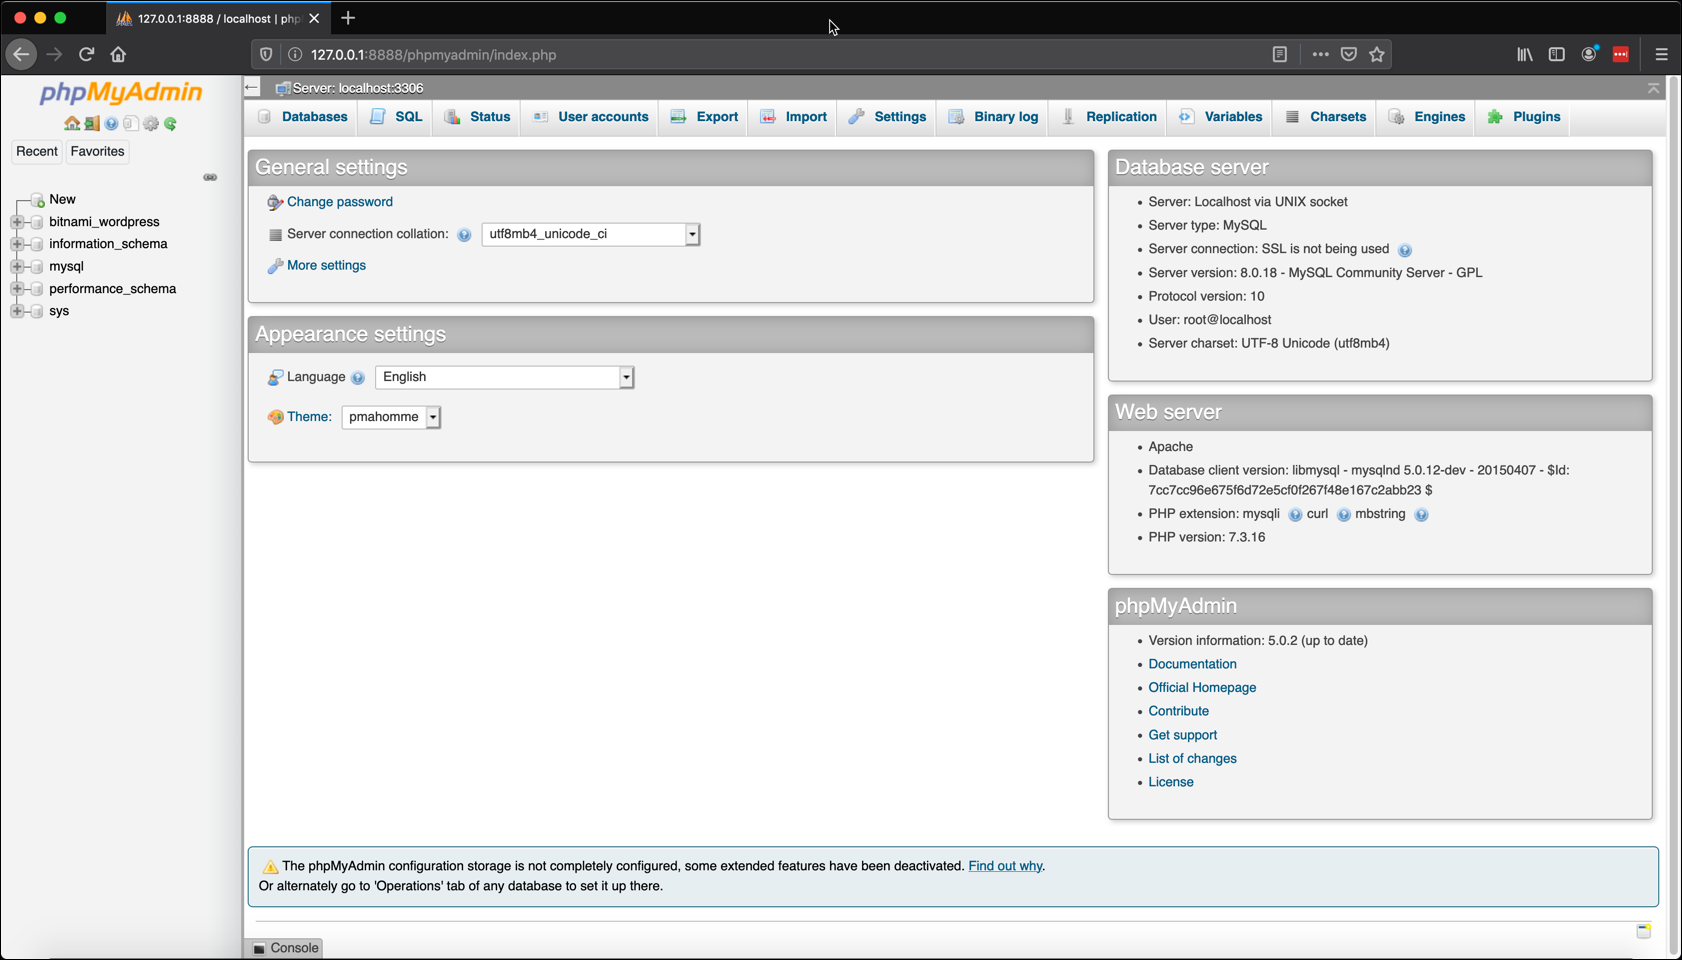
- As the root user, you can use the phpMyAdmin to create databases, import and export the content of those databases, and create user accounts with privileges to access those databases.
- When you are done using phpMyAdmin, click the log out icon (a door) in the left sidebar.
- When you are finished using the SSH connection to access phpMyAdmin, you can terminate it by pressing
Control+C.
Connect to an EC2 Instance Using SSH and use the Bitnami Helper Tool
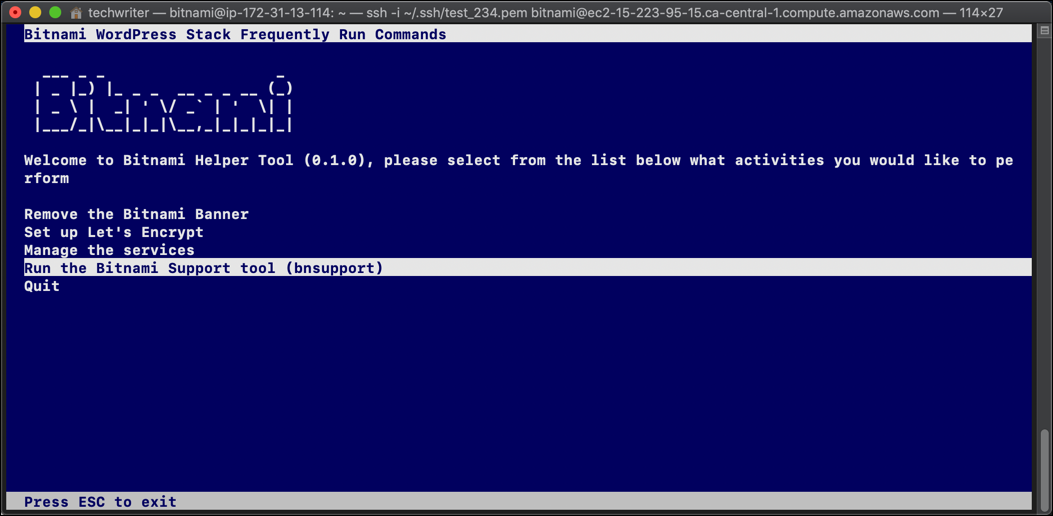
A newer feature provided by the WordPress Certified by Bitnami and Automattic AMI is the Bitnami Helper Tool, which can help you complete some common tasks.
- Use the instructions to Connect to an EC2 Instance Using SSH.
- Part of Bitnami’s MOTD suggest using the
bnhelper-toolto do help manage the EC2 instance. Enter the command:sudo /opt/bitnami/bnhelper-tool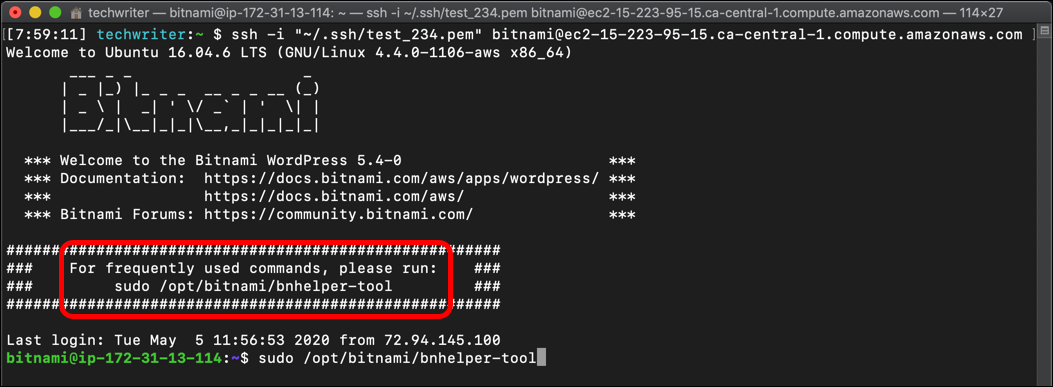
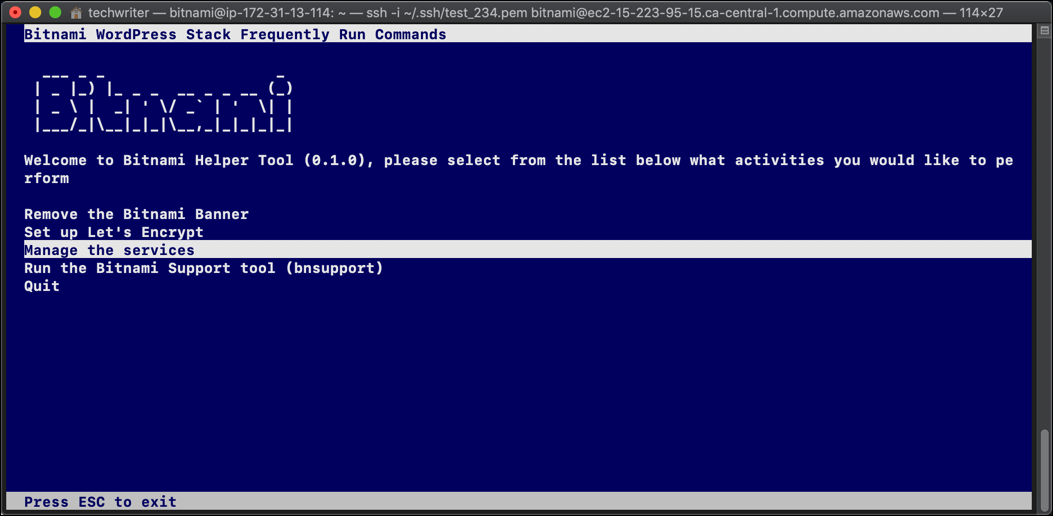
- The Bitnami Helper Tool currently contains four features:
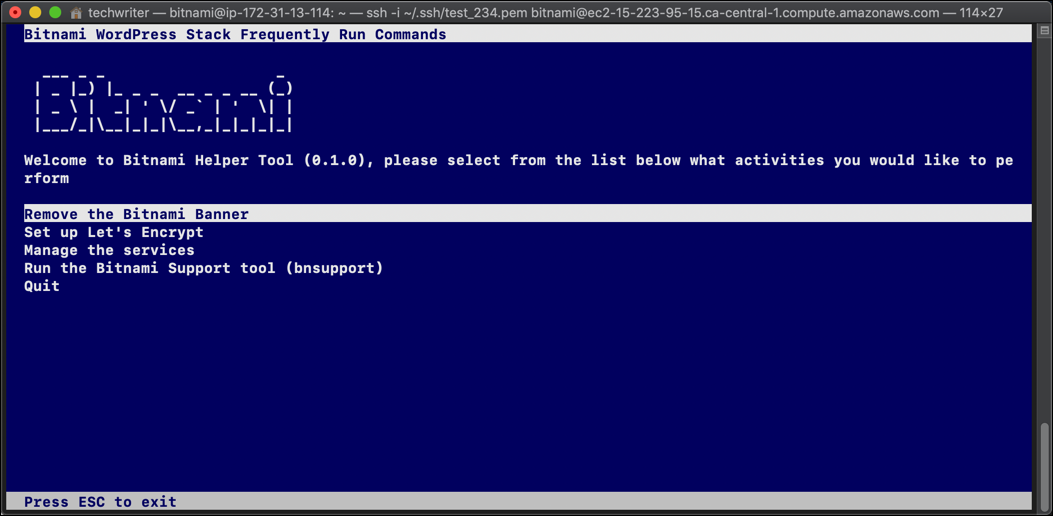
- Remove the Bitnami Banner
- Set up Let’s Encrypt
- Manage the services
- Run the Bitnami Support tool (bnsupport)
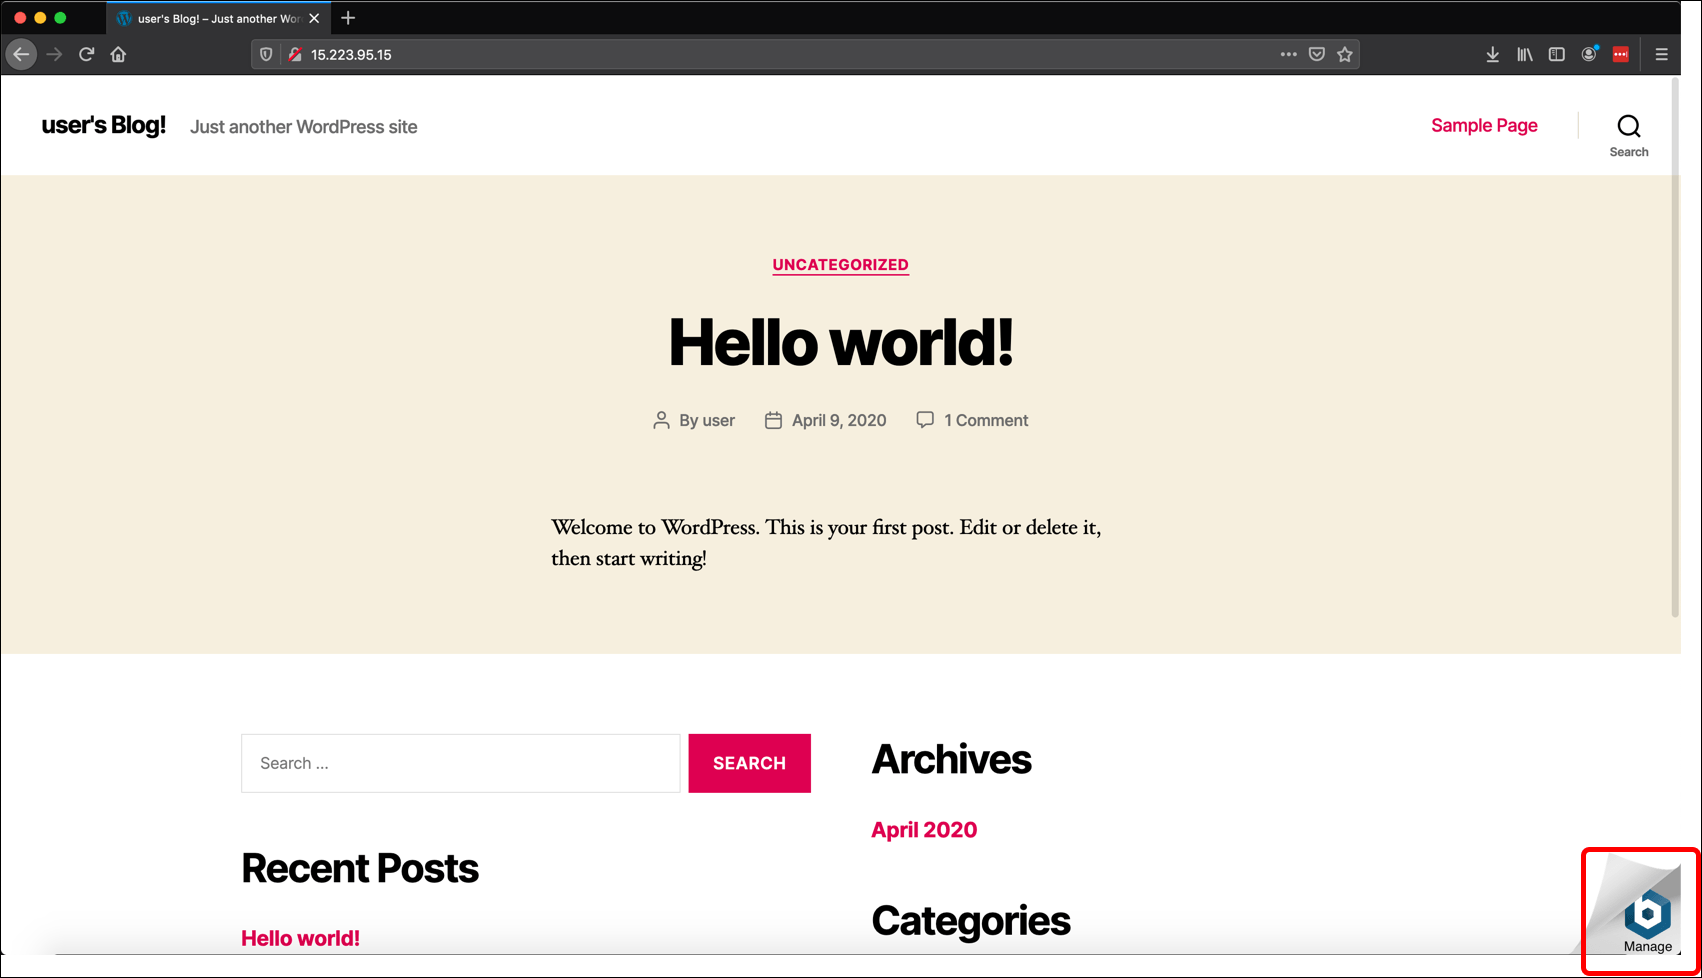
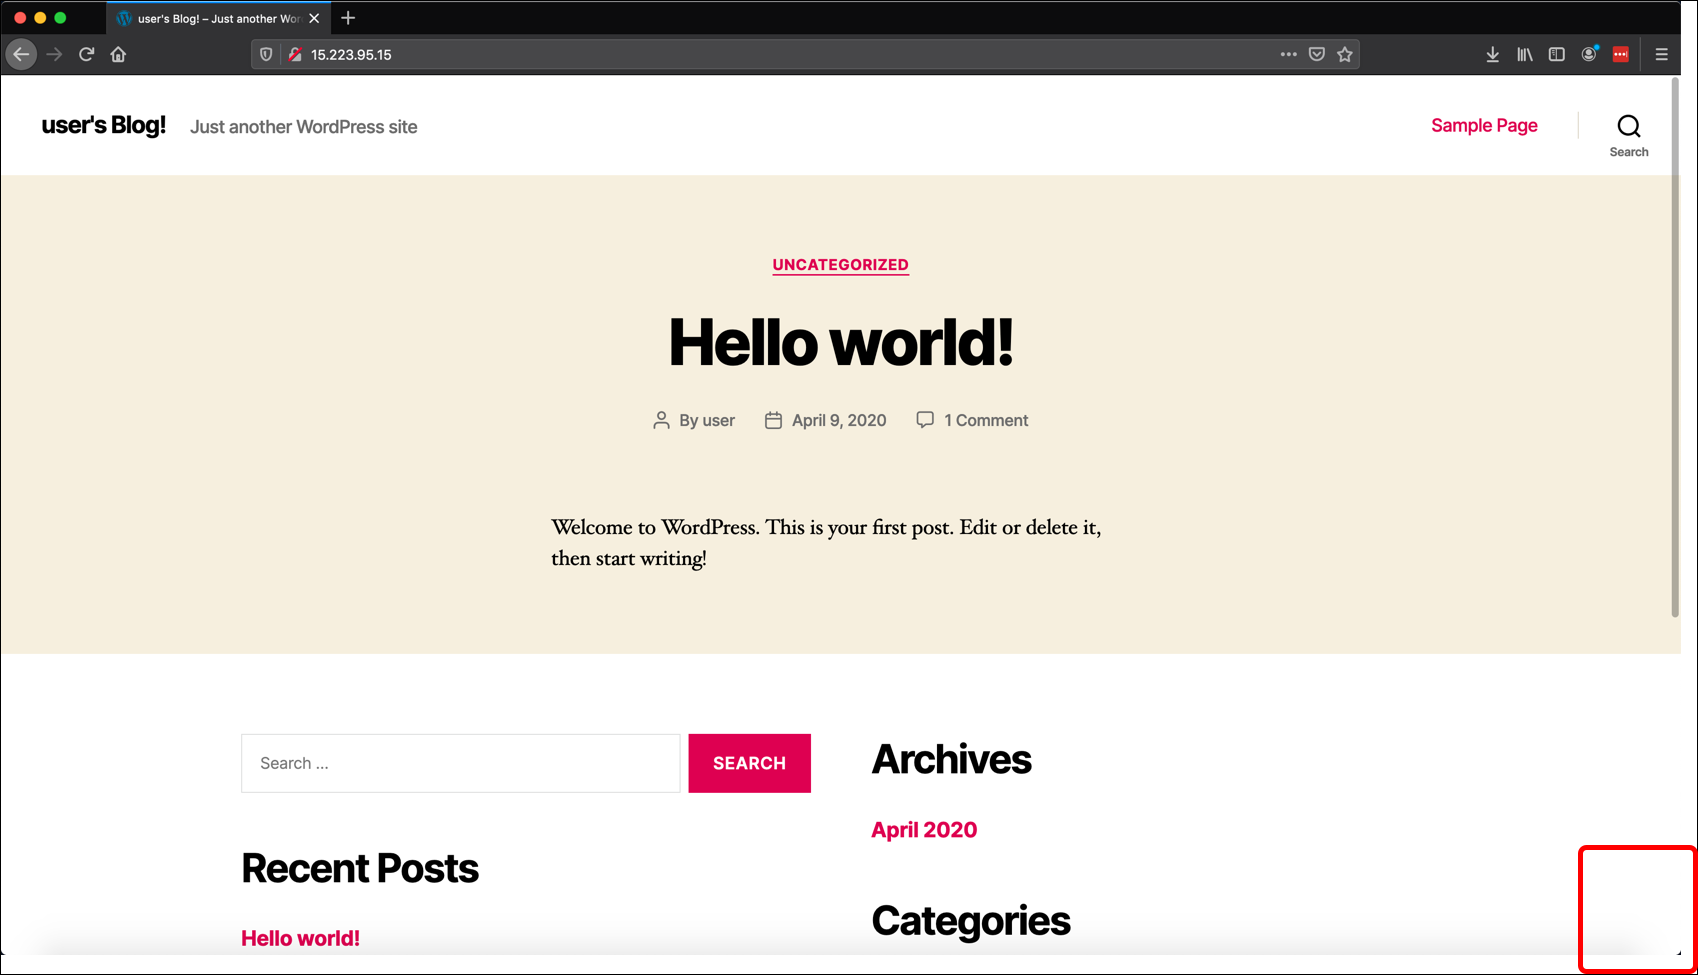
- When you first create a WordPress site from the WordPress Certified by Bitnami and Automattic AMI, it includes a small Bitnami banner in the bottom-right corner of the screen.
- Press
Enterto select the first option, Remove the Bitnami Banner. - The Bitnami Helper Tool displays a status message,
Removing the bitnami banner.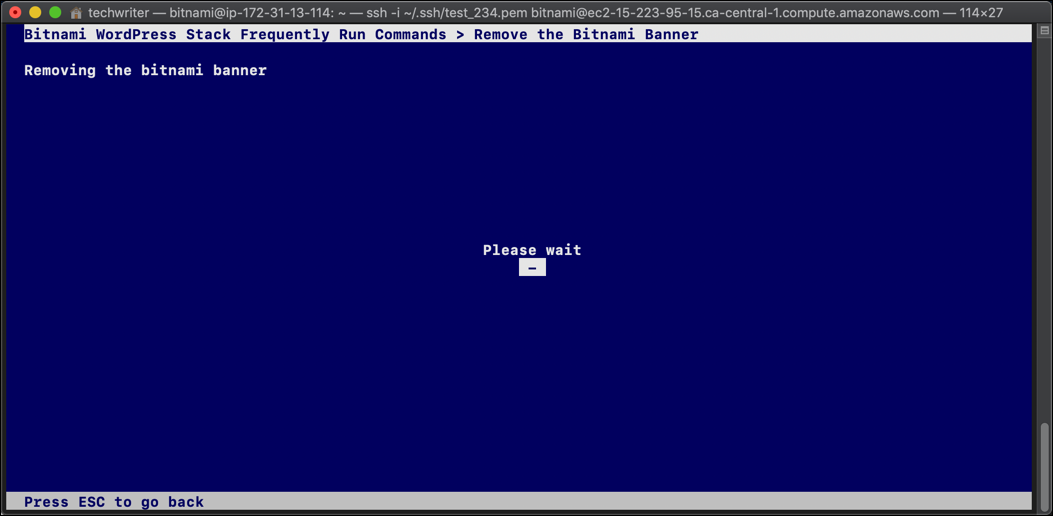
- When it is complete, the tool displays a success message. Press the
Esckey to return to the menu.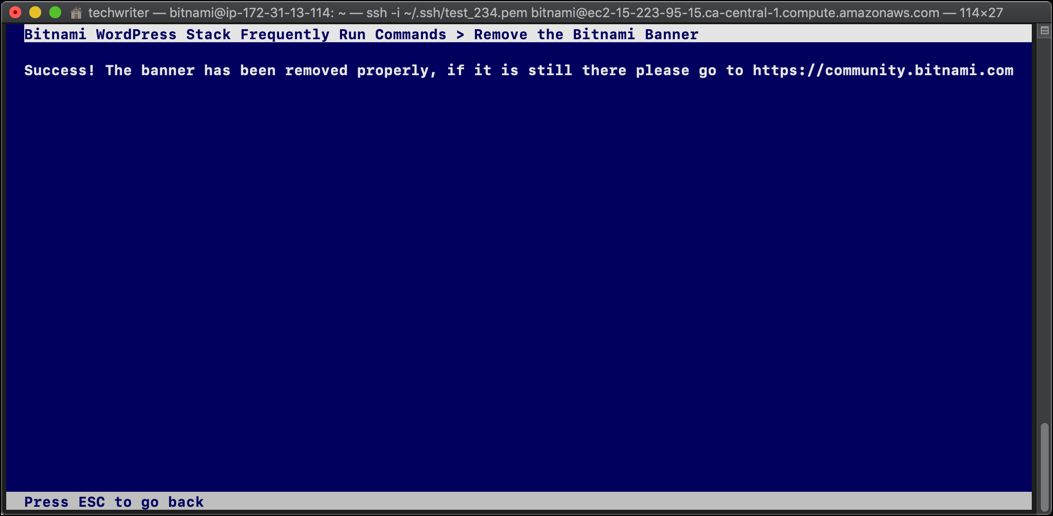
- If you reload your WordPress site, the banner is gone.
- Use the arrow keys on your keyboard to select the next option is to select Set up Let’s Encrypt and press
Enter. This tool lets you add an SSL certificate to your WordPress site with Let’s Encrypt. (This feature was added after I wrote my Introduction to Installing Let’s Encrypt Certificates for WordPress on Amazon Web Services (AWS) series of tutorials, so I’m not going to complete it.)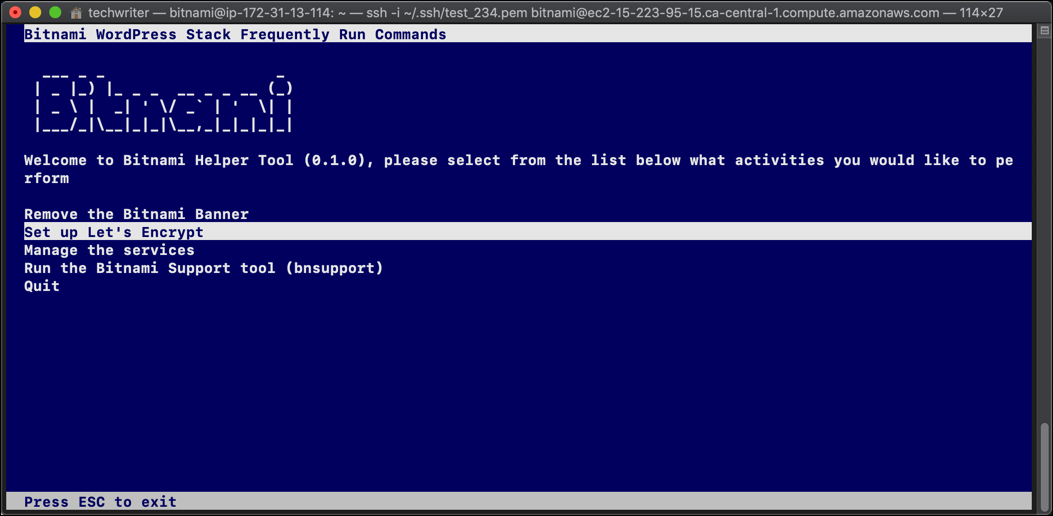
- The command-line displays an
Executing [...]message.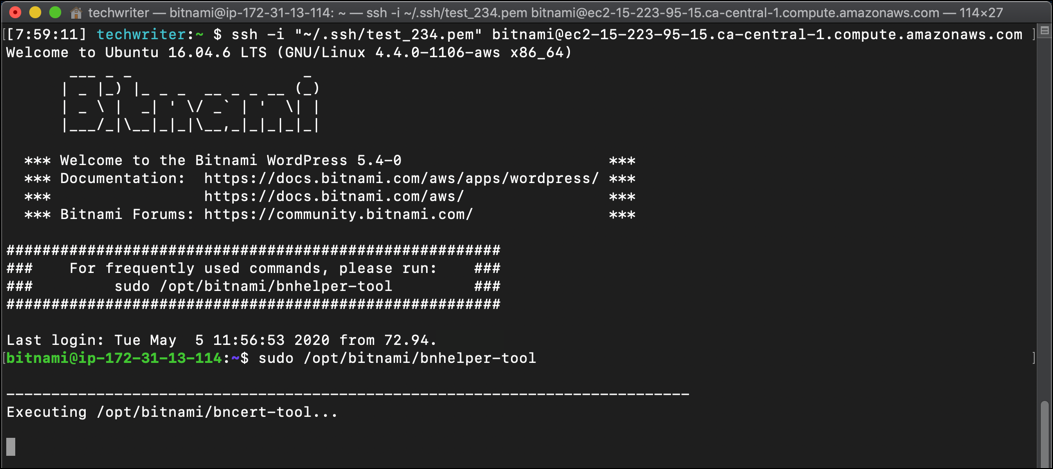
- The first step is to enter your domain name or domain names, but I will exit the process with
Control+C.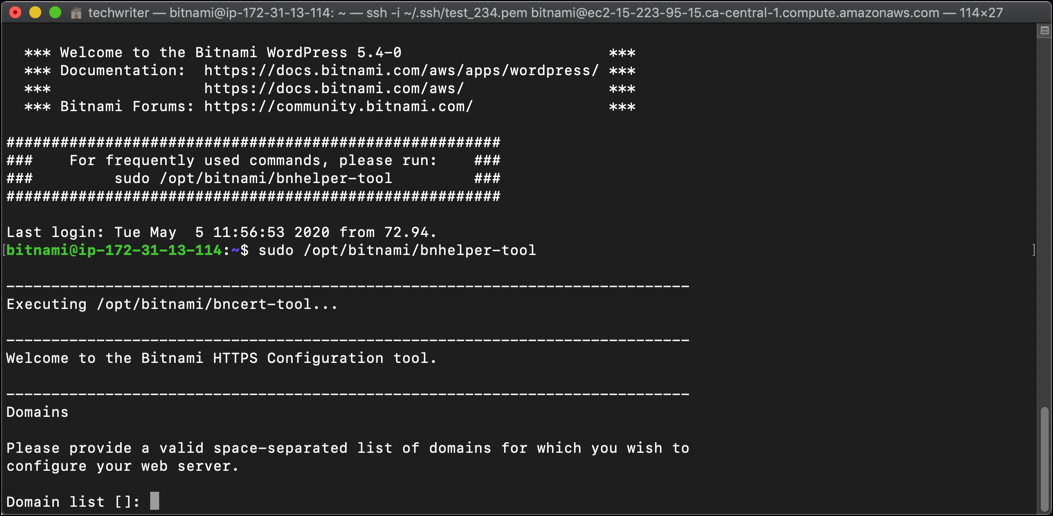
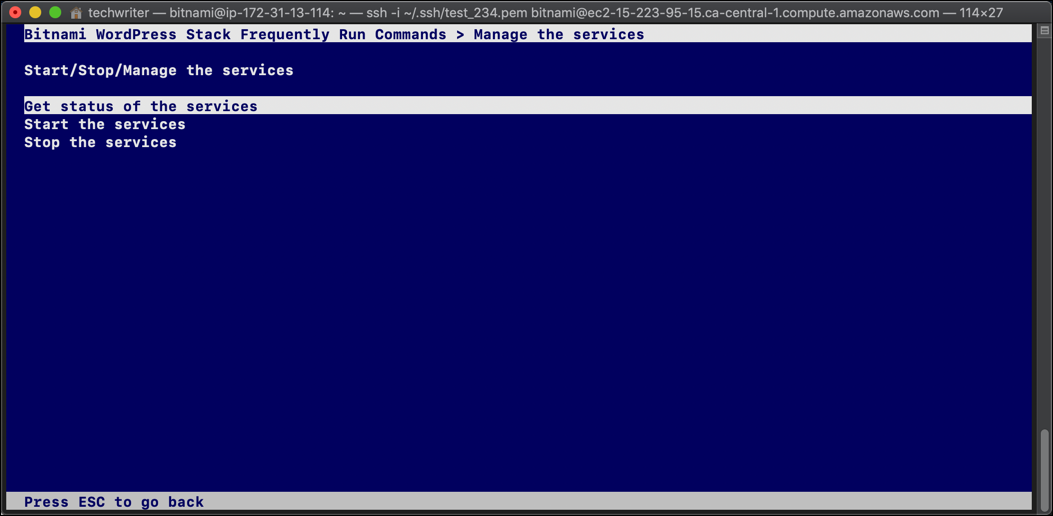
- You can also select the Bitnami Helper Tool’s Manage the services option
- “The services” are the three services that make WordPress work: Apache, MySQL, and PHP-FPM, the A, M, and, P in “LAMP stack.” Select Get status of the services. If you need to troubleshoot or stop the services to configure your server, you can also select Start the services or Stop the services.
- The status should show each of the three services are running. Press the
Esckey to return to the menu.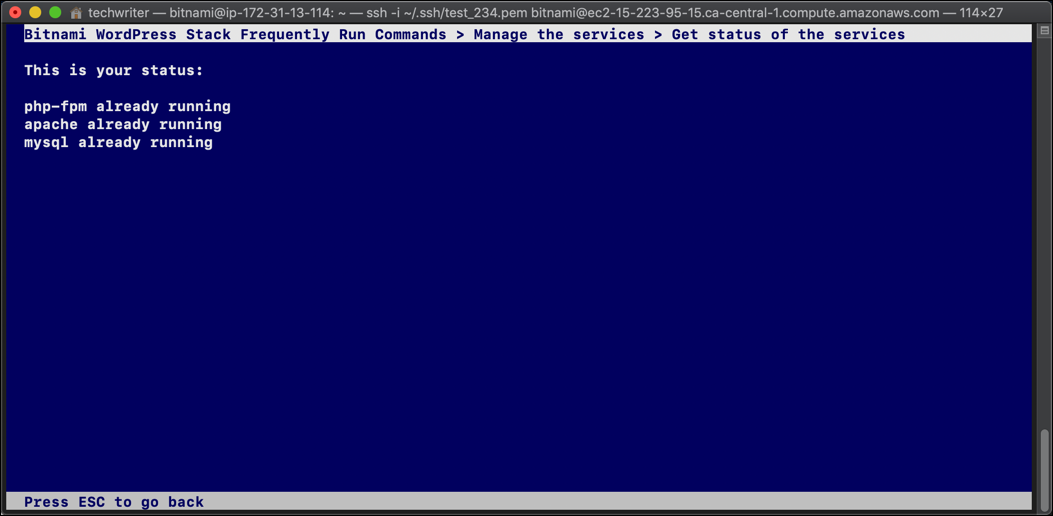
- There is also a Run the Bitnami Support tool (bnsupport) feature. If you select this option, you will enter a command-line interface that will collect diagnostic information from your EC2 instance and send it to Bitnami. When you are done, select
Quitor press theEsckey to return to the command-line interface.