Update: May 2020
This article was originally created in 2018 and completely updated in May 2020. I will not be updating it going forward.
This is part of my Introduction to Hosting WordPress on Amazon Web Services (AWS) tutorial.
In the first two articles of this series I went over the steps to create an AWS EC2 instance from the WordPress Certified by Bitnami and Automattic image to host a WordPress site. In this article I am going to go over the steps to access that instance with an IP address, and how to assign a domain name to that instance using the Route 53 service from AWS. But first I’m going to go over something else: restarting or shutting down an EC2 instance.
- Restarting or Shutting Down an EC2 instance
- Create an Elastic IP for your EC2 instance
- Associate an Elastic IP with a Domain Name using Route 53
Restarting or Shutting Down an EC2 instance
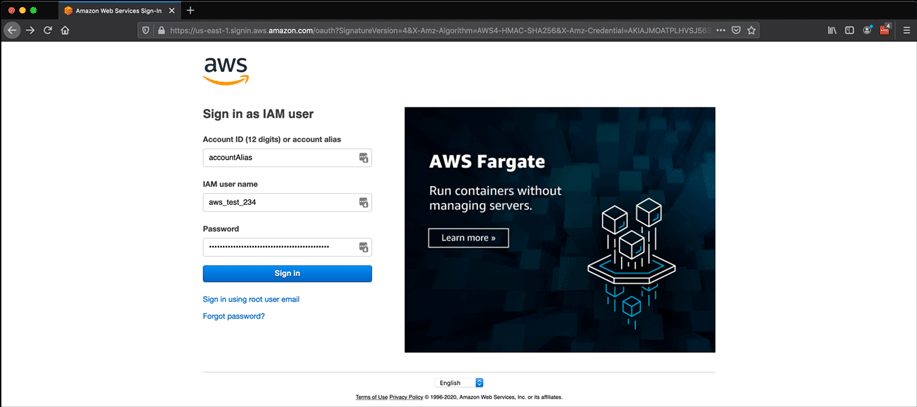
- Log in to your AWS account.
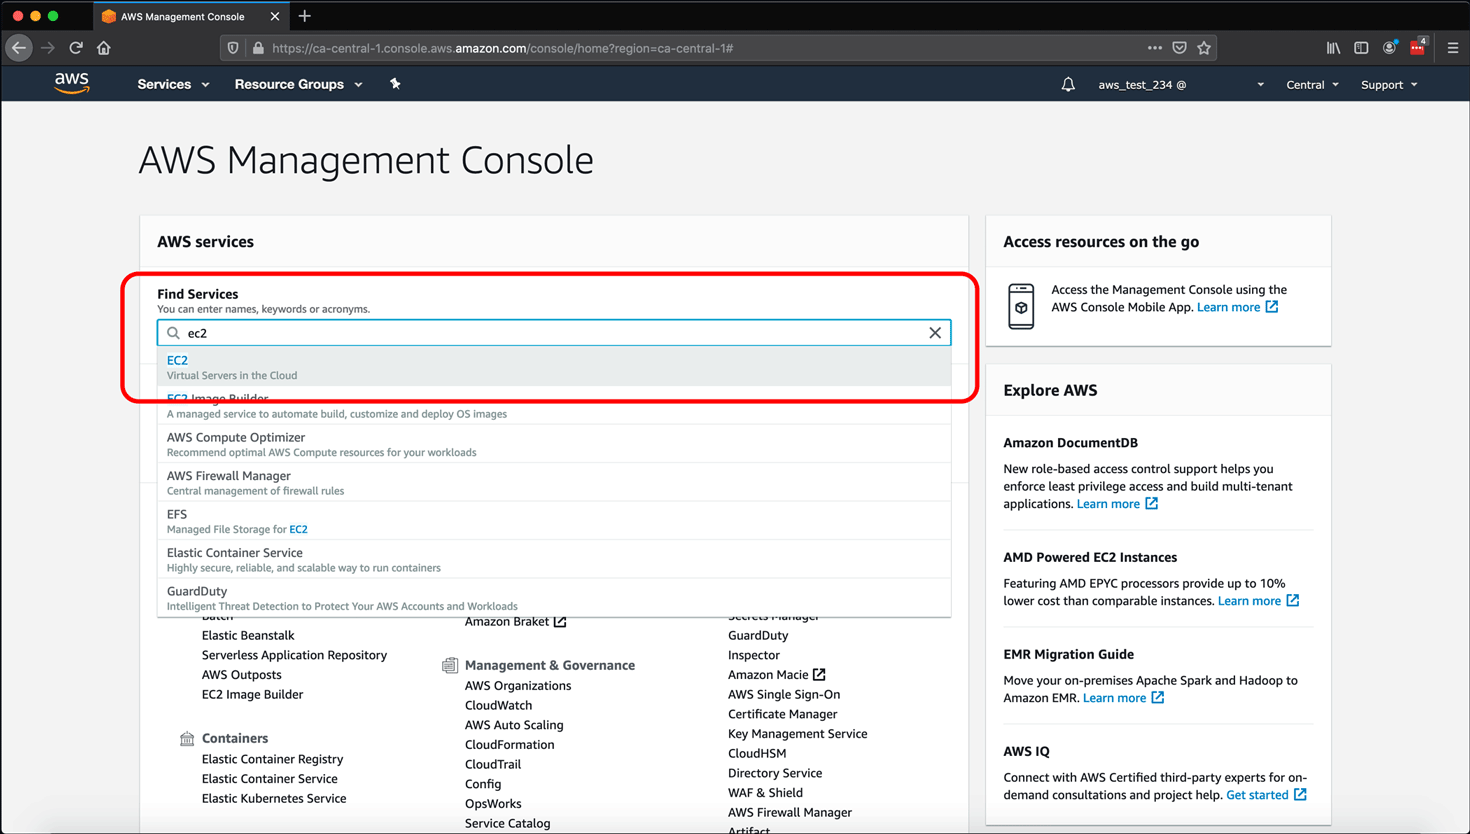
- From the AWS Management Console, type EC2 into the Find Services search box.
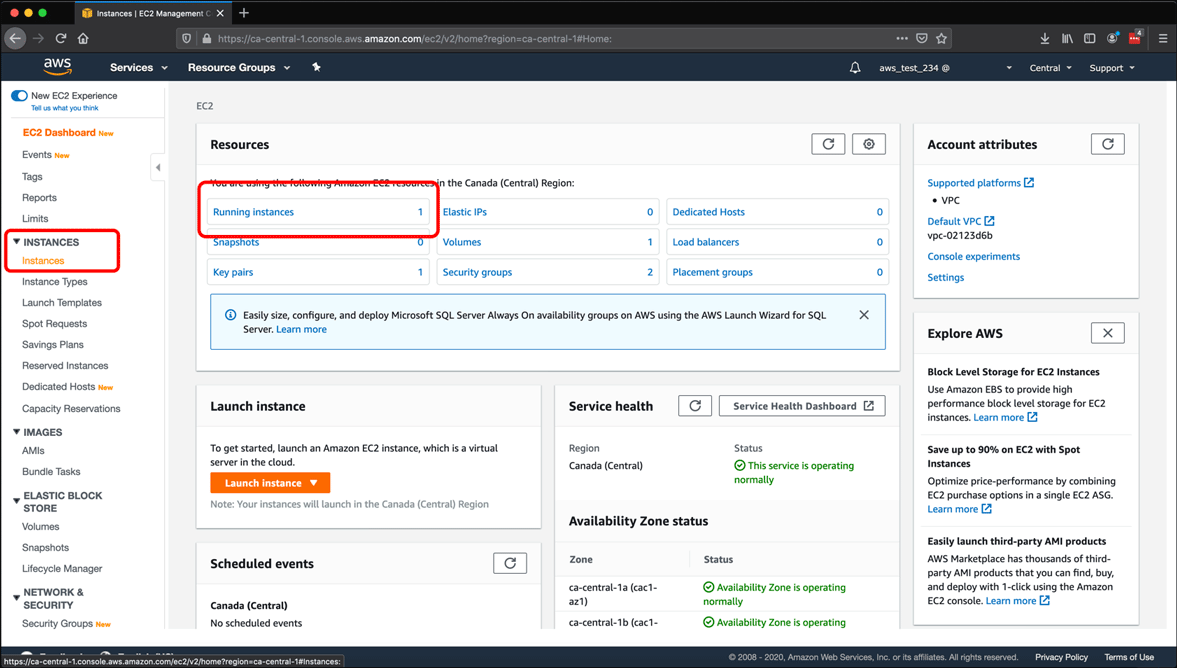
- To see your instances, click Instances in the left sidebar under Instances or click Running Instances in the Resources pane.
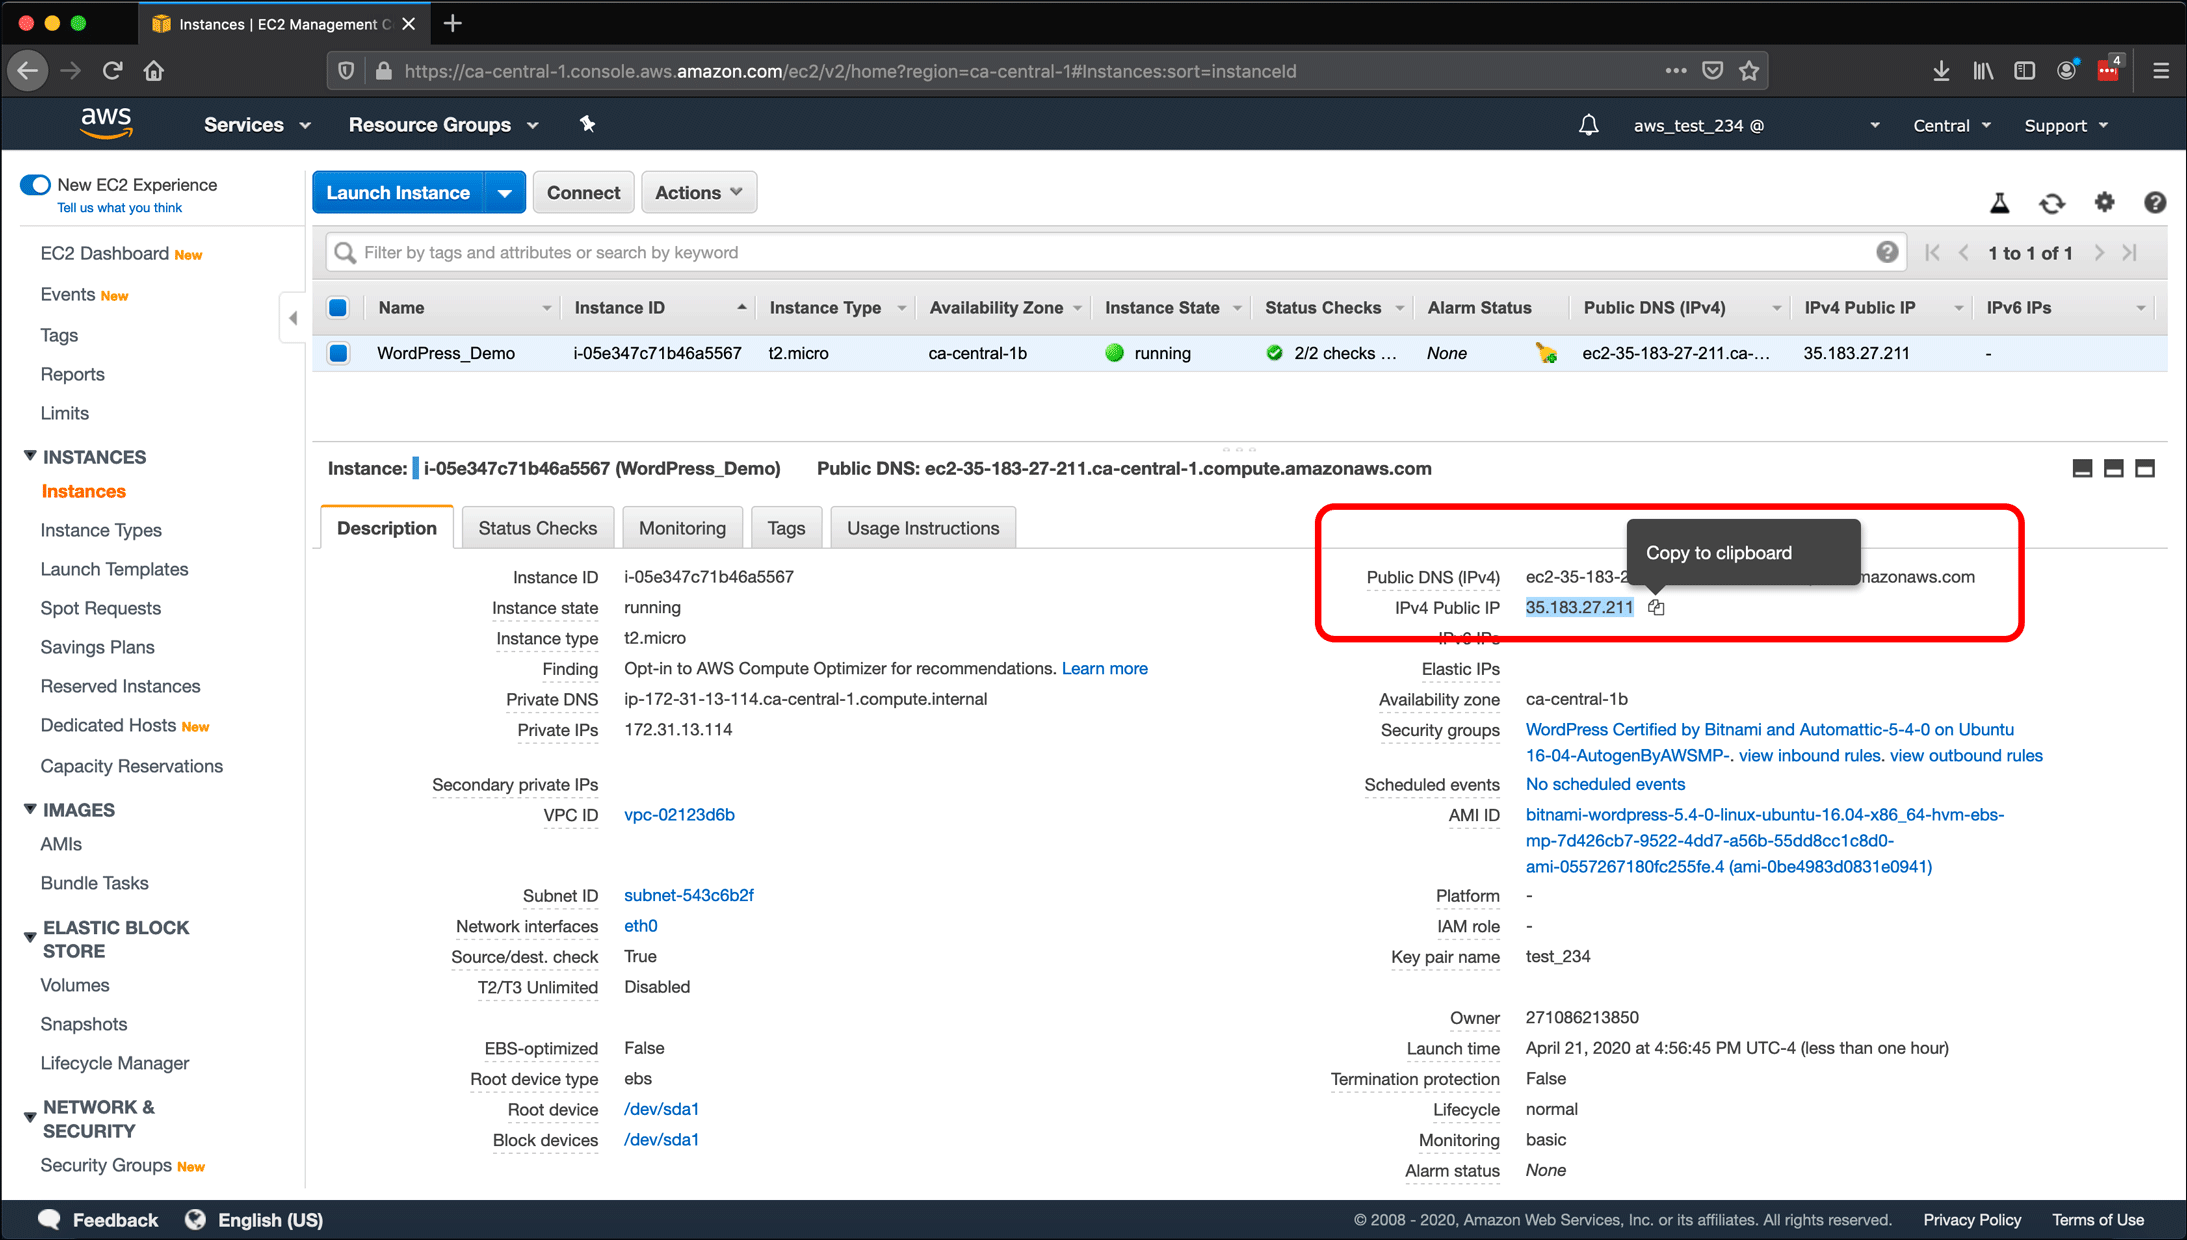
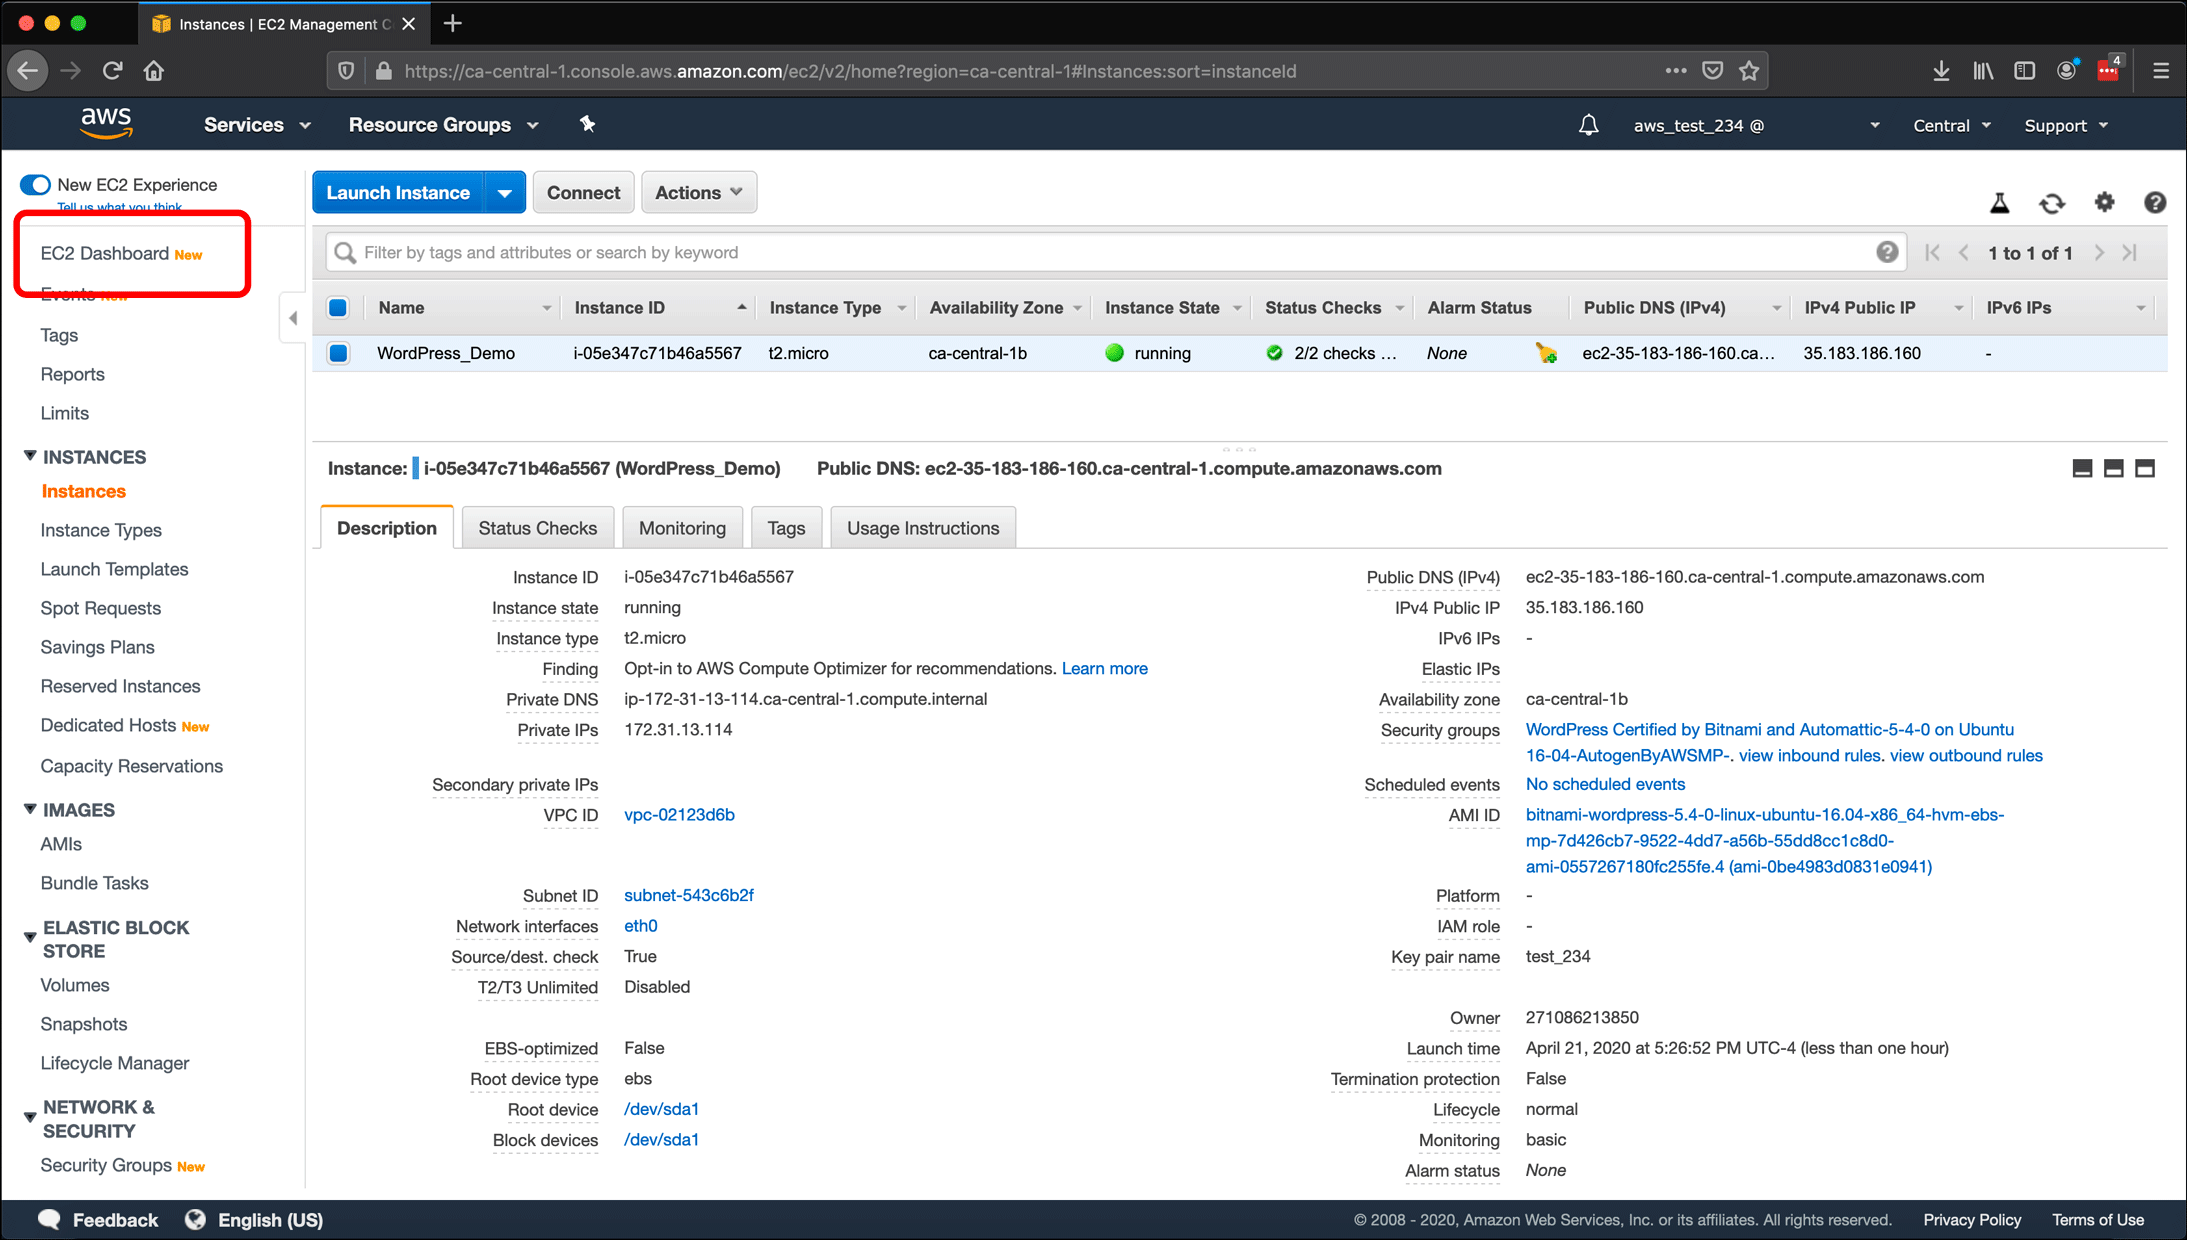
- Select an instance from the list on the Instances screen. (In this screenshot, there is only one instance). If you look under the Description tab’s right column you will see fields for Public DNS (IPv4) and IPv4 Public IP, the IP address for your EC2 instance on the internet. Click the IP address and a copy icon will appear. Copy the address, which in this example is 35.183.27.211, and keep it for your records.
- After you create an instance, it is online and running and online until stop the instance (shut it down), or reboot (restart) it, or terminate (delete) it. If you’re not using an instance, you can shut it down so that you incur fewer charges on your AWS bill. Or you may want to reboot the instance as a way to troubleshoot an issue. To stop or reboot an instance, select the instance from the list, click the Actions button, click the Instance State submenu, and click either Stop or Reboot.
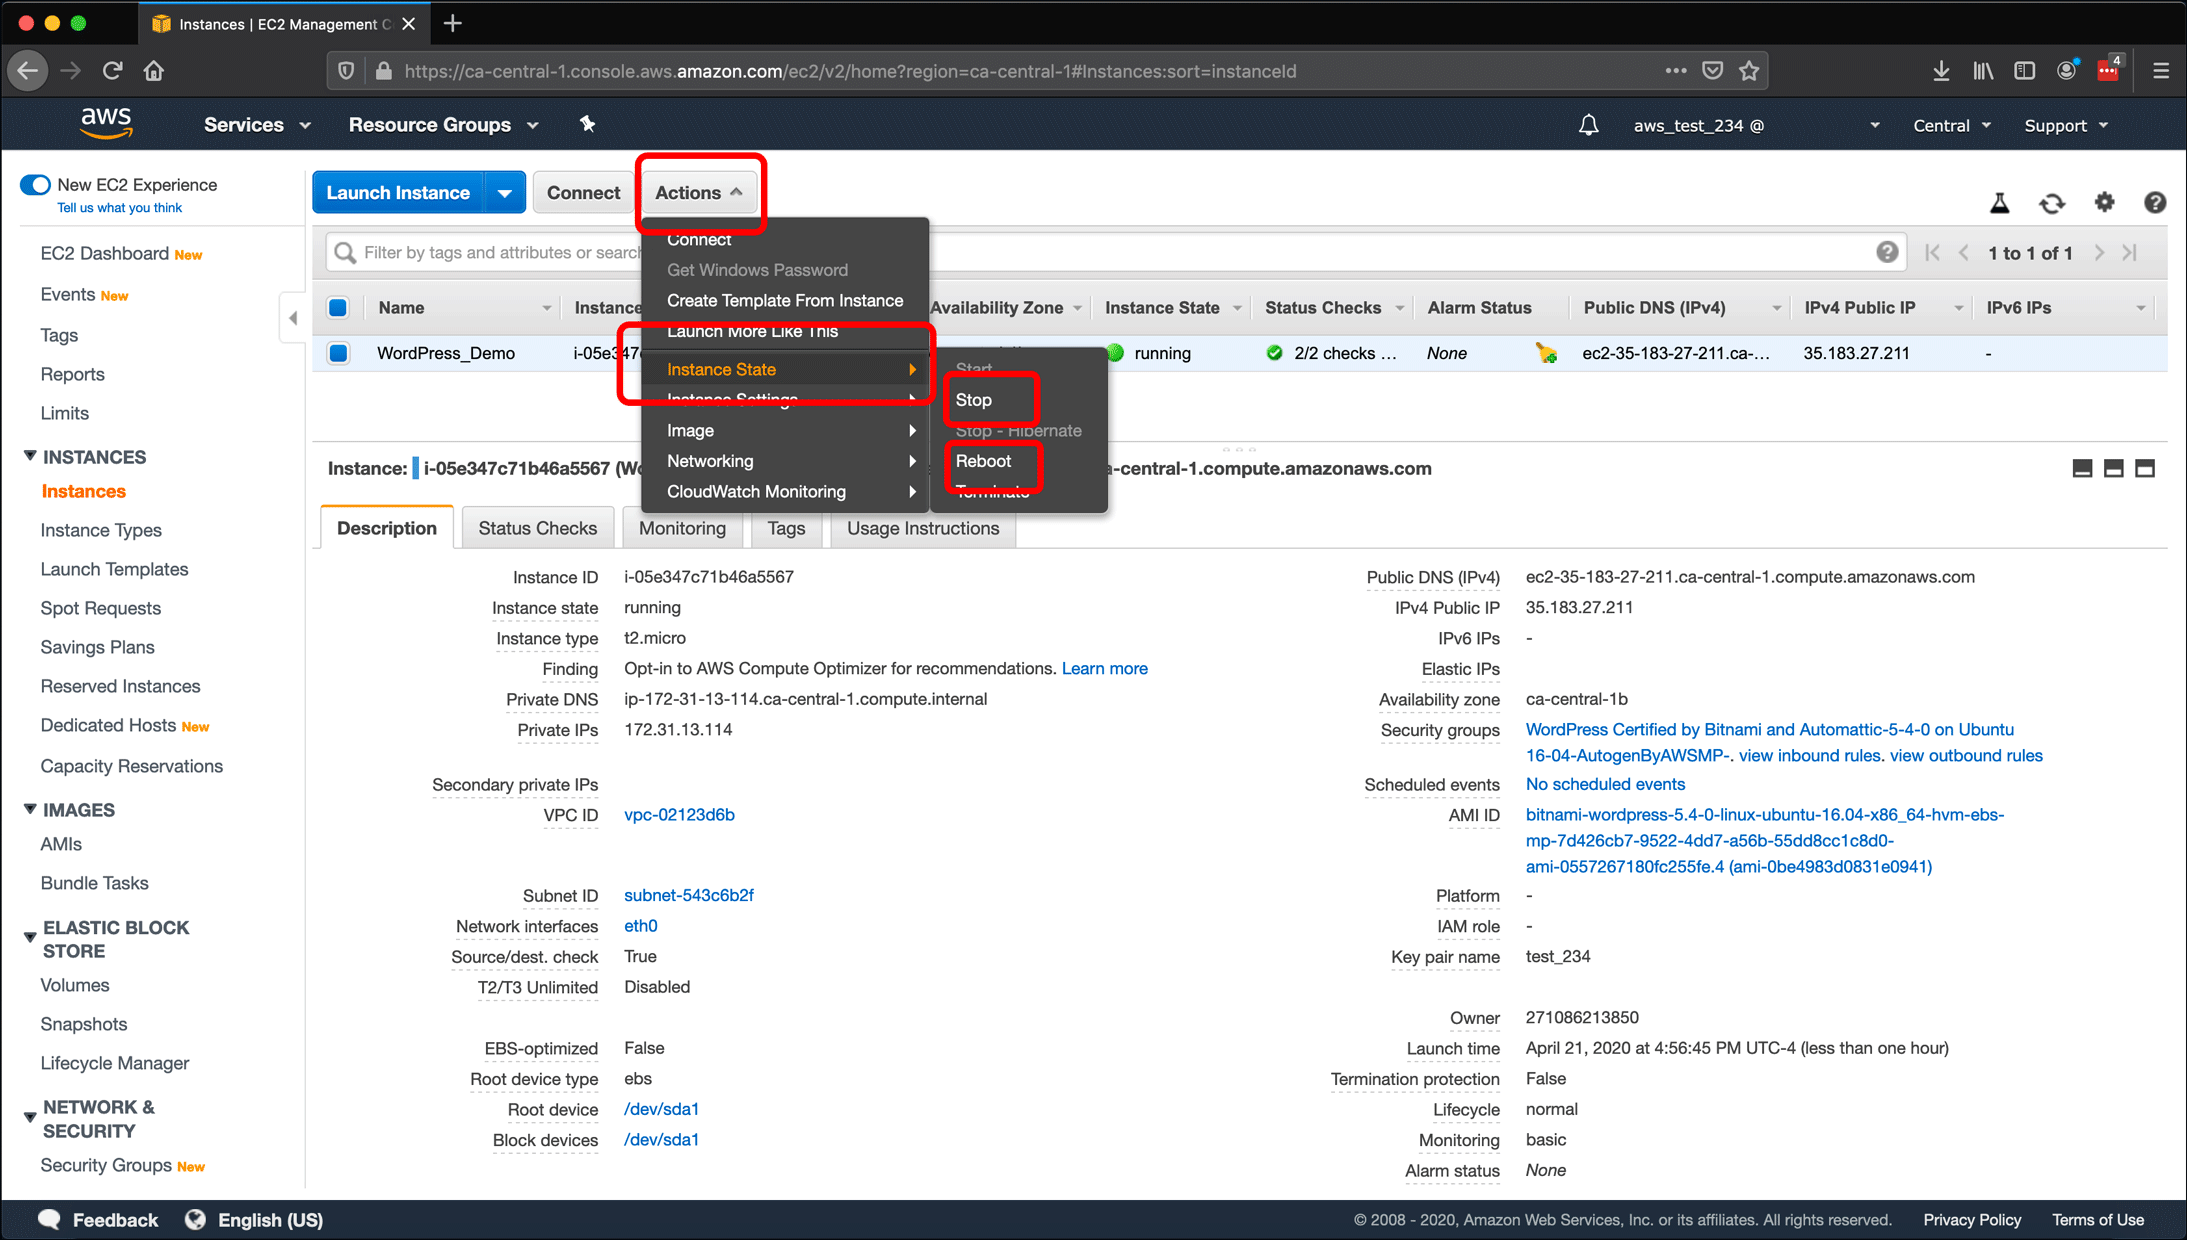
- For this demonstration, I select Stop to shut down the instance.

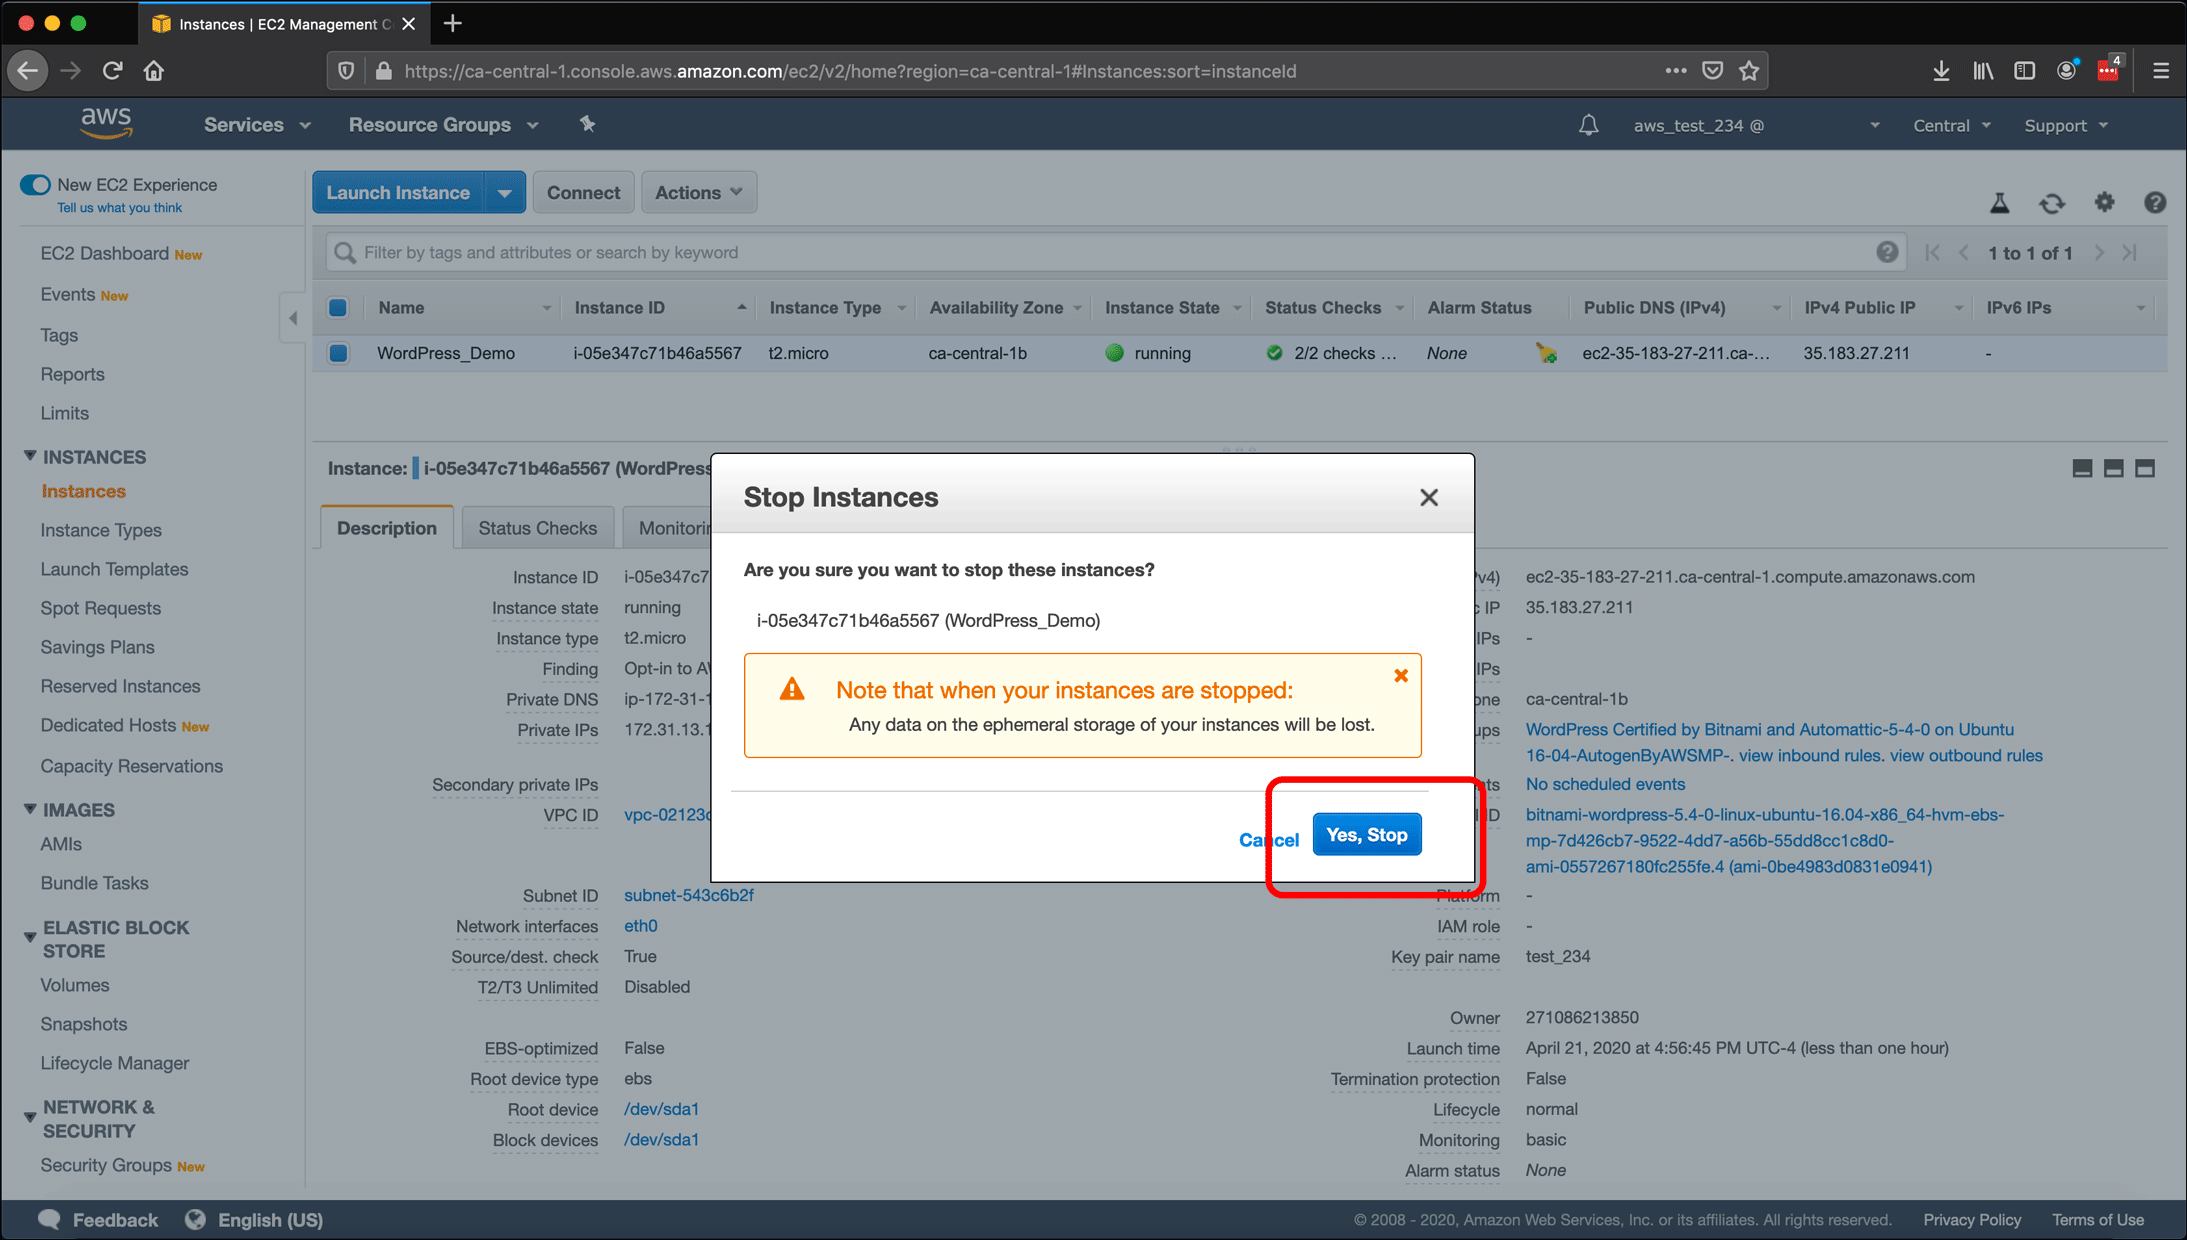
- A Stop Instances pop-up will warn you that by stopping the instance you risk losing any ephemeral data. Click Yes, Stop.
- If you had chosen to reboot, you would get a similar pop-up and would click Yes, Reboot.
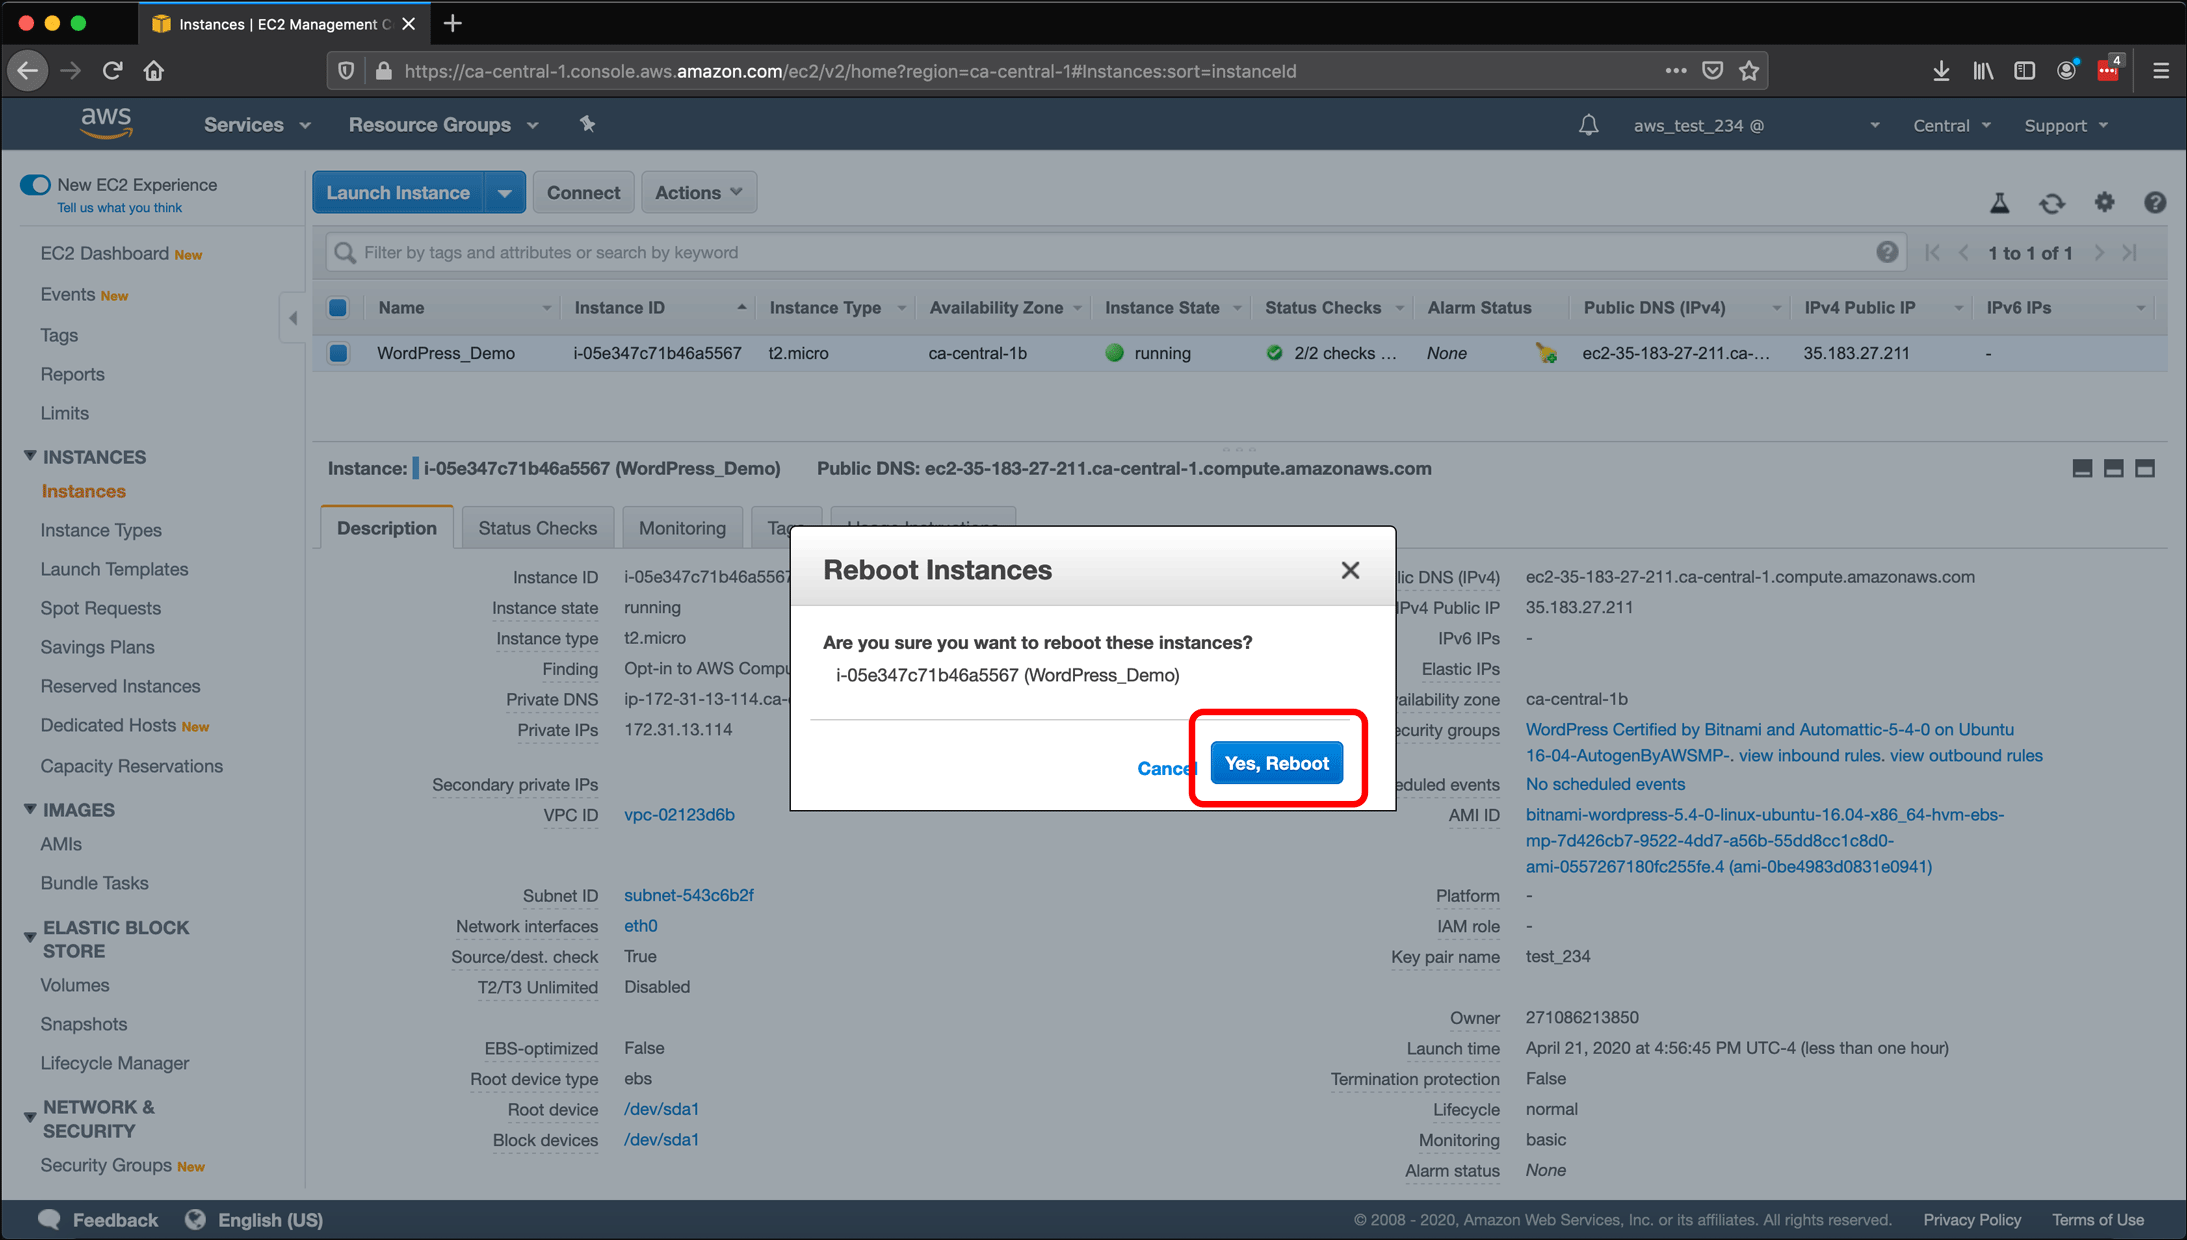
- If you had chosen to reboot, you would get a similar pop-up and would click Yes, Reboot.
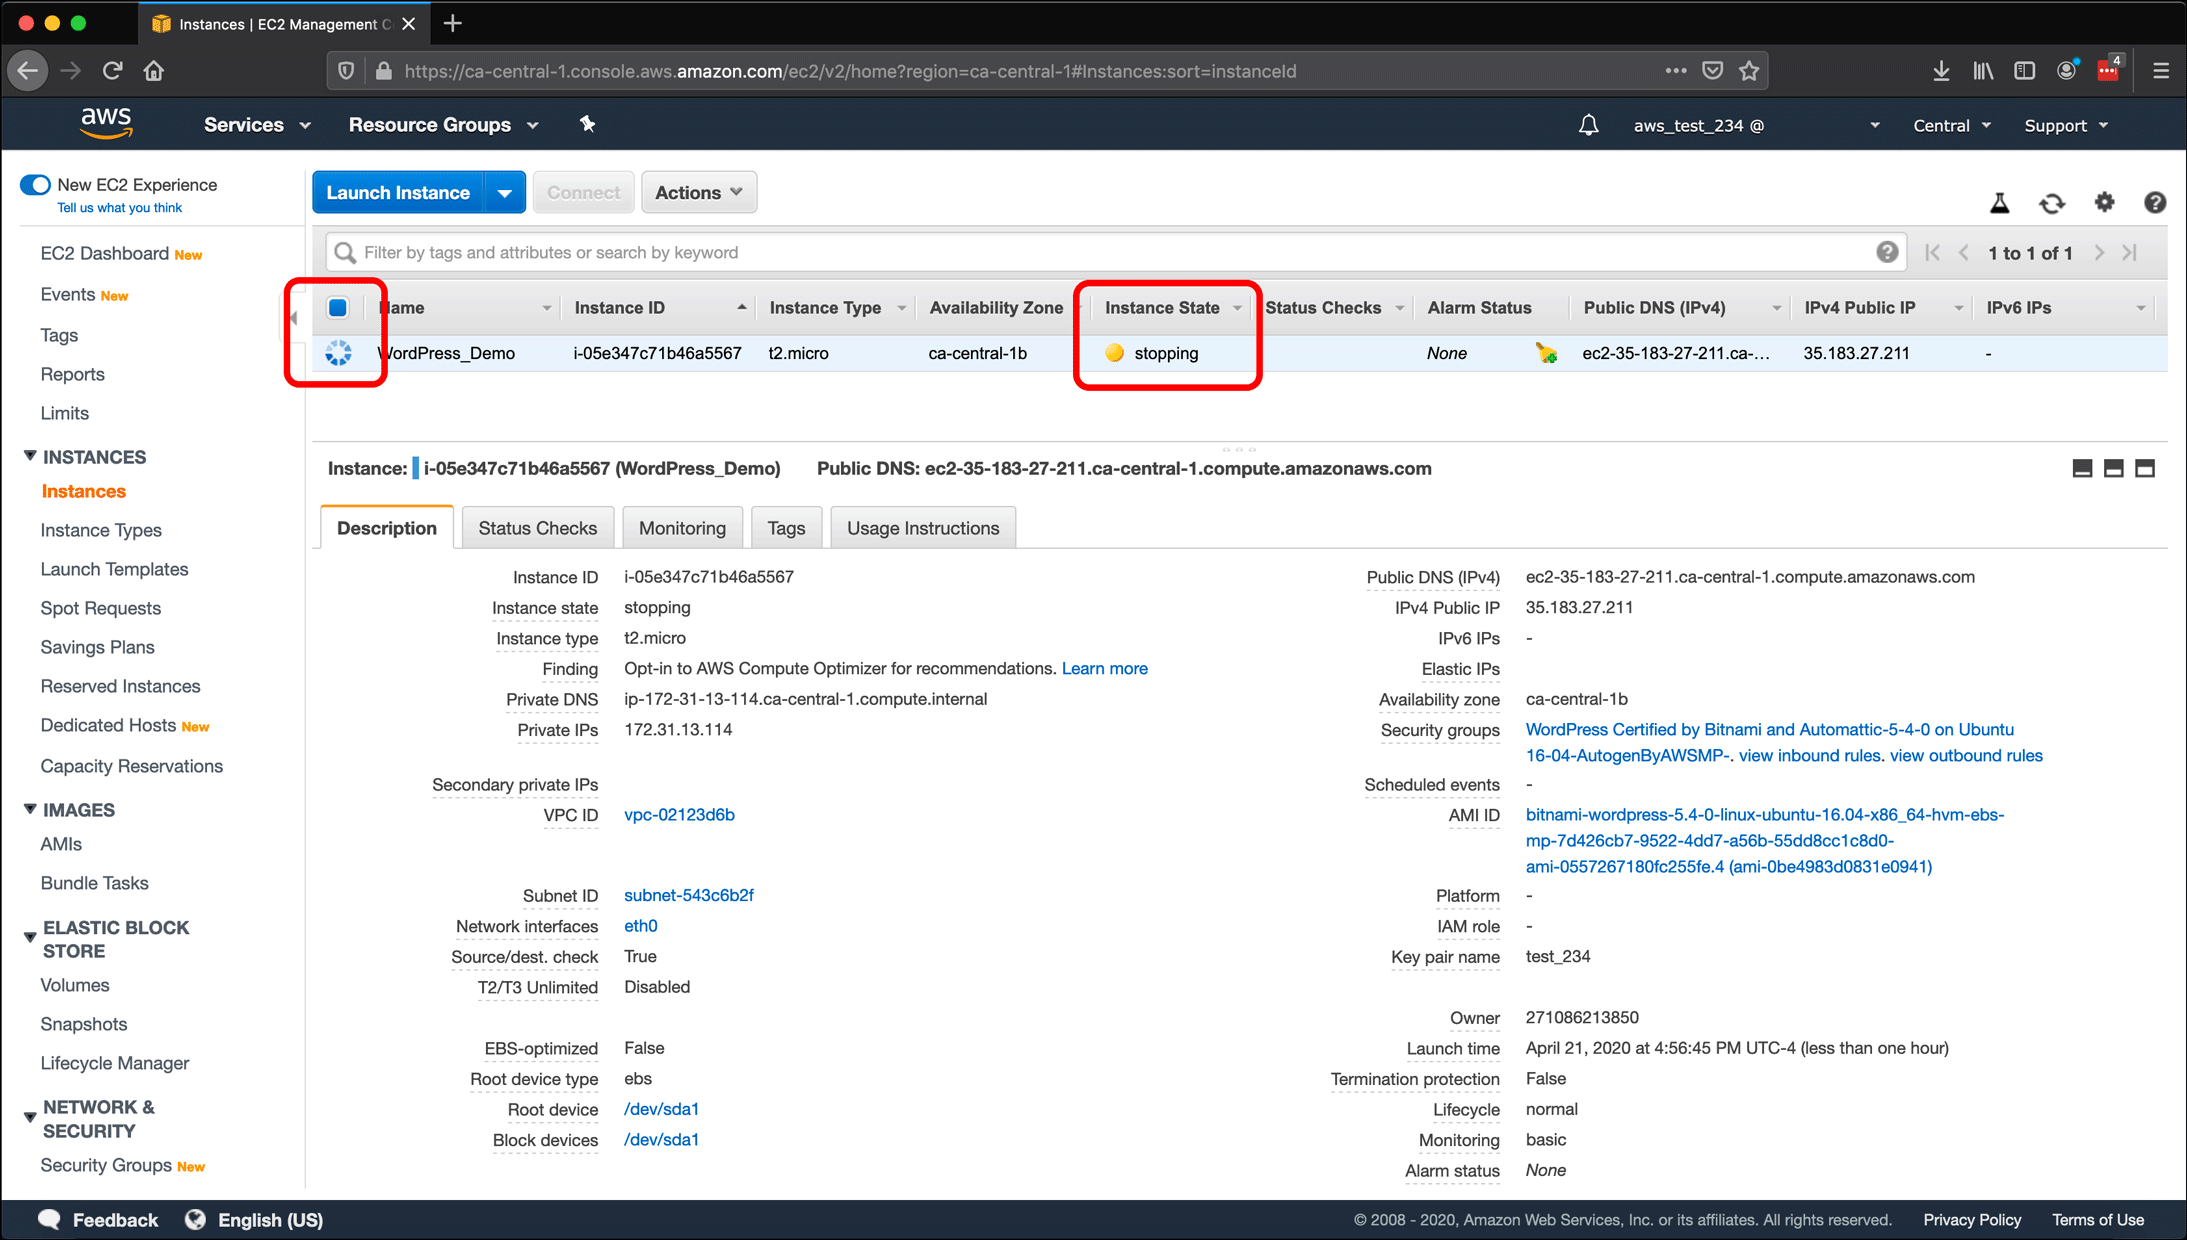
- Your instance will show a progress icon and the Instance State will change to stopping.
- When the instance has shut down, Instance State changes to stopped. The Description tab no longer displays an IP address.

- It’s time to start the instance again. Click the Actions button, click the Instance State submenu, then click Start.

- Click Yes, Start when the Start Instances pop-up appears.

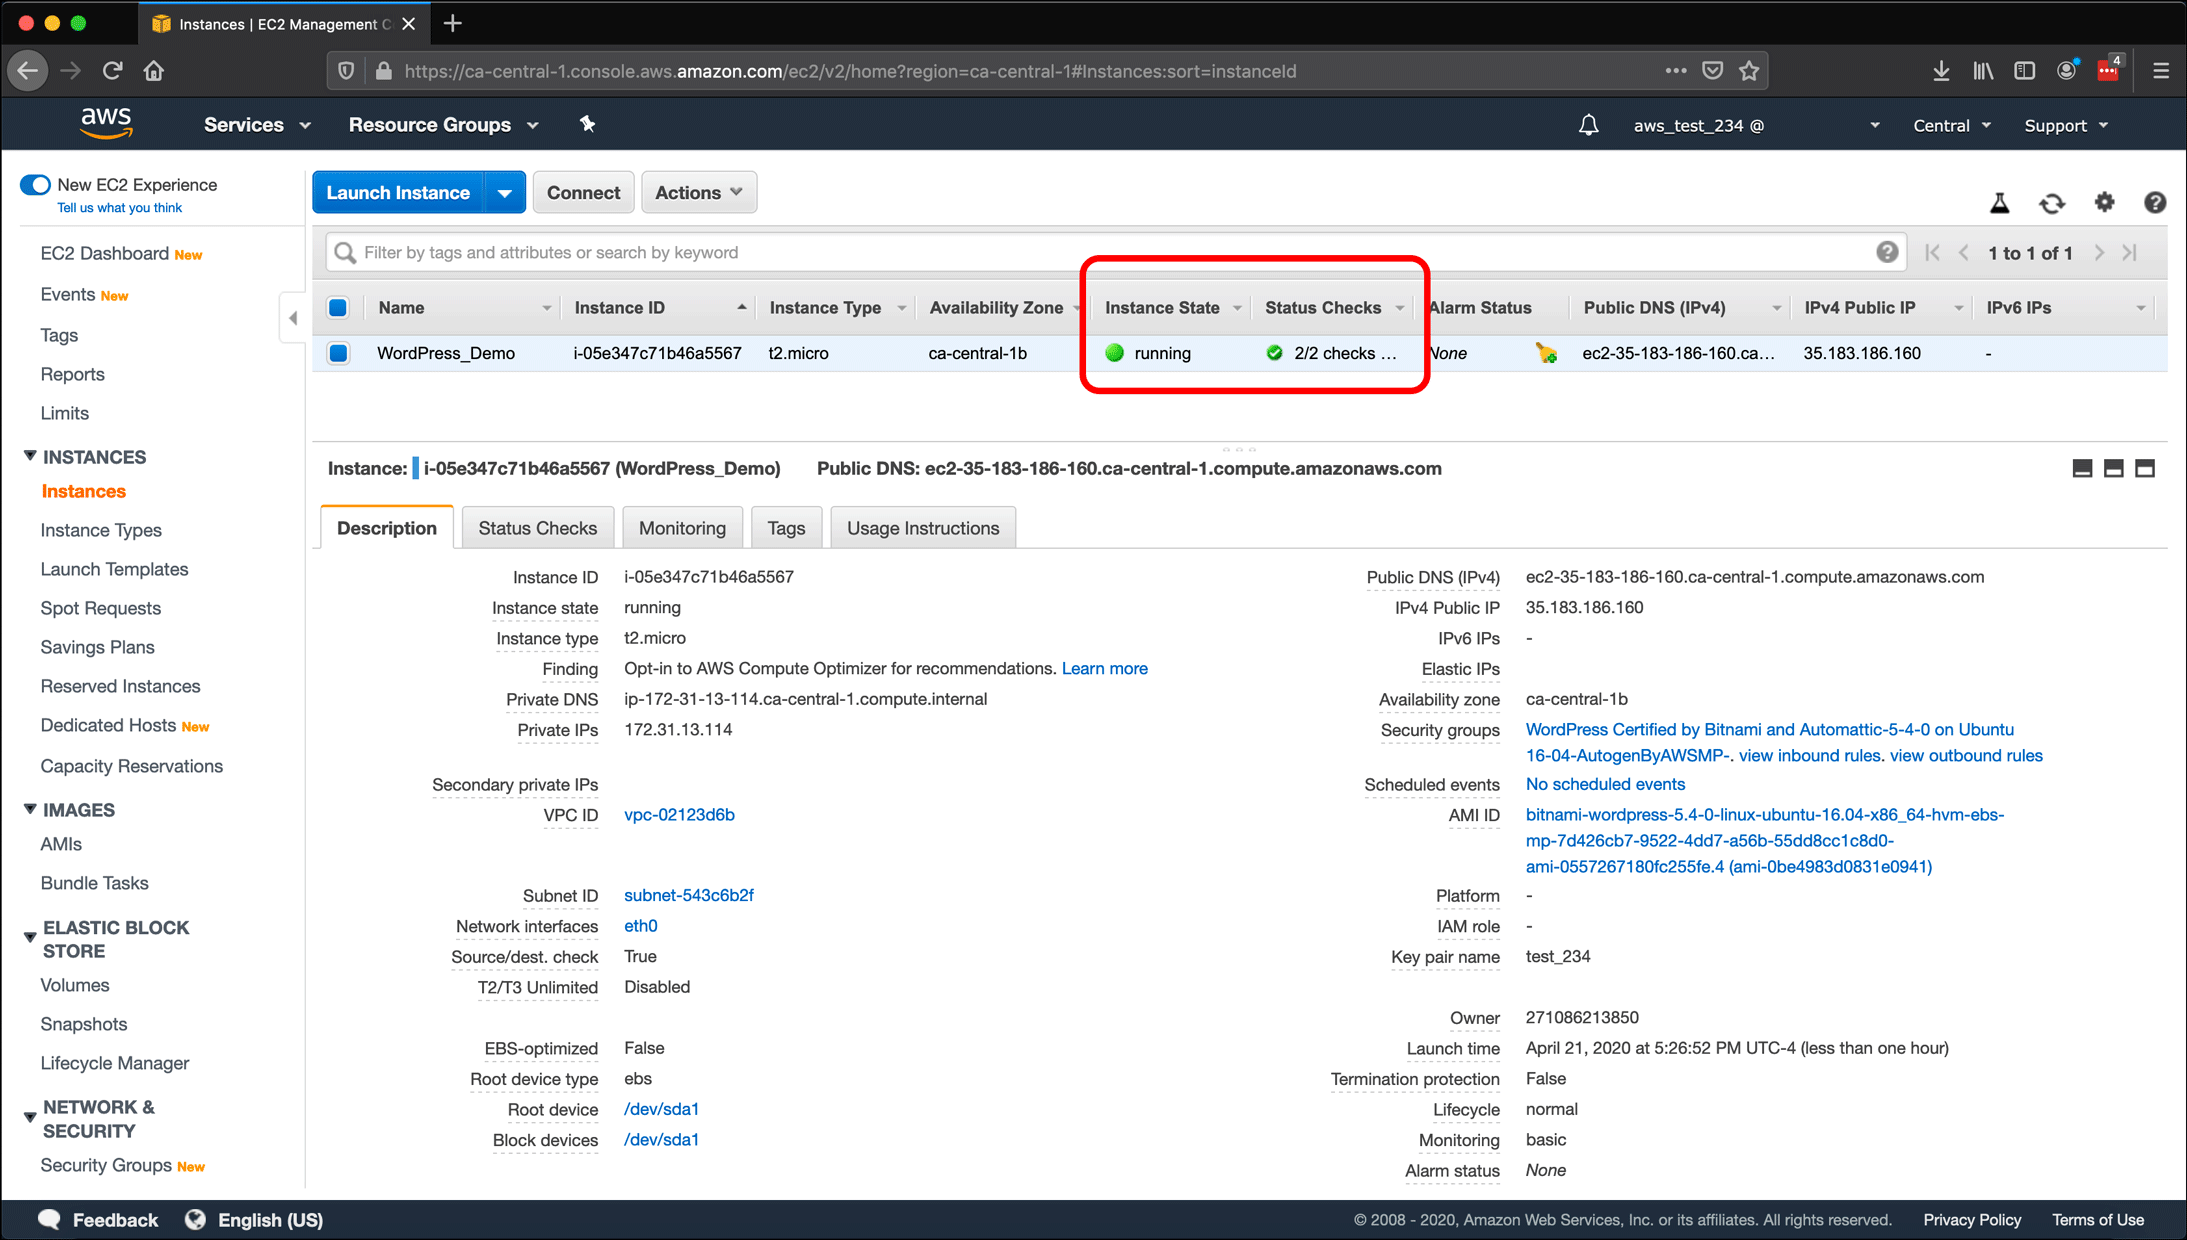
- After restarting, the instance’s Instance State will display running.
- Under the Description tab, Public DNS (IPv4) and IPv4 Public IP are displaying IP address information again. But if you look at the values, they have changed. Before we stopped the instance, the IP address in the IPv4 Public IP field was 35.183.27.211; now it is 35.183.186.160.
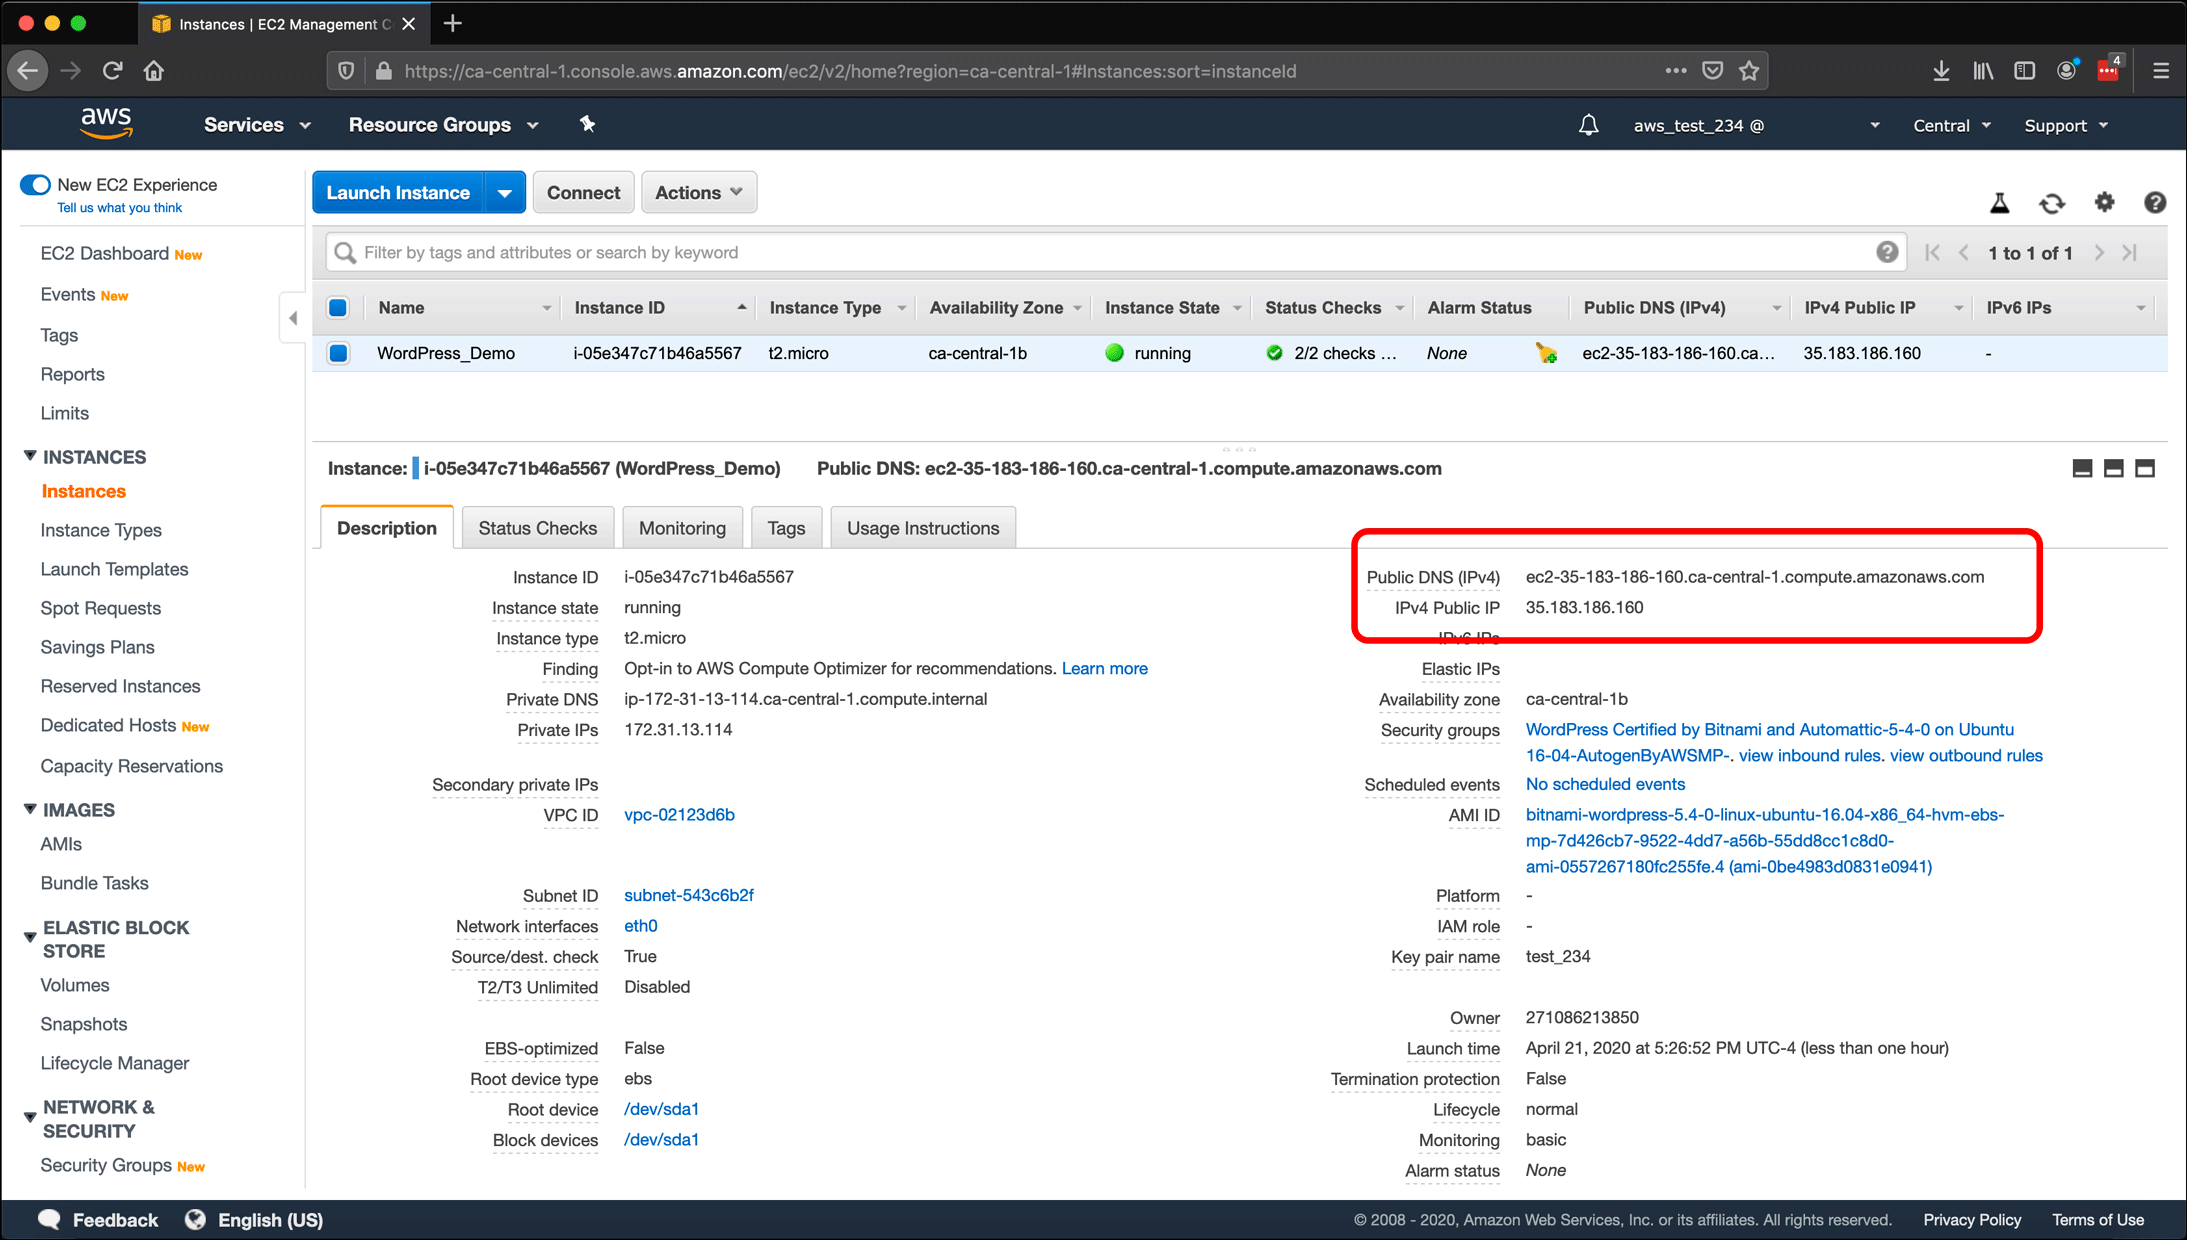
So what did we learn? If you restart or stop your instance, the IP address will not persist, and AWS will assign you a new one. This will make it very difficult to keep track of your instance’s IP, and you need that IP address to do just about everything. AWS has a solution: the Elastic IP address.
Create an Elastic IP for your EC2 instance
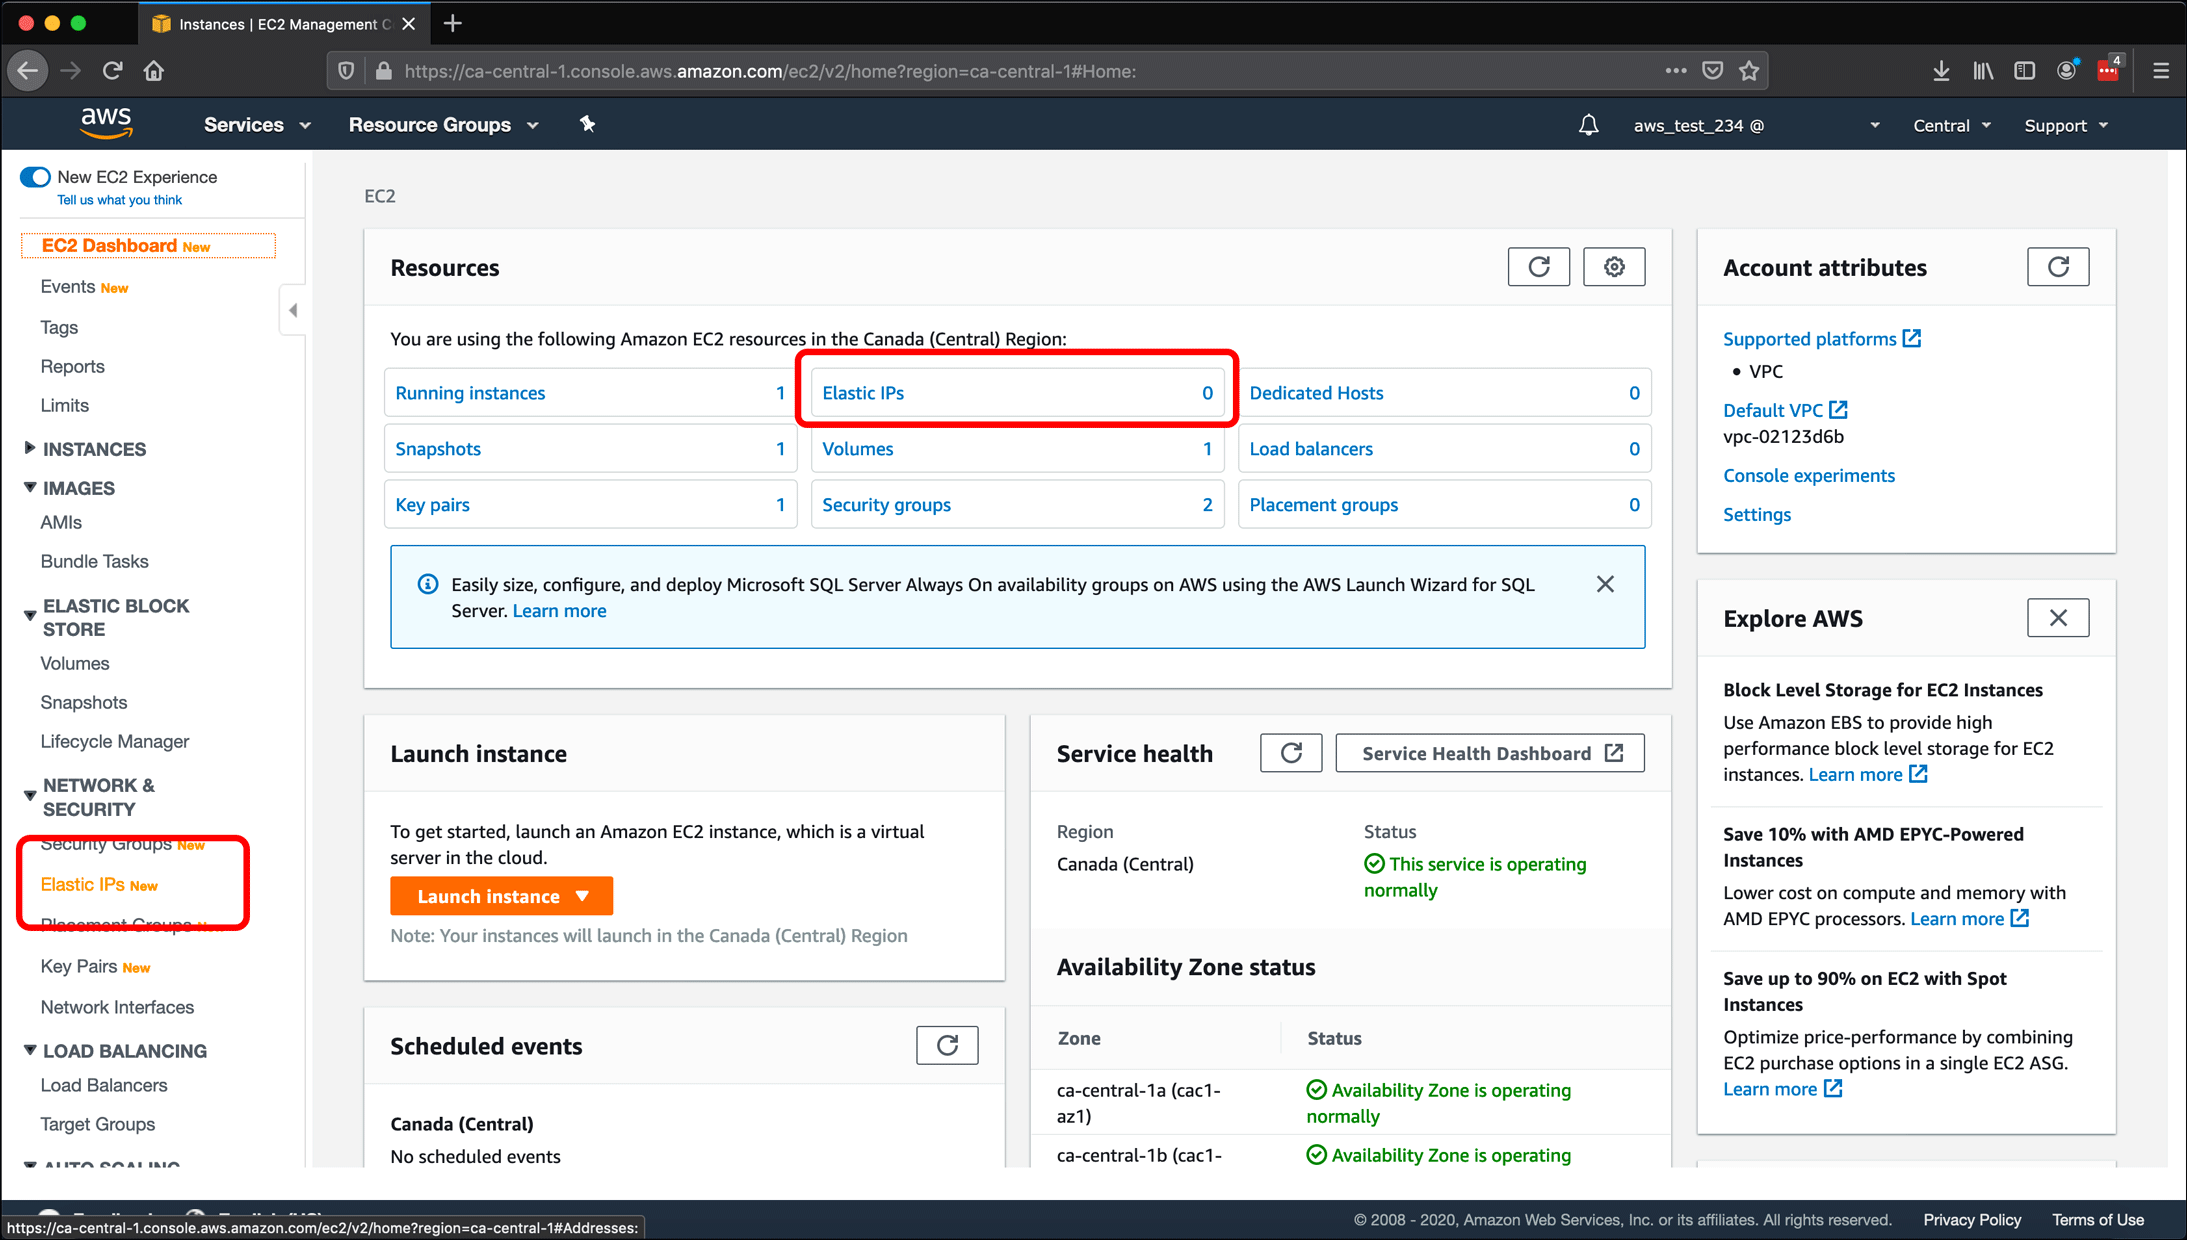
- To create an Elastic IP and assign it to your instance, click EC2 Dashboard in the left sidebar.
- Click Elastic IPs in the left sidebar under Networking & Security or click Elastic IPs in the Resources pane.
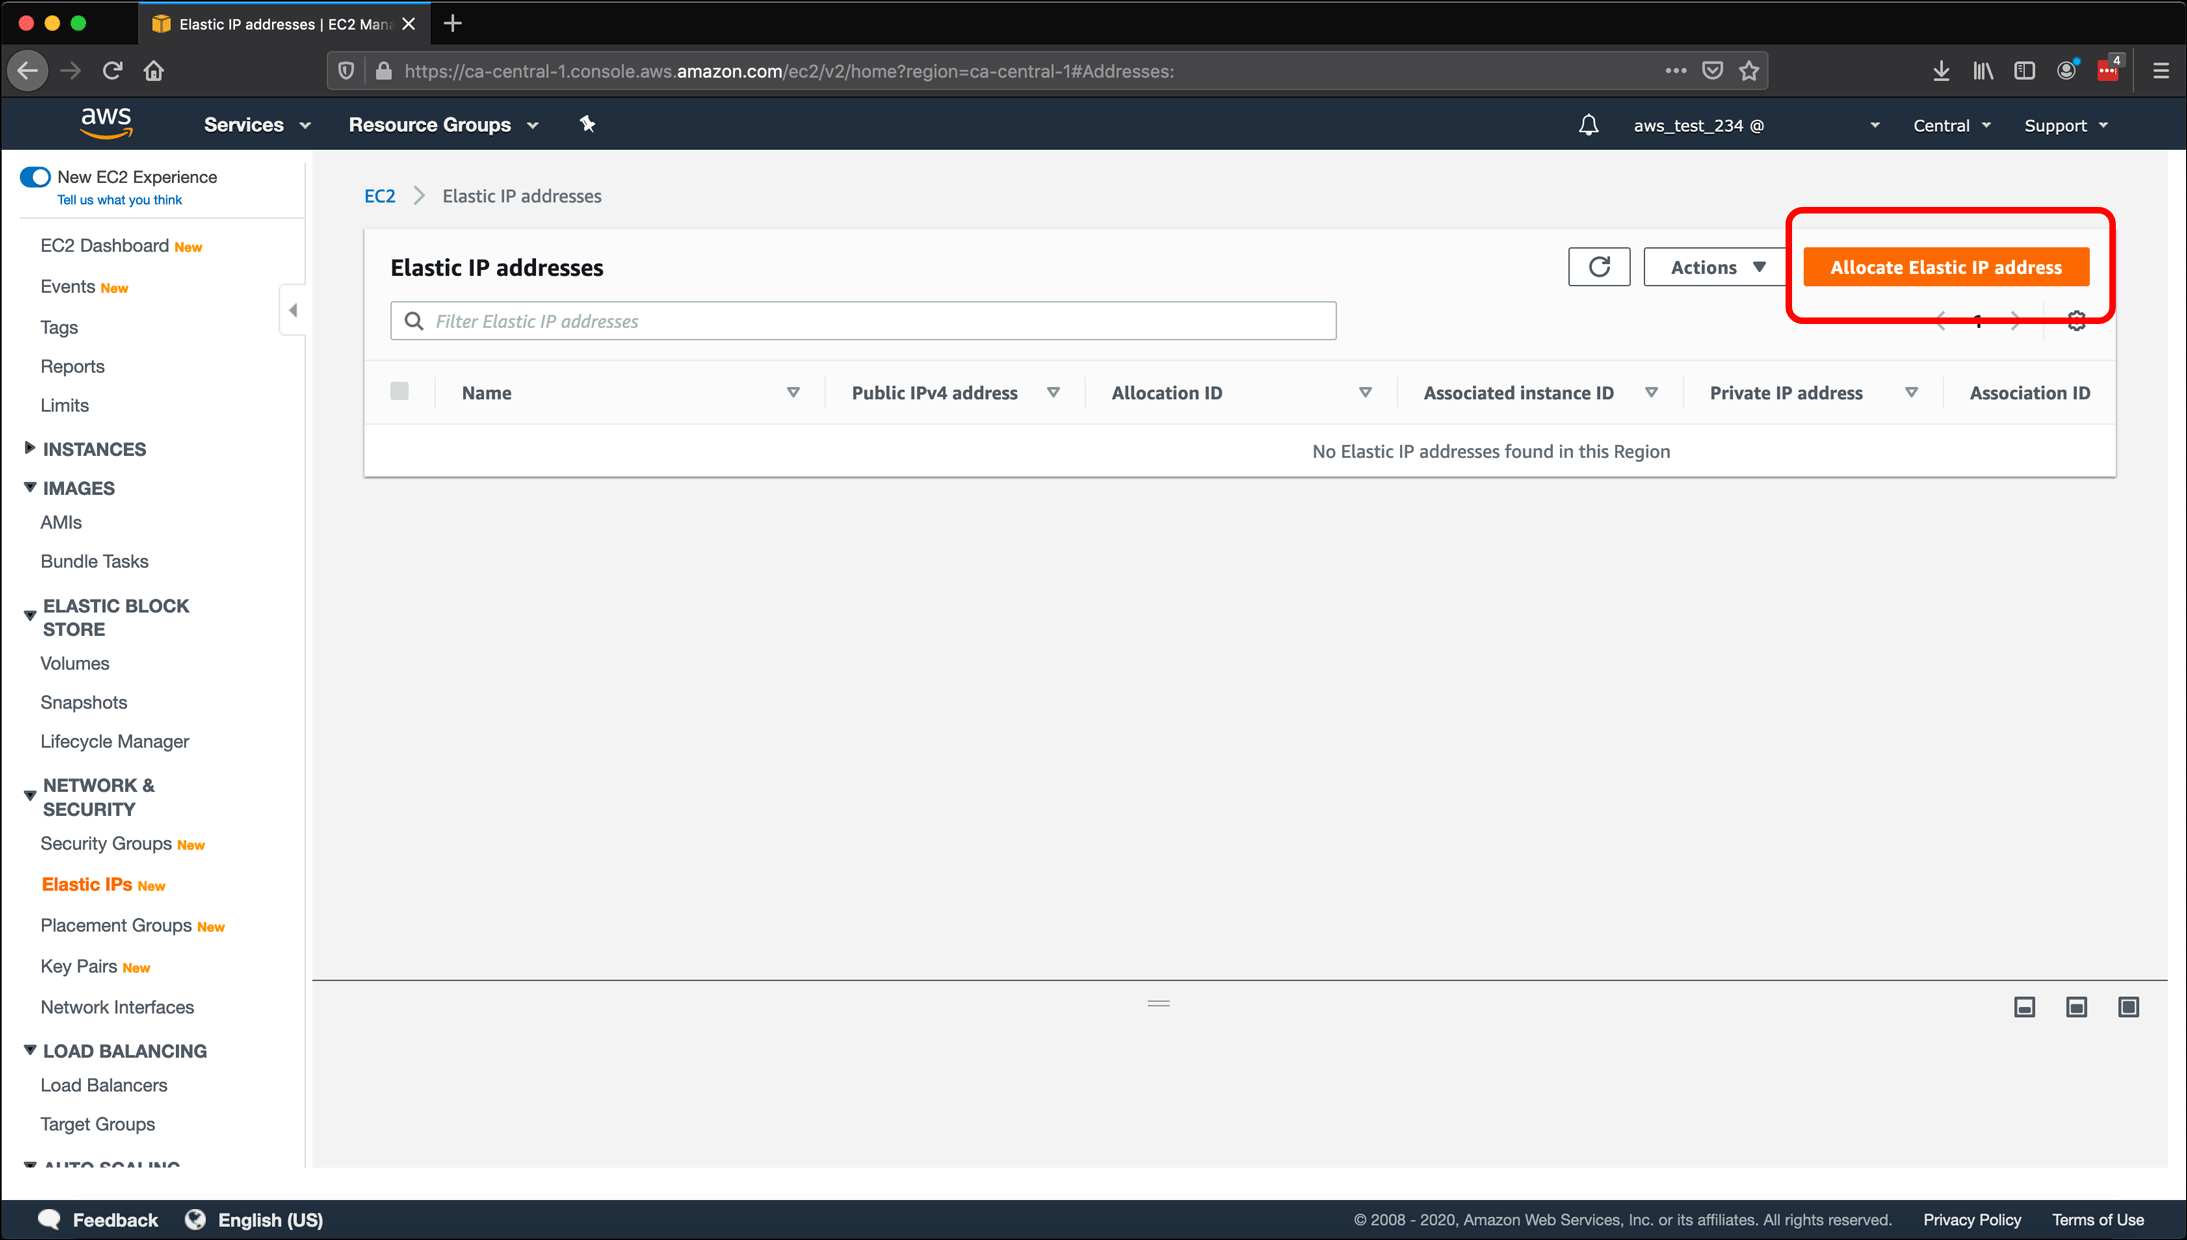
- Click the Allocate Elastic IP address button on the Elastic IP addresses screen.
- The Allocate Elastic IP address screen gives you options about where your IP address will come from. You can bring your own address to AWS, but since I don’t have any IP addresses, I leave the radio button set to Amazon’s pool of IPv4 addresses and click Allocate.

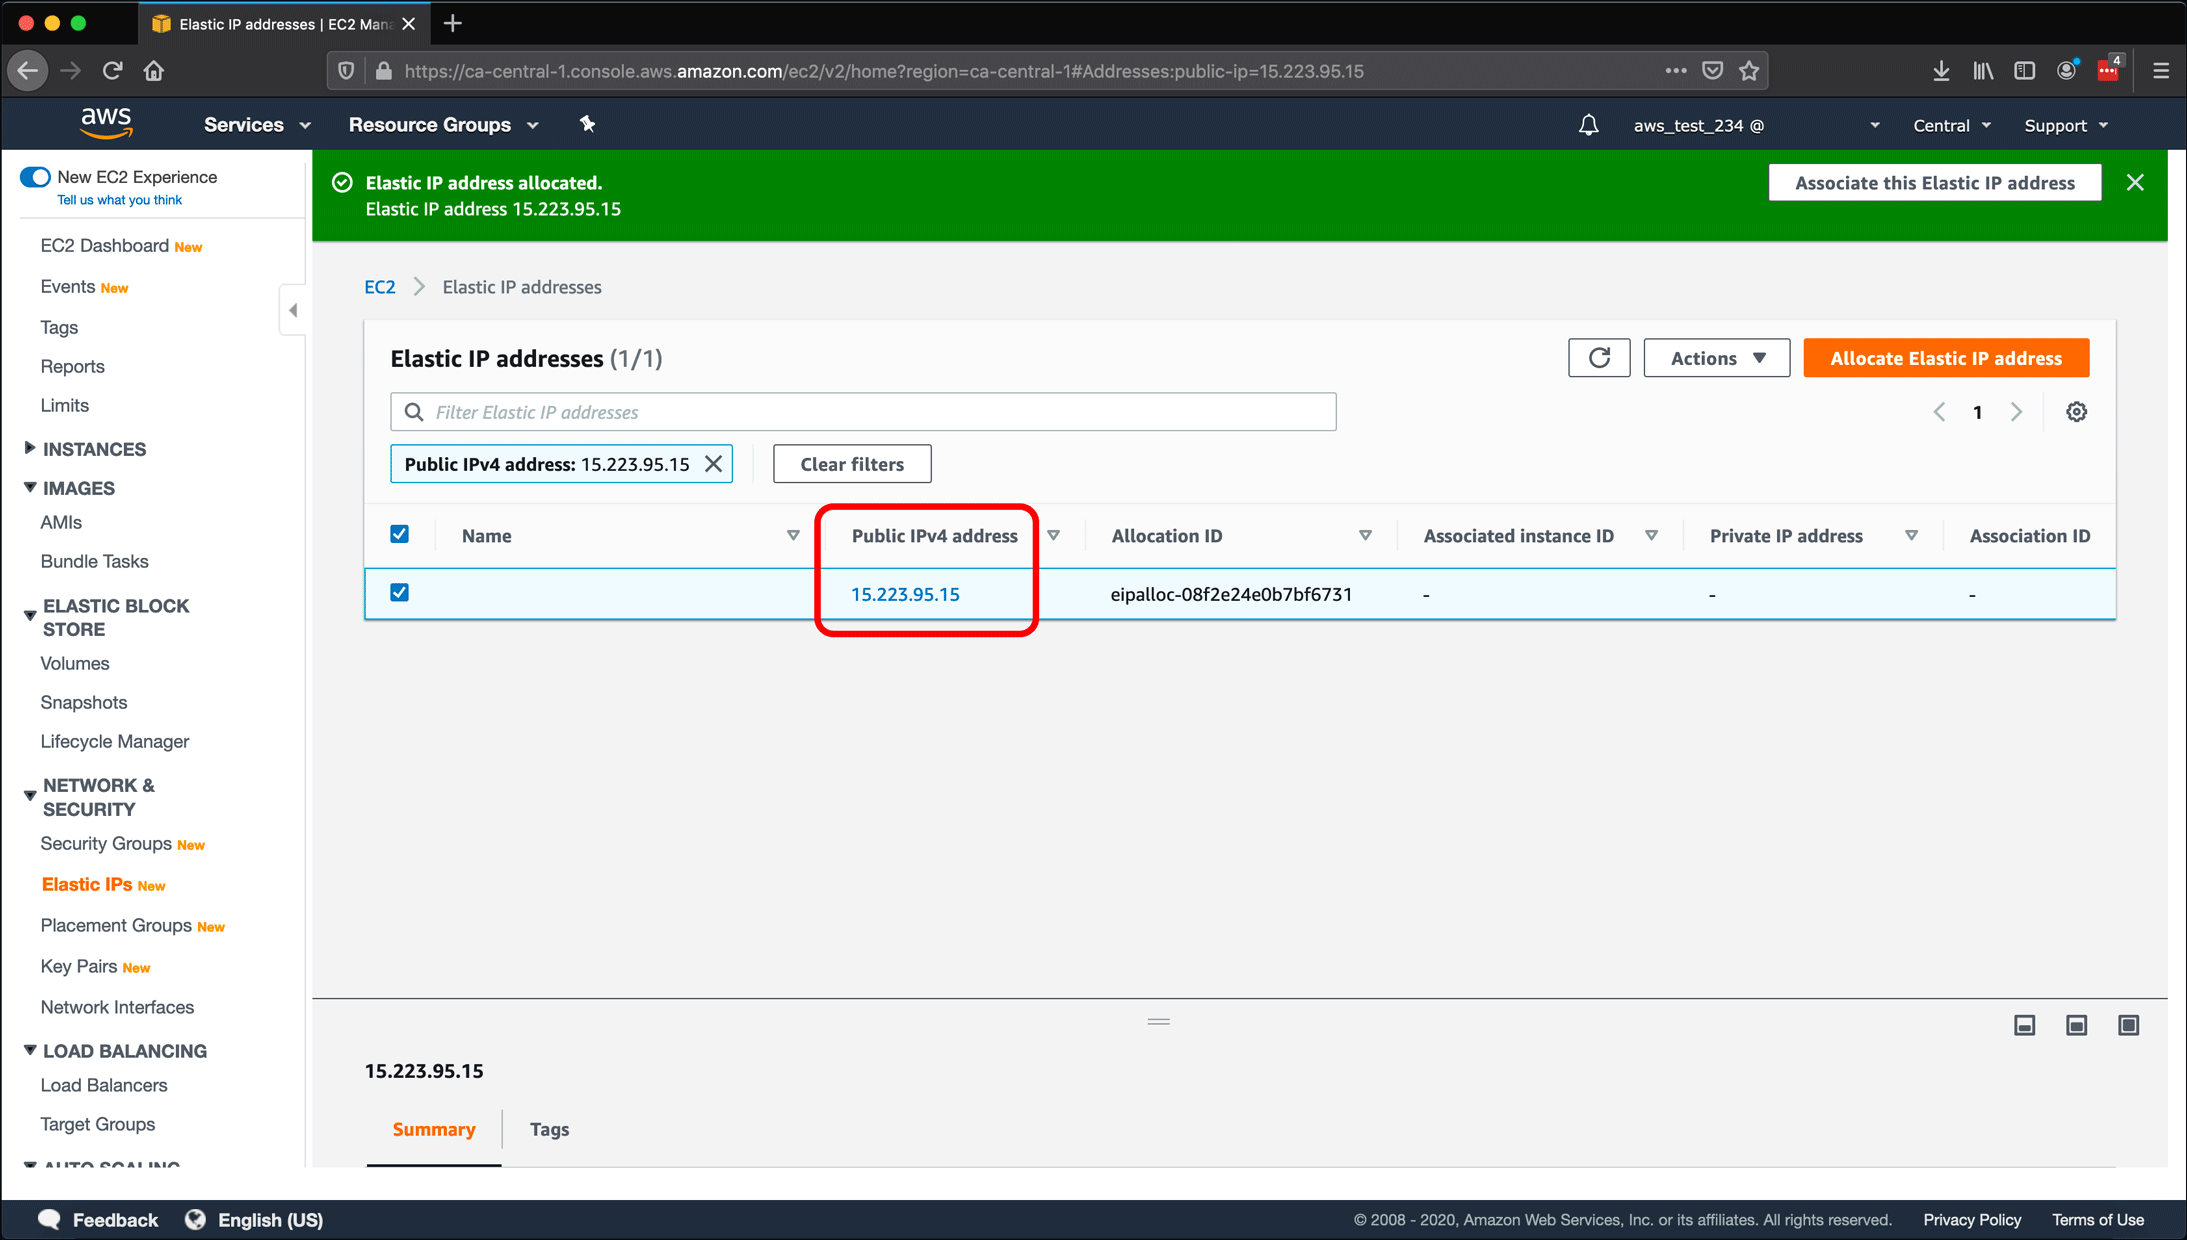
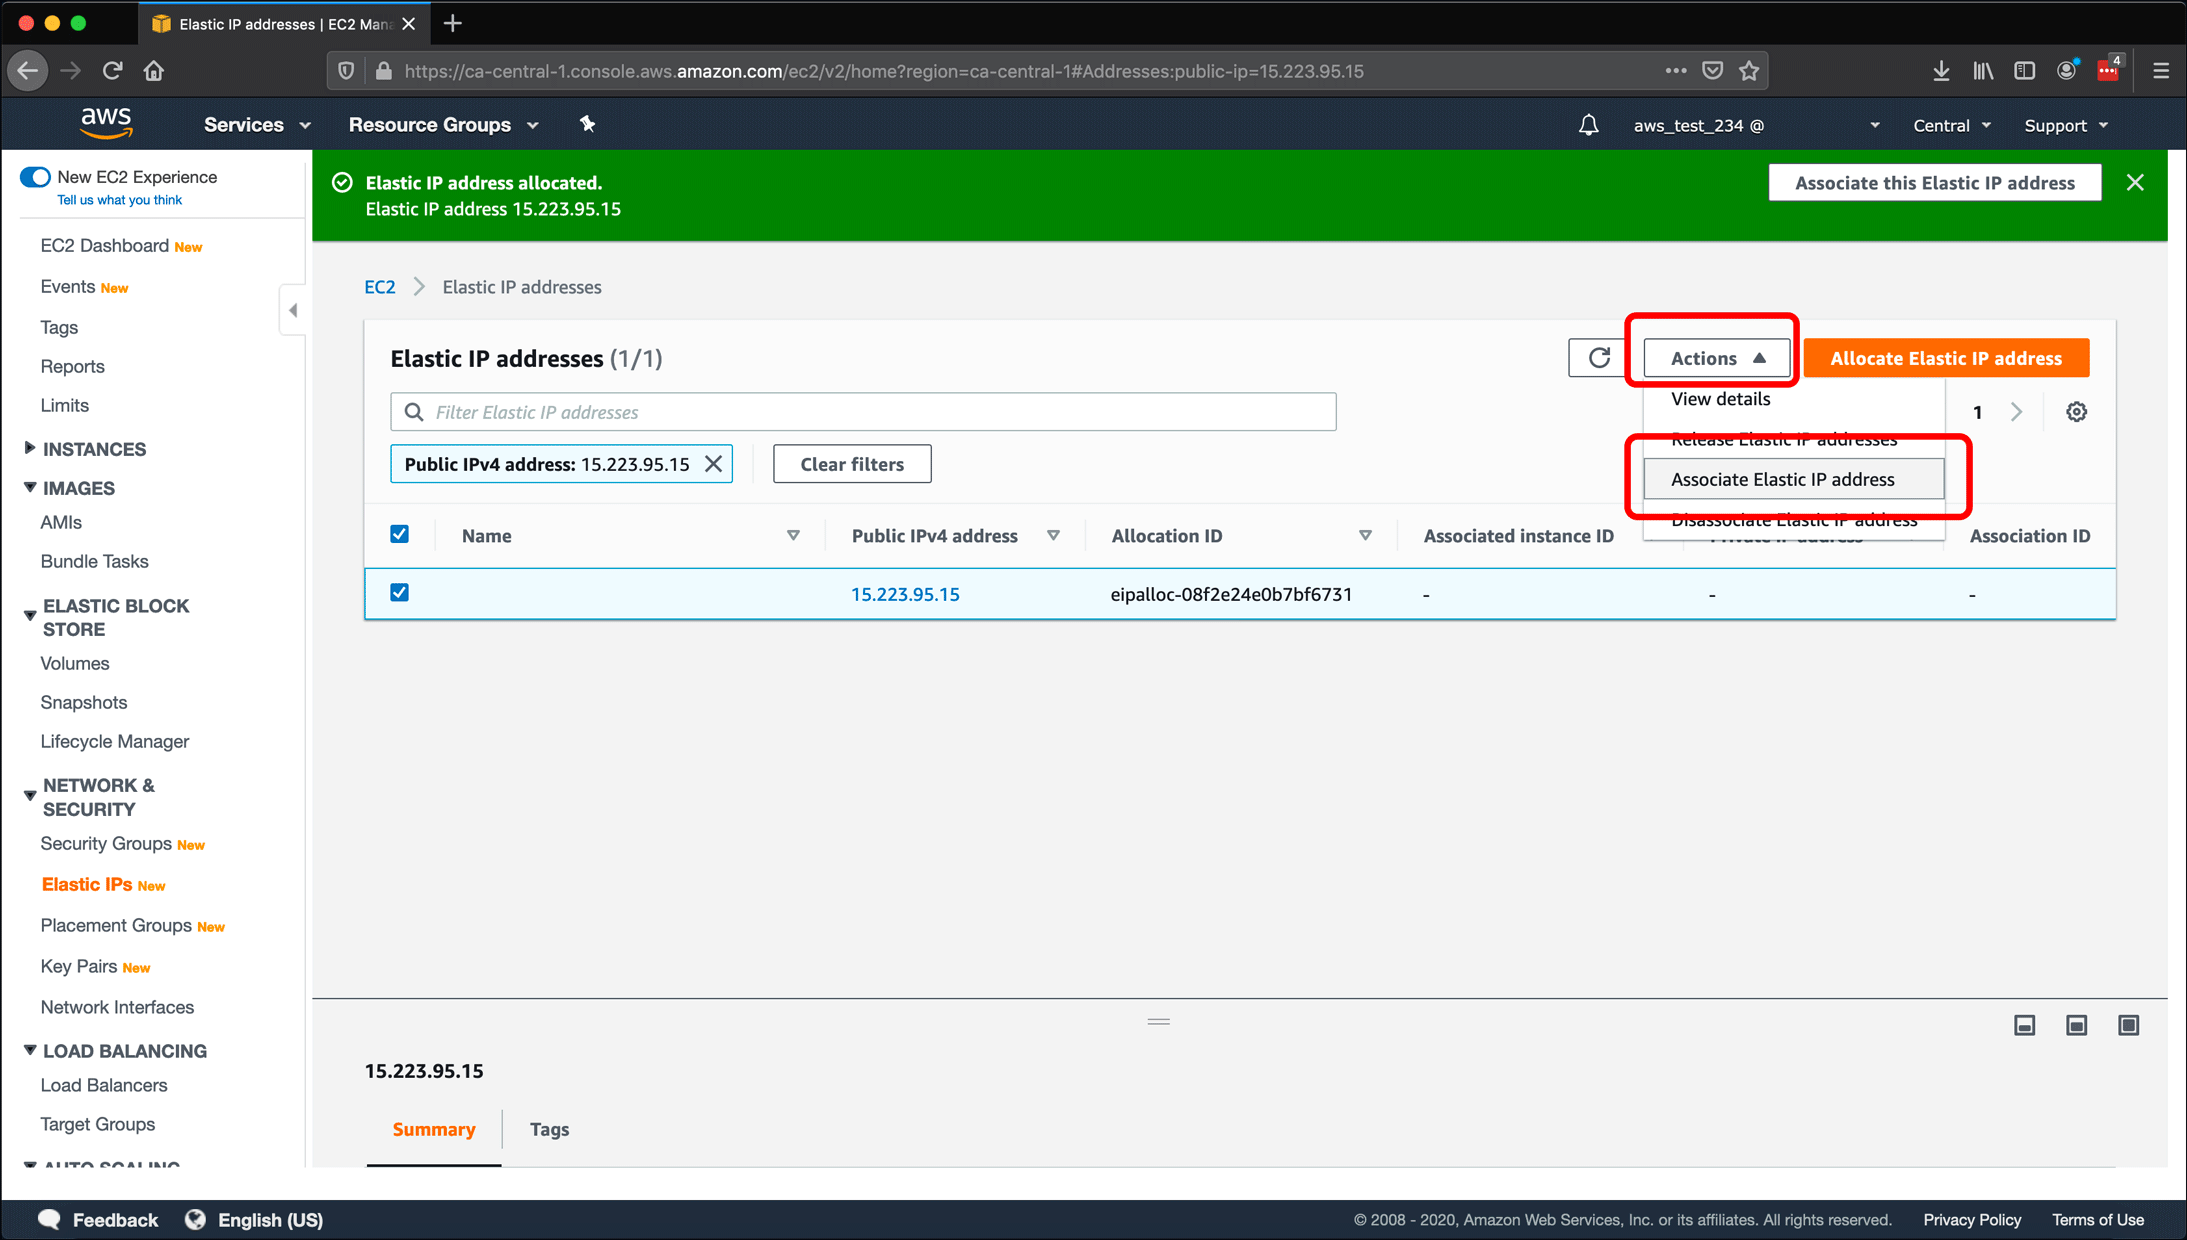
- The new Elastic IP address is displayed in the Public IPv4 address column: 15.223.95.15.
- Now the Elastic IP address exists, it needs to “associated” with the instance. Click the Actions button and then click Associate IP address.
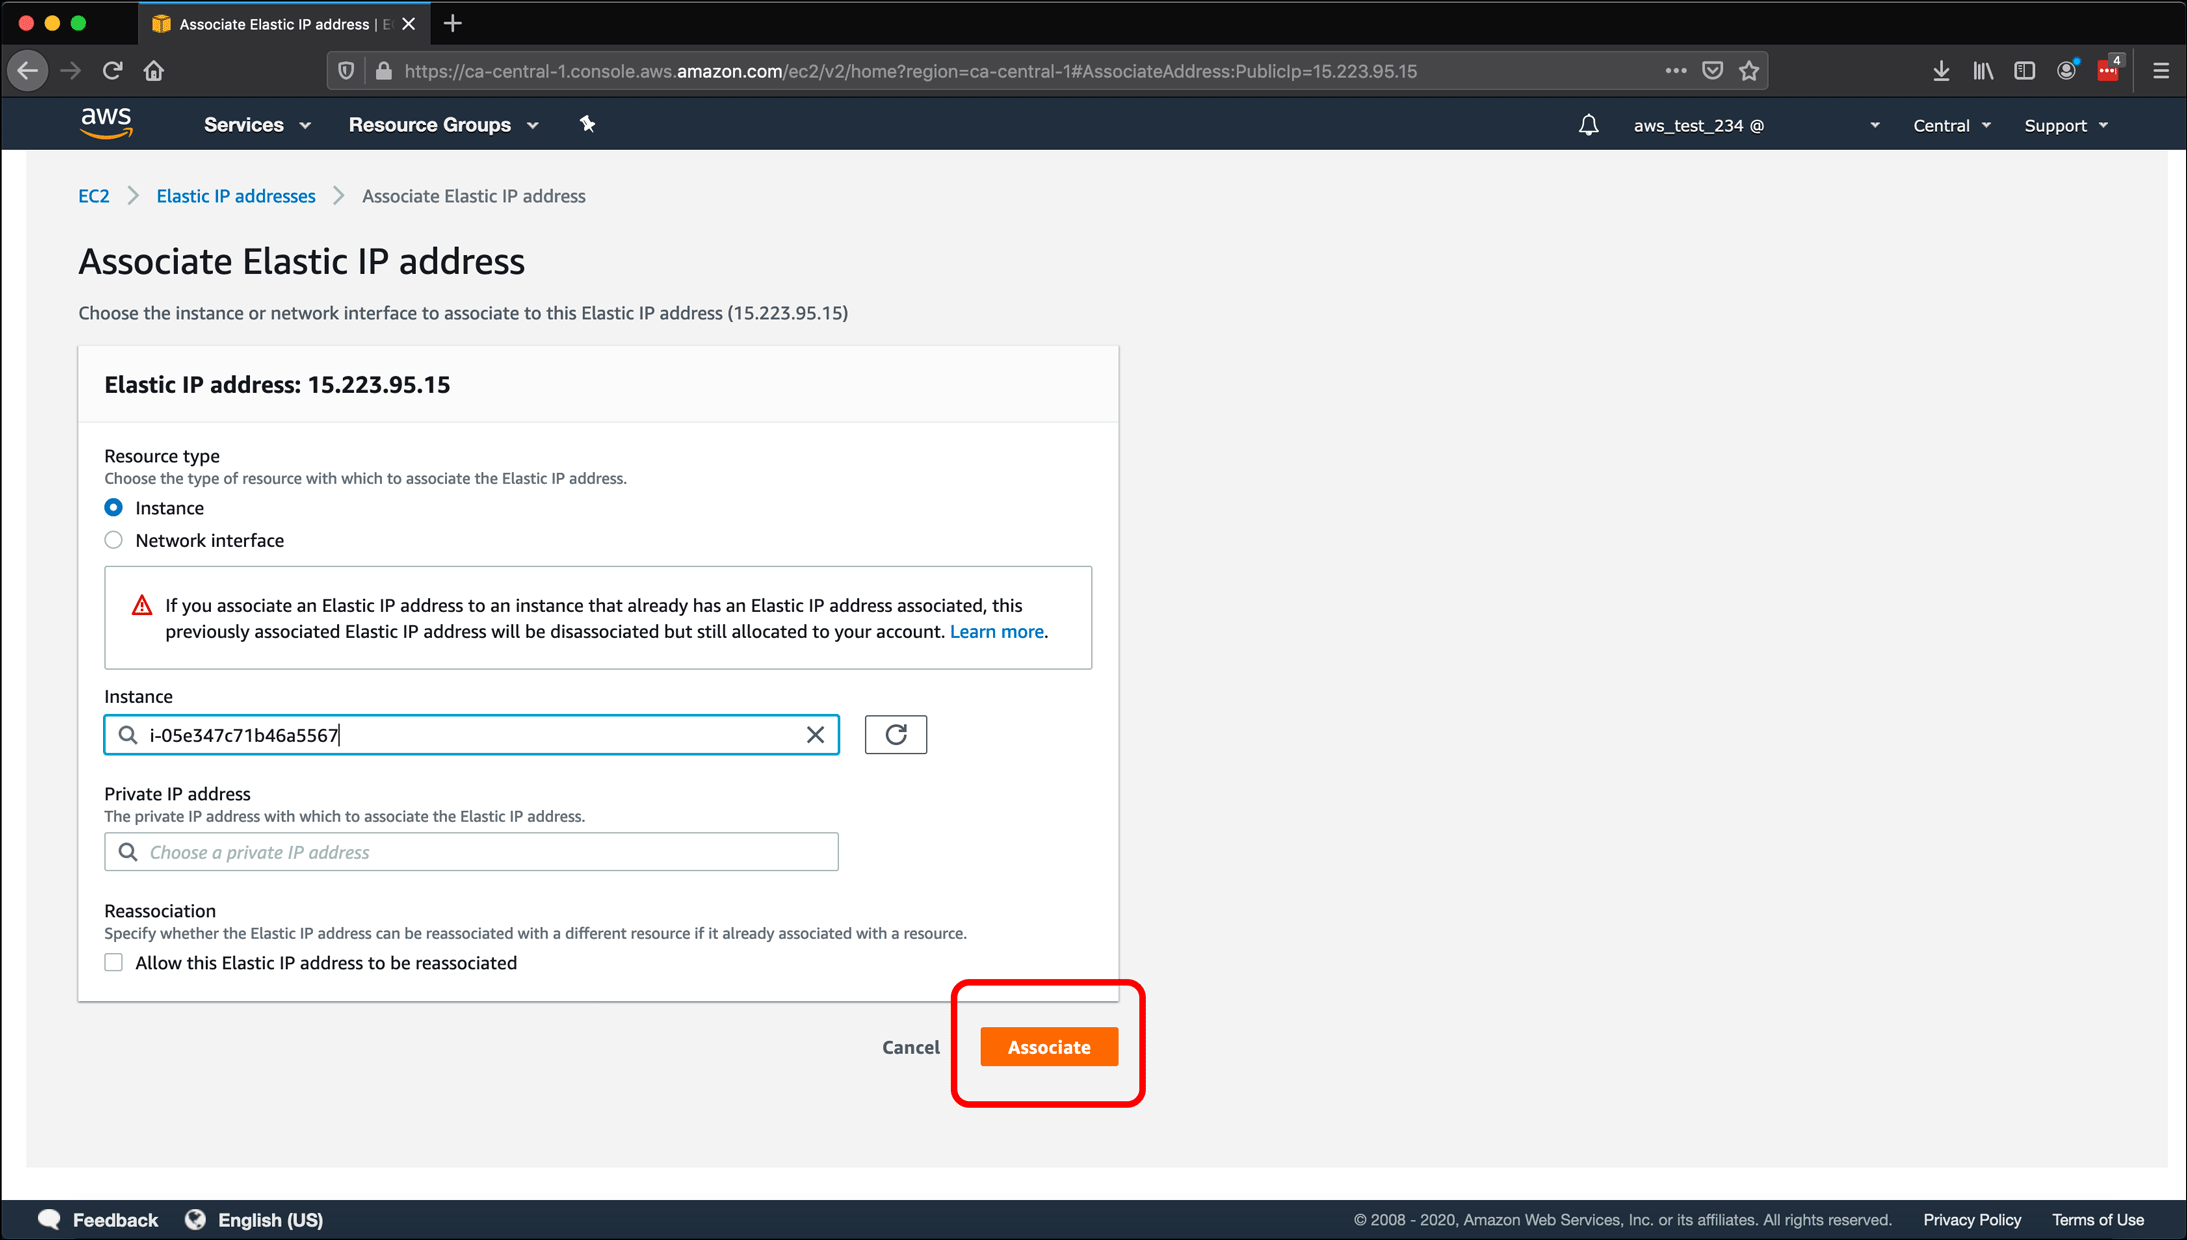
- On the Associate Elastic IP address screen. If the Resource Type does not default to Instance, select it.
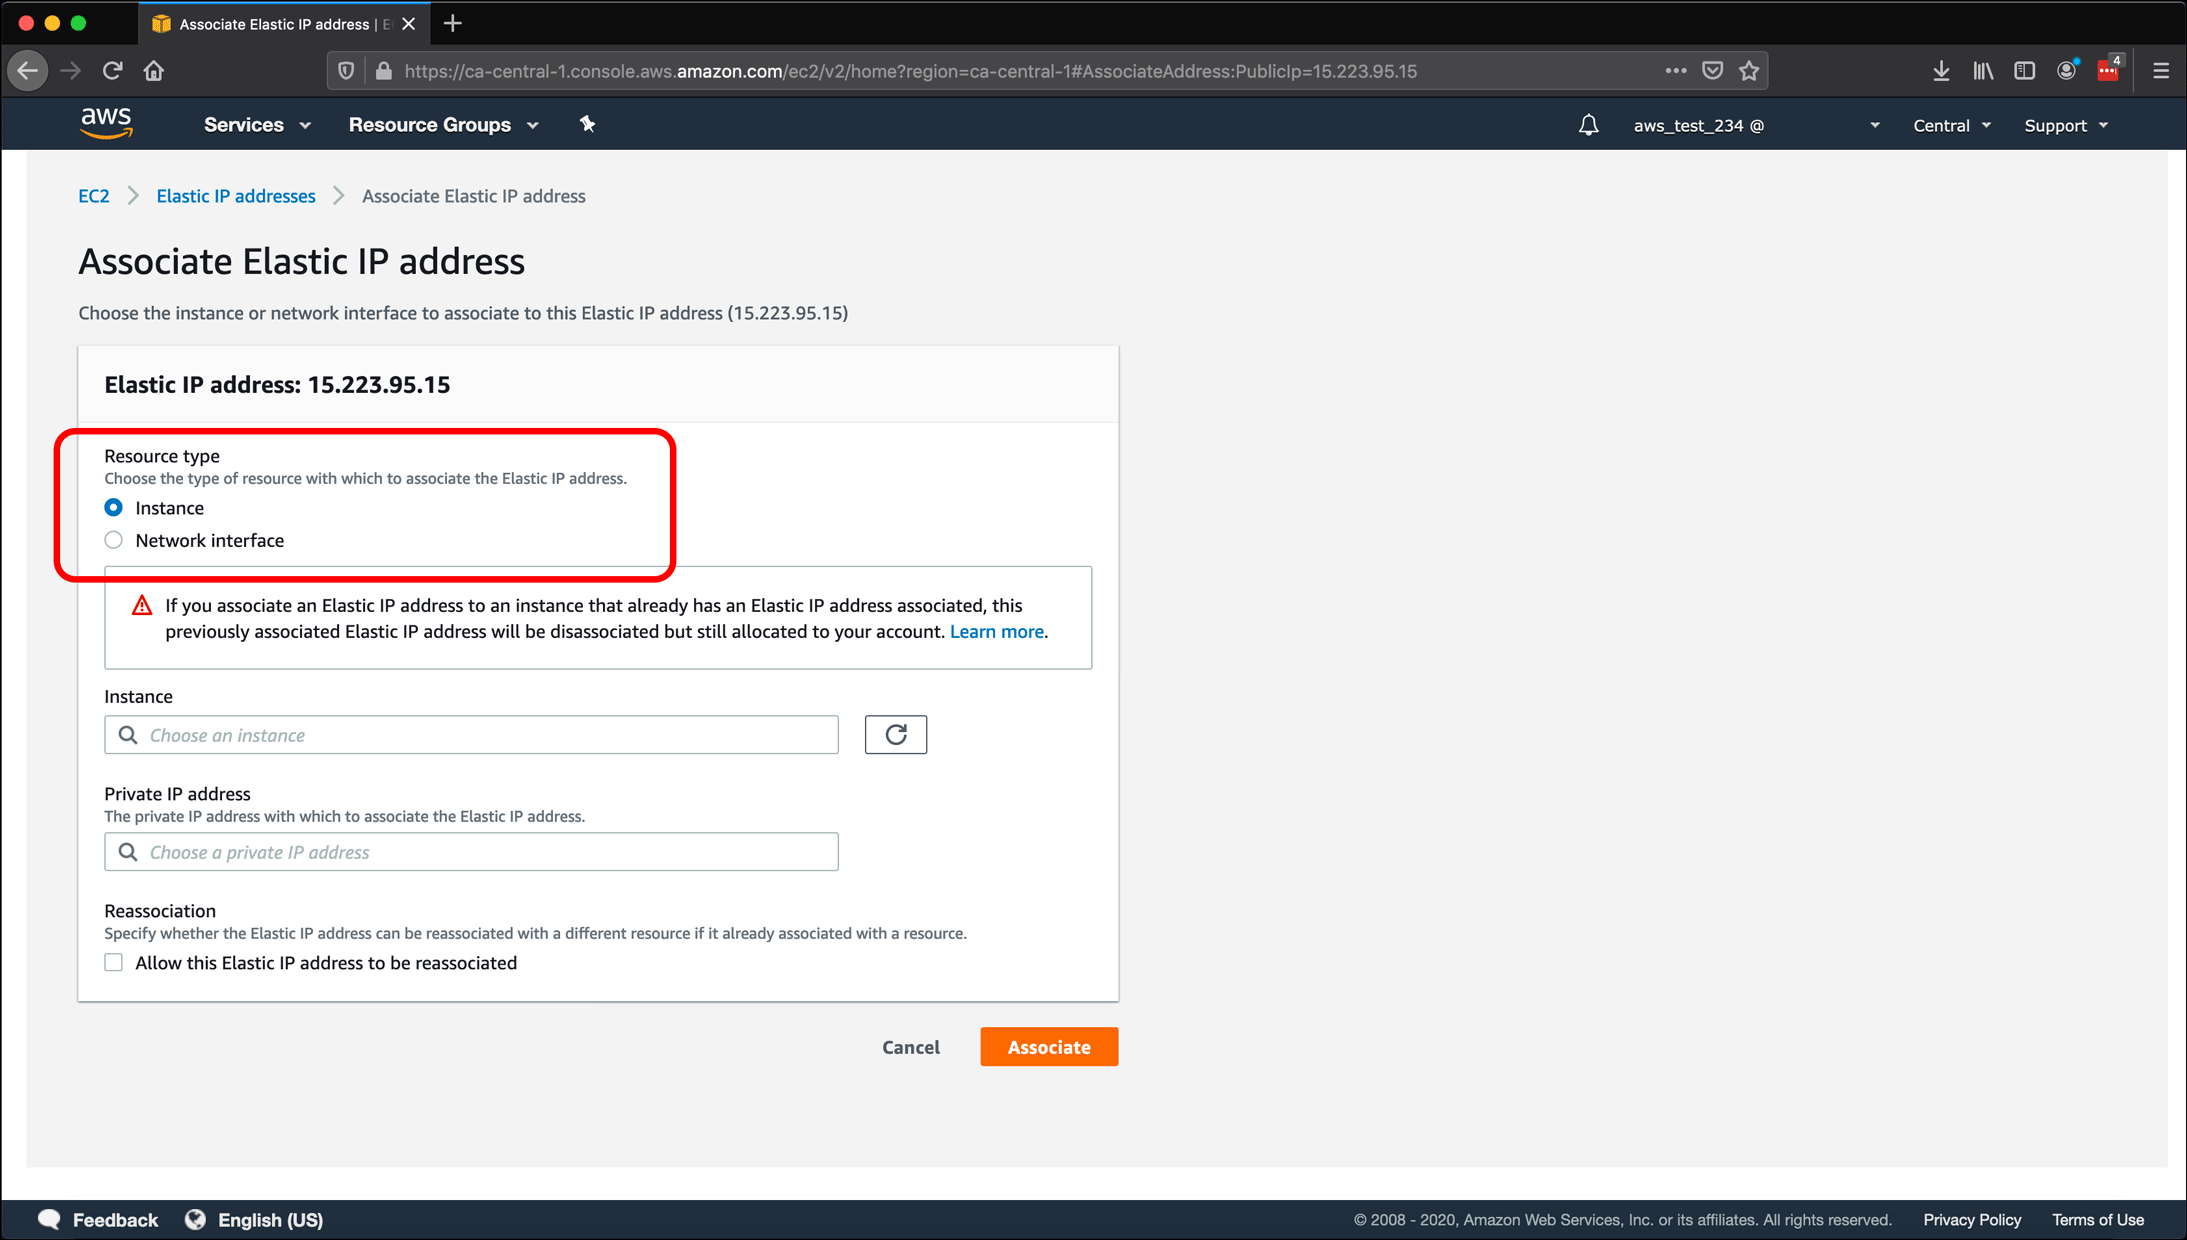
- Click in the Instance box to search for and select the instance. Since I only have one, it immediately appears as a suggested result.
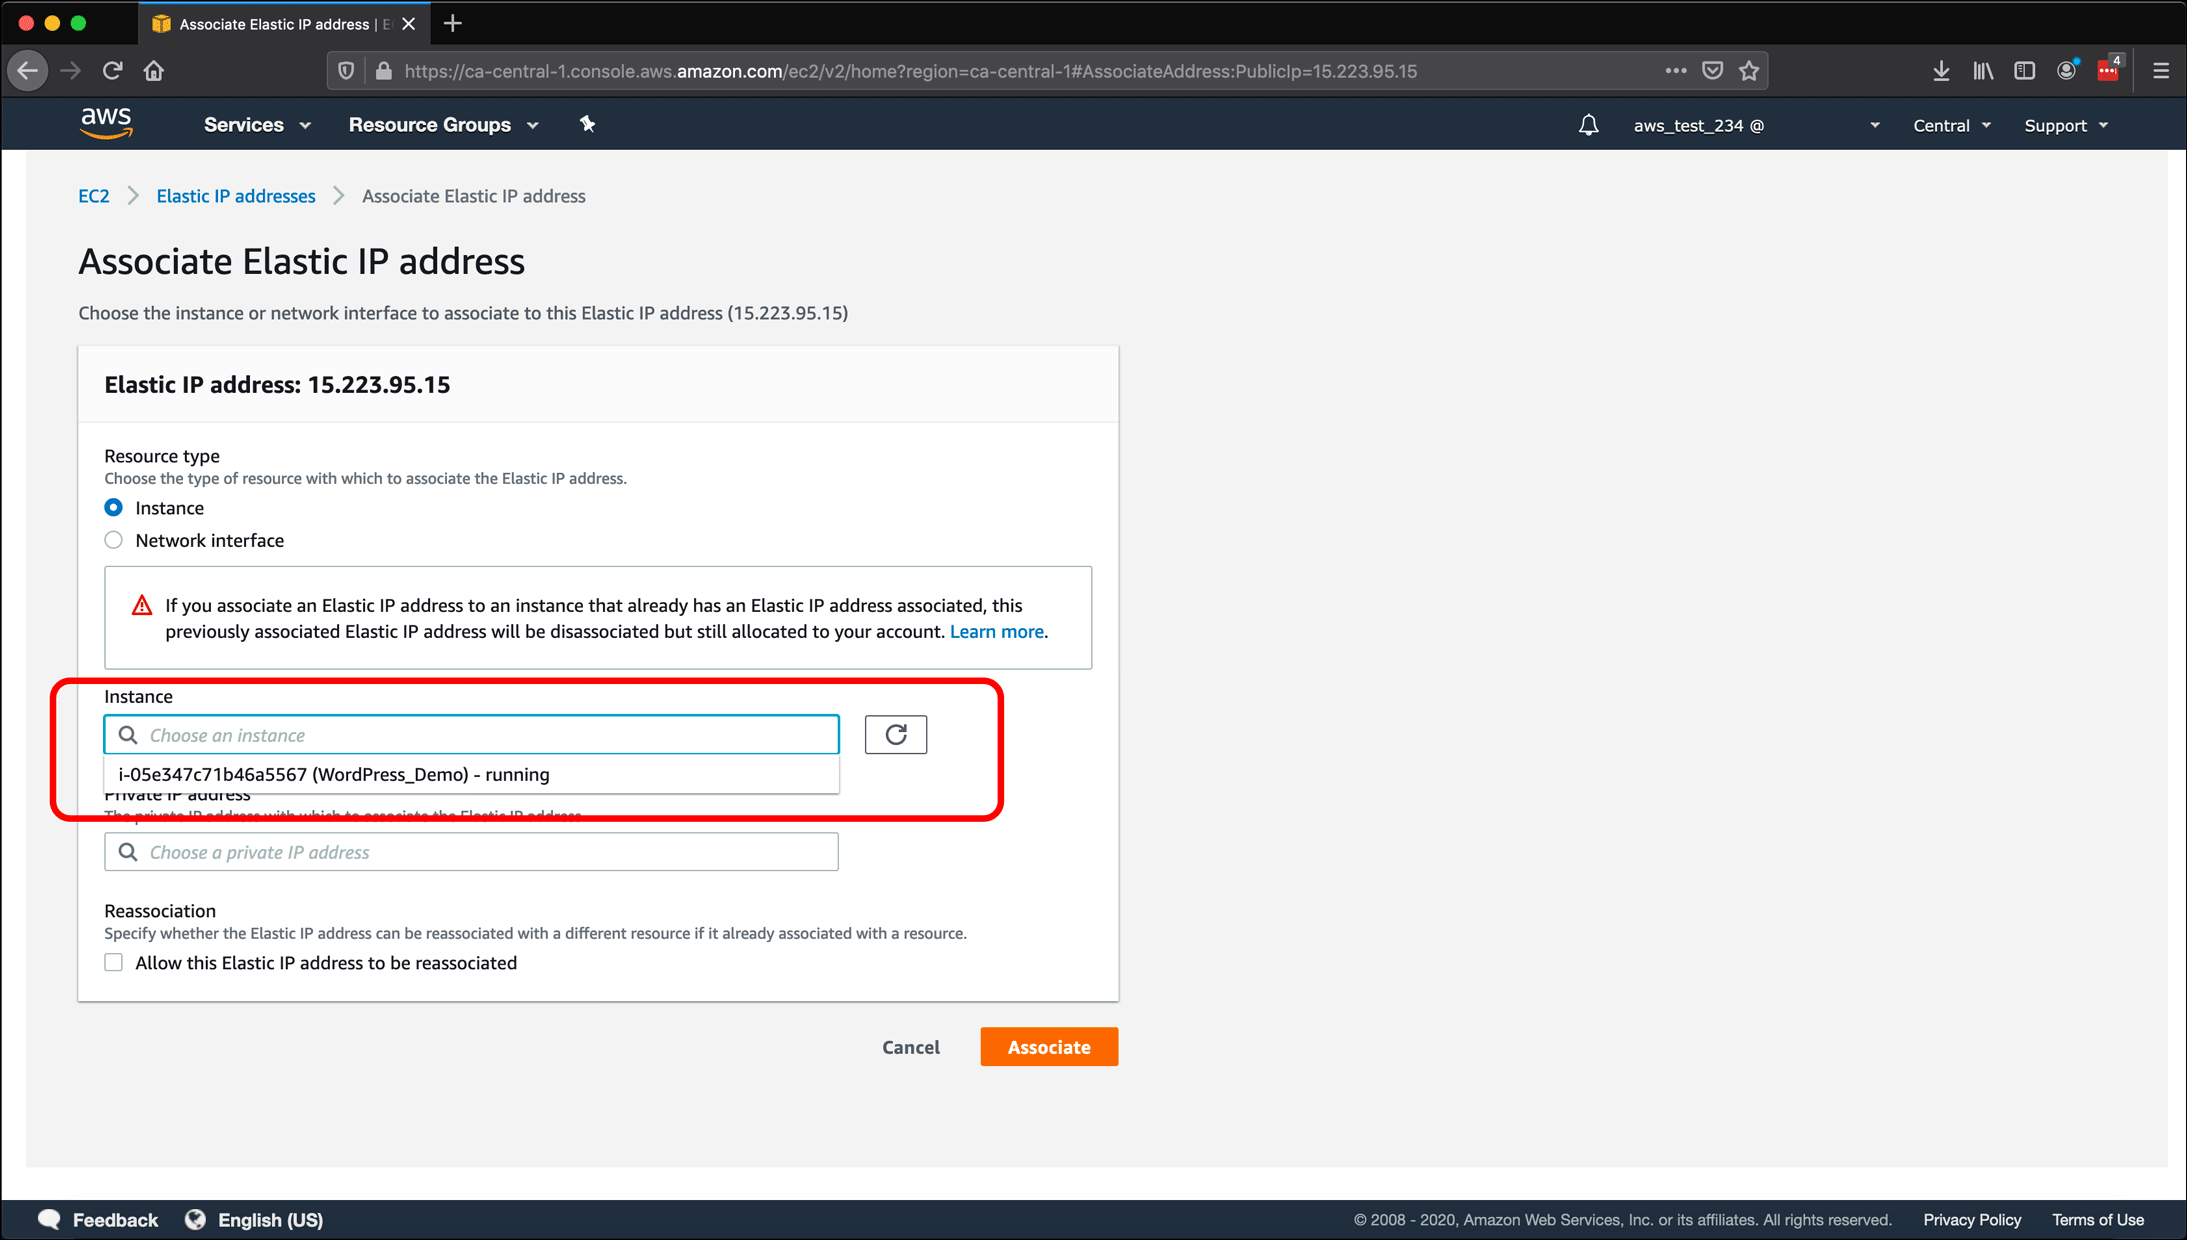
- However, I can search by the name of my instance with WordPress.
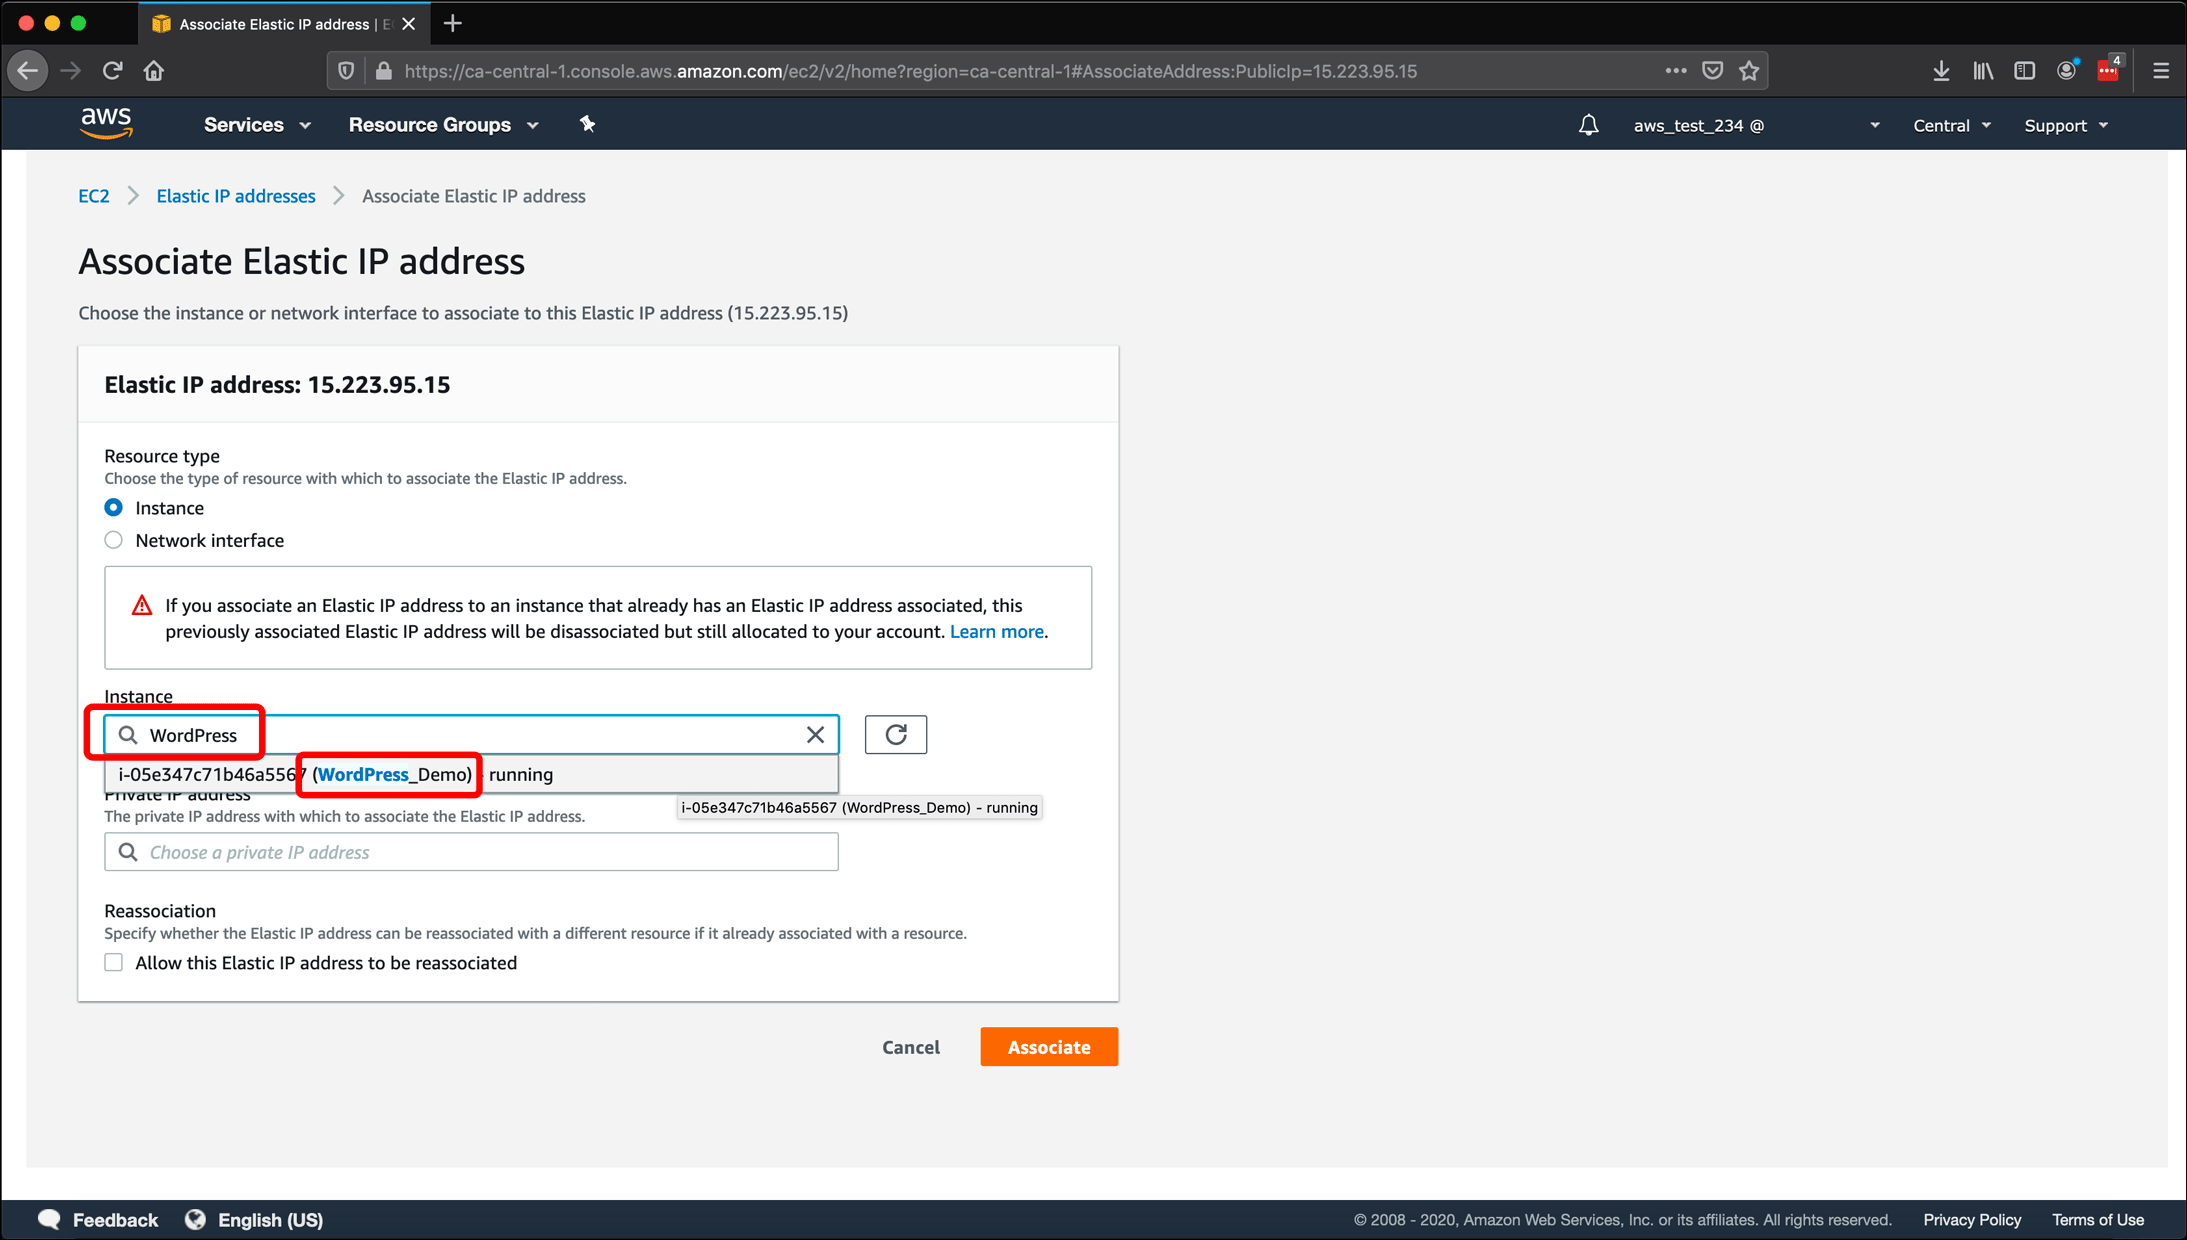
- I can also search by the Instance ID.

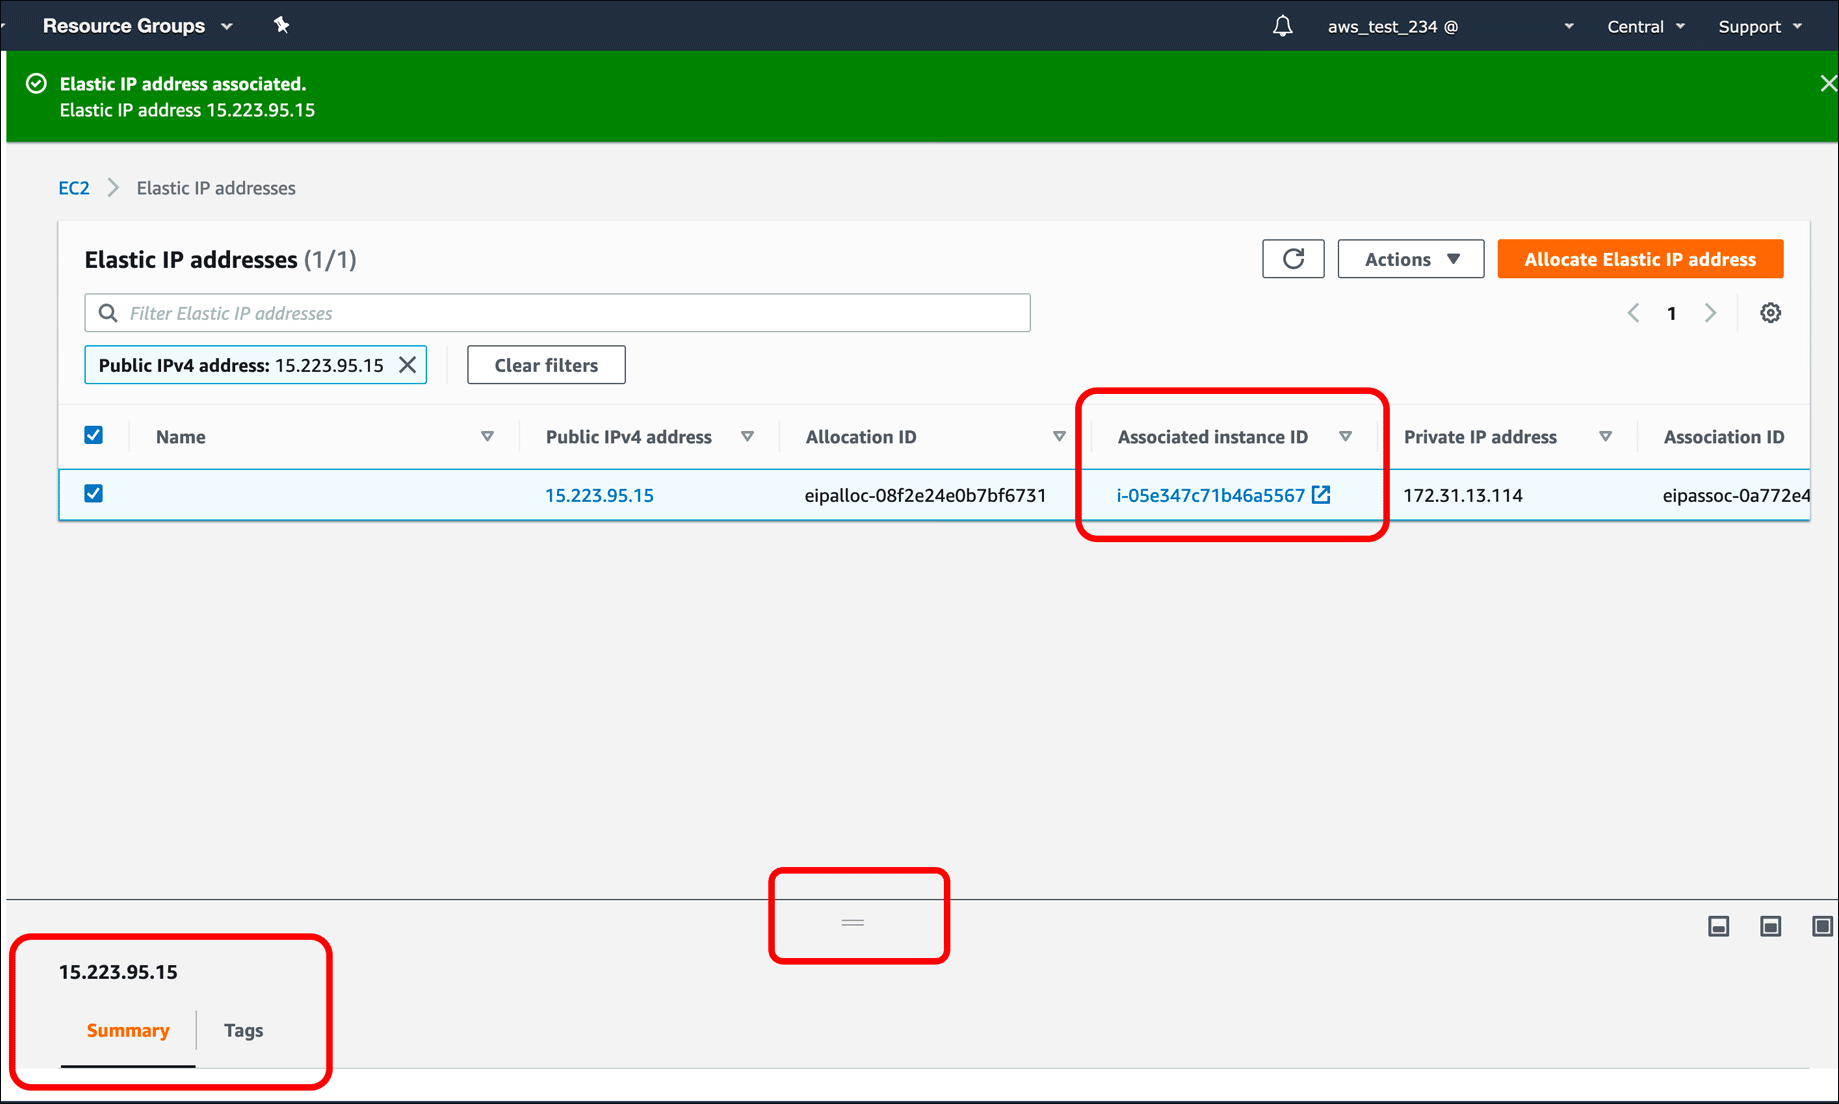
- Select the instance and click Associate.
- The Instance ID appears in the Associated Instance ID field. There is a properties pane at the bottom of the screen which you can expand with the handle.
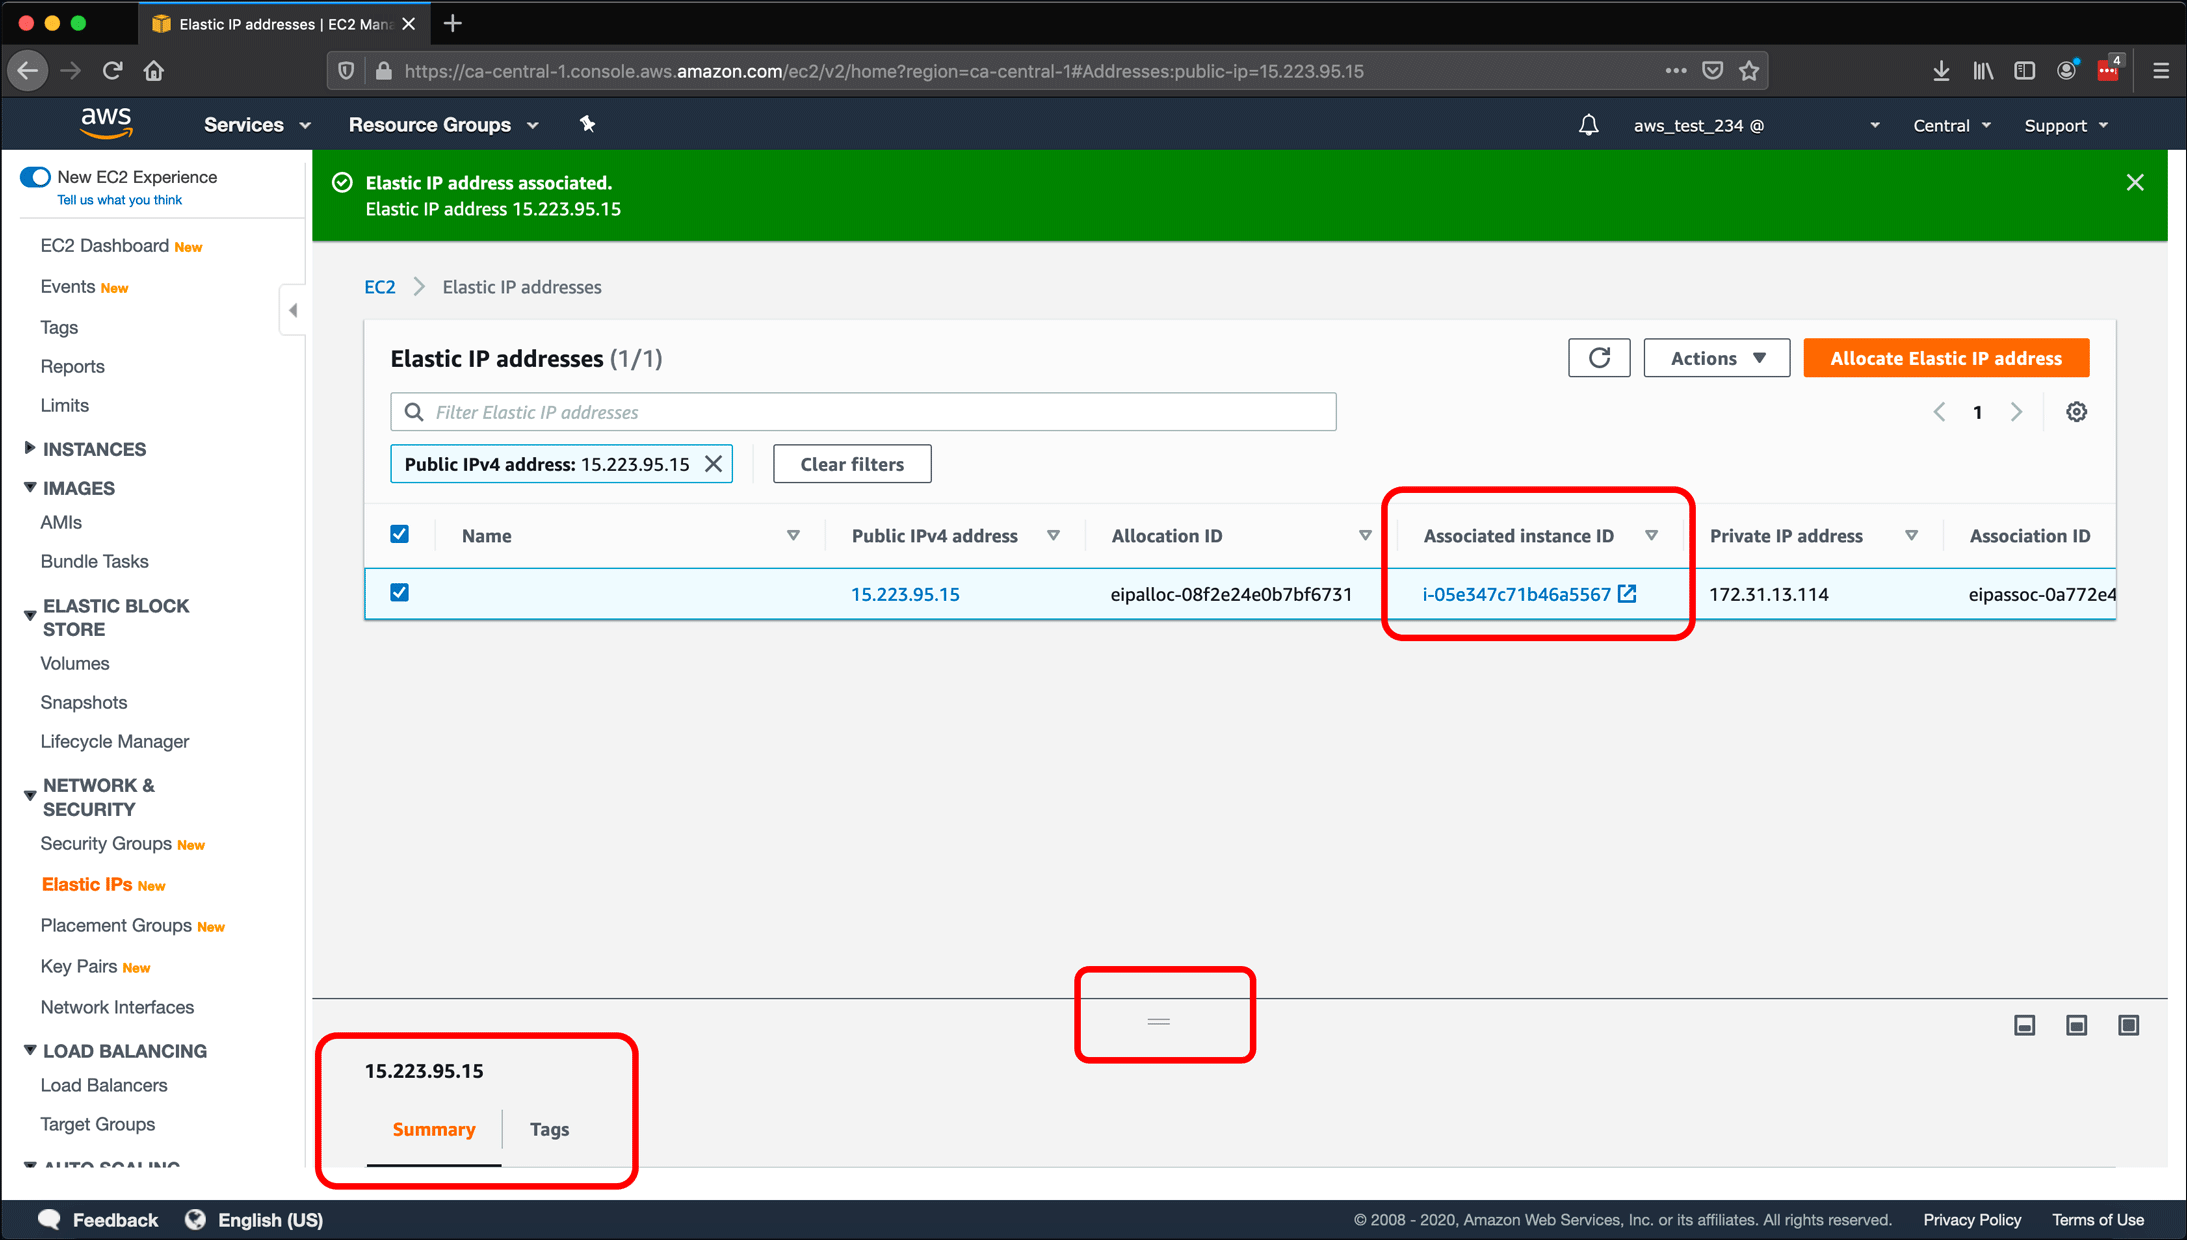
- The Summary tab shows all of the Elastic IP’s properties. Add a name by clicking Tags.
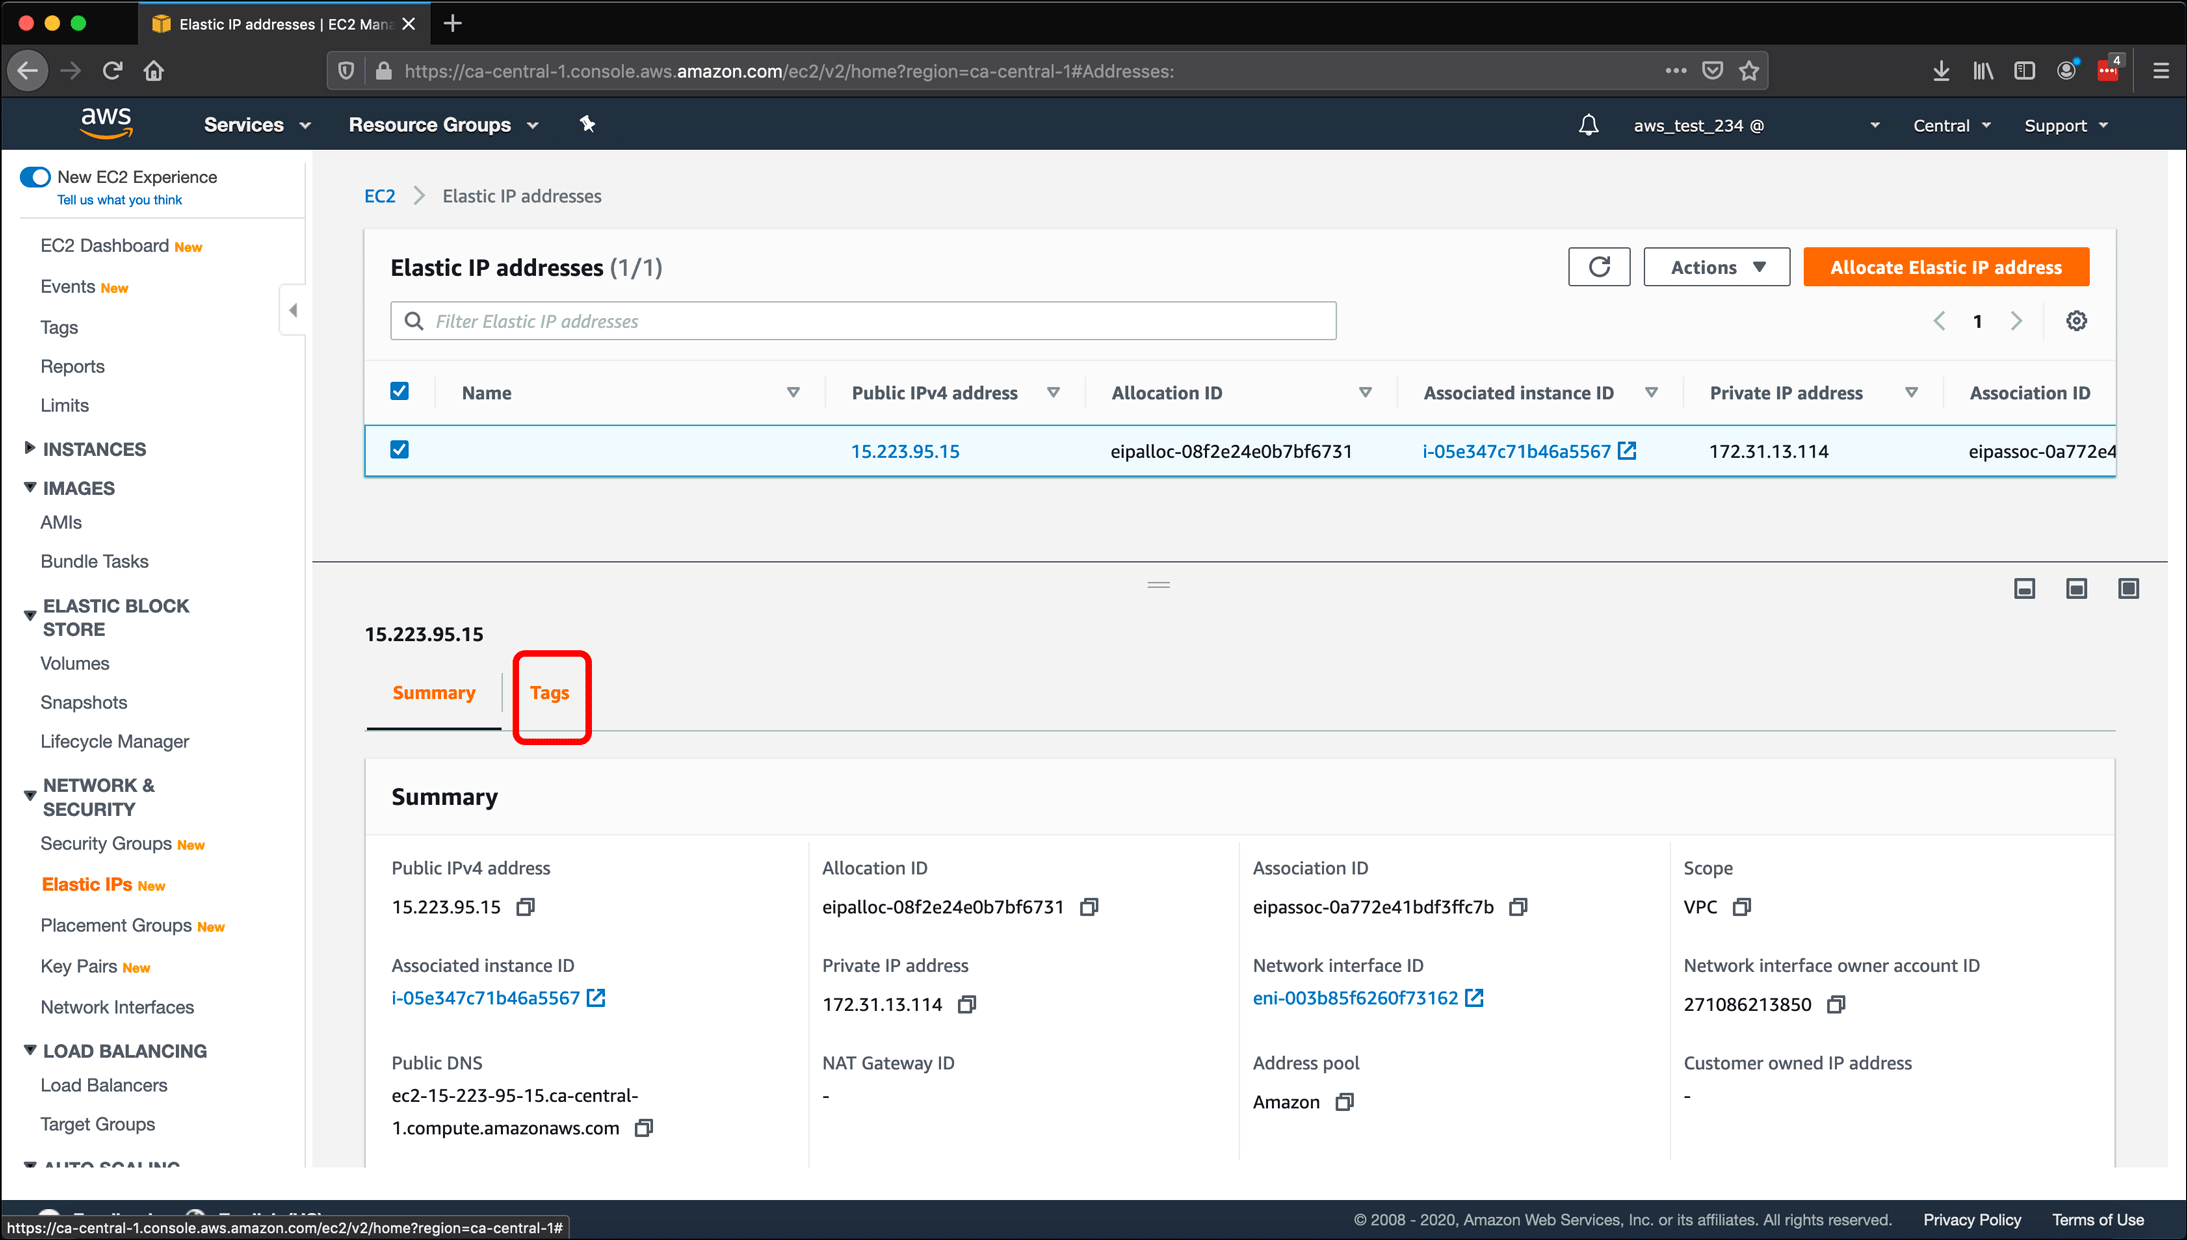
- Click the Manage tags button.

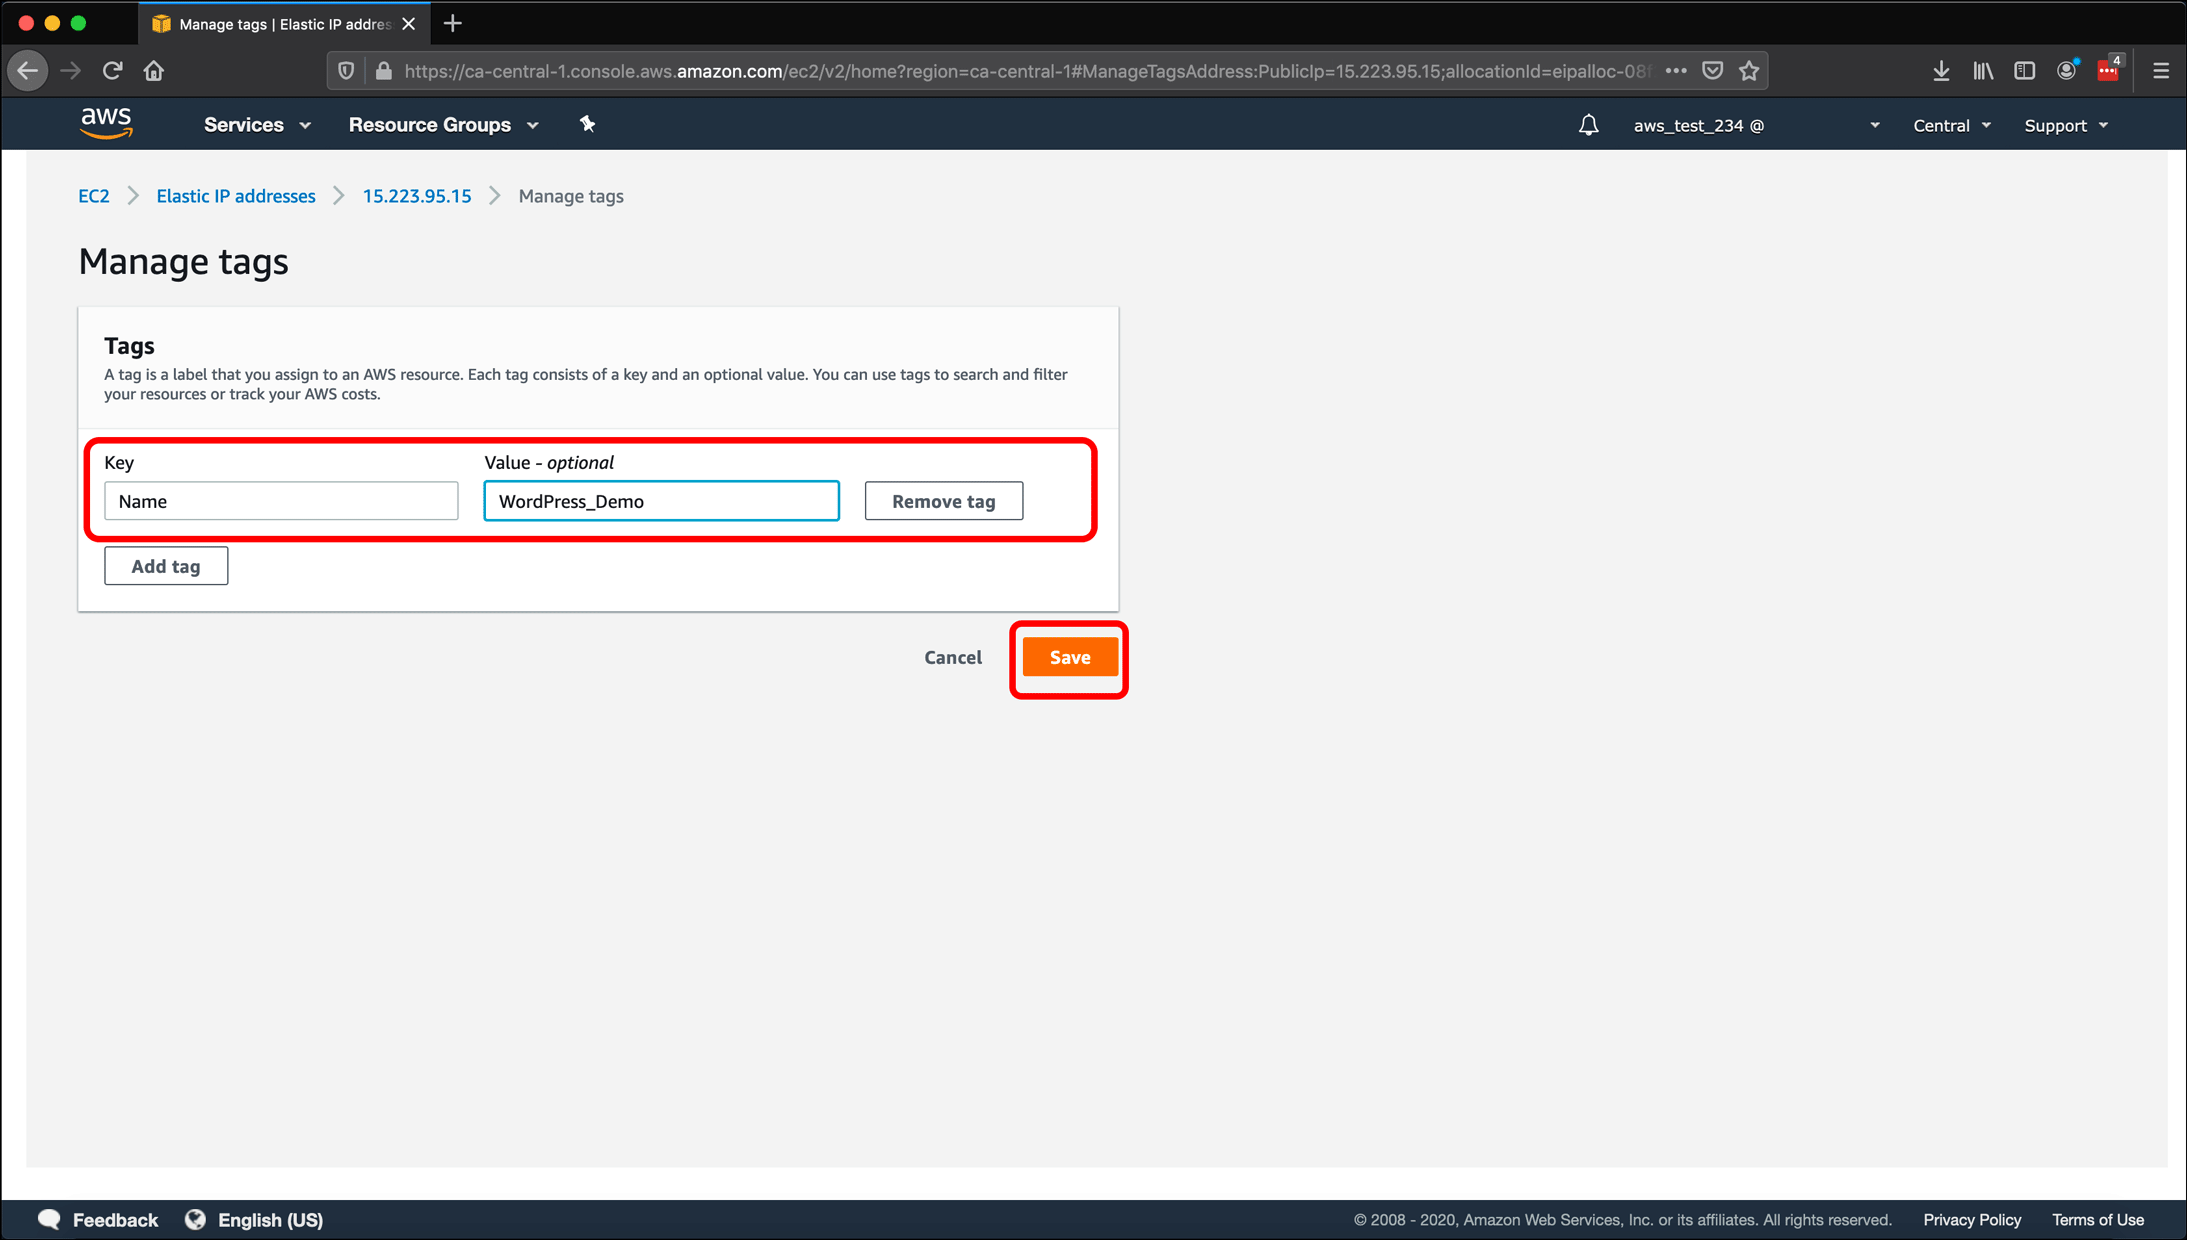
- Tag the Elastic IP with a key/value pair click Save.
- A page that lists all of the properties of the Elastic IP address appears, including the Associated Instance ID. Click the Elastic IP addresses link above the IP address.
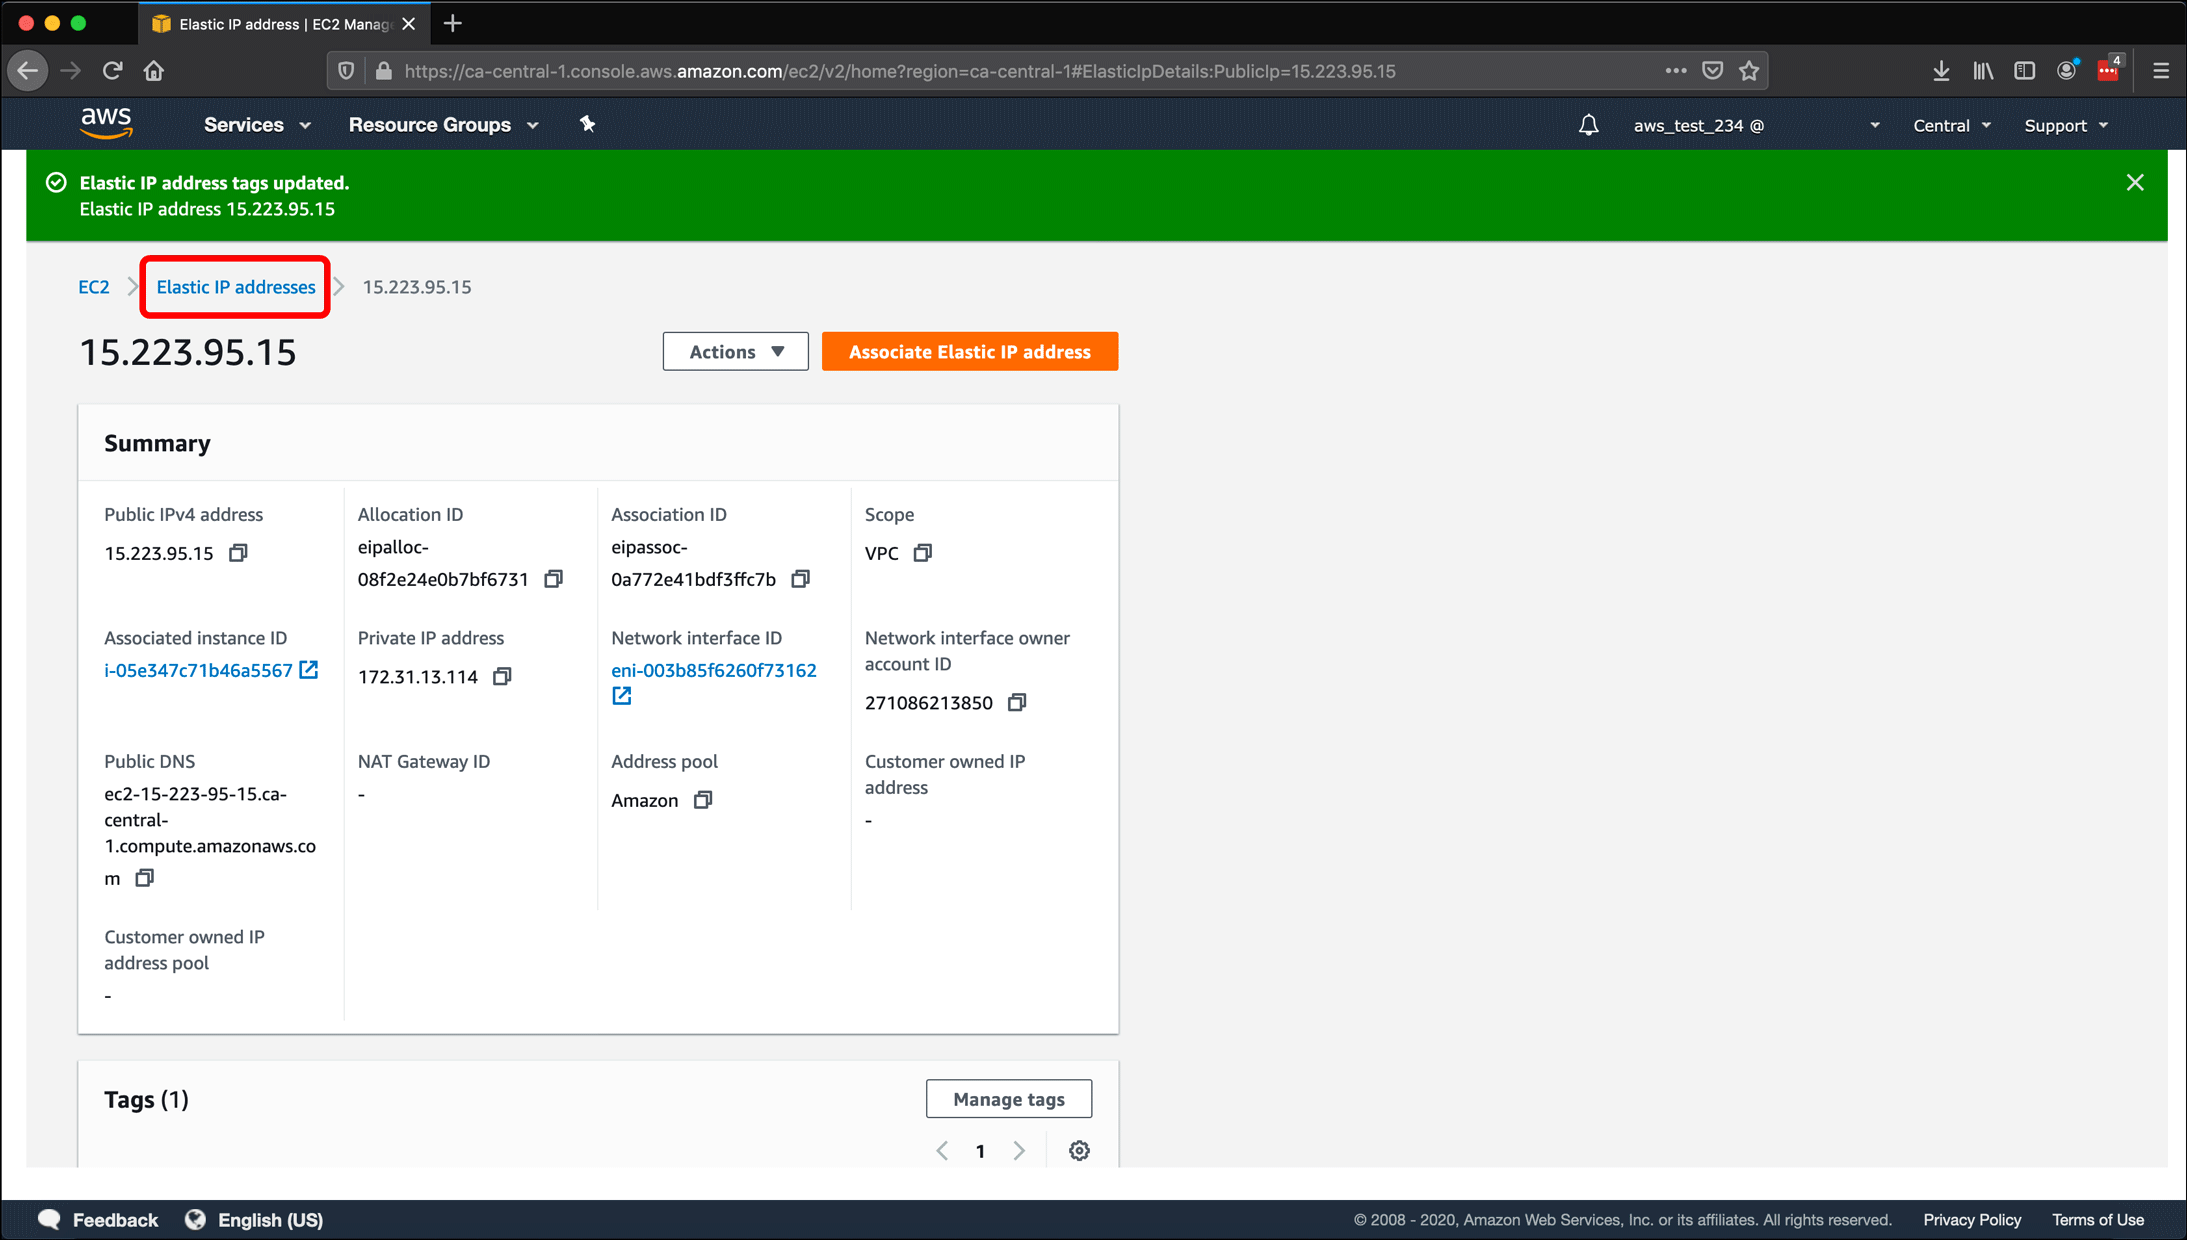
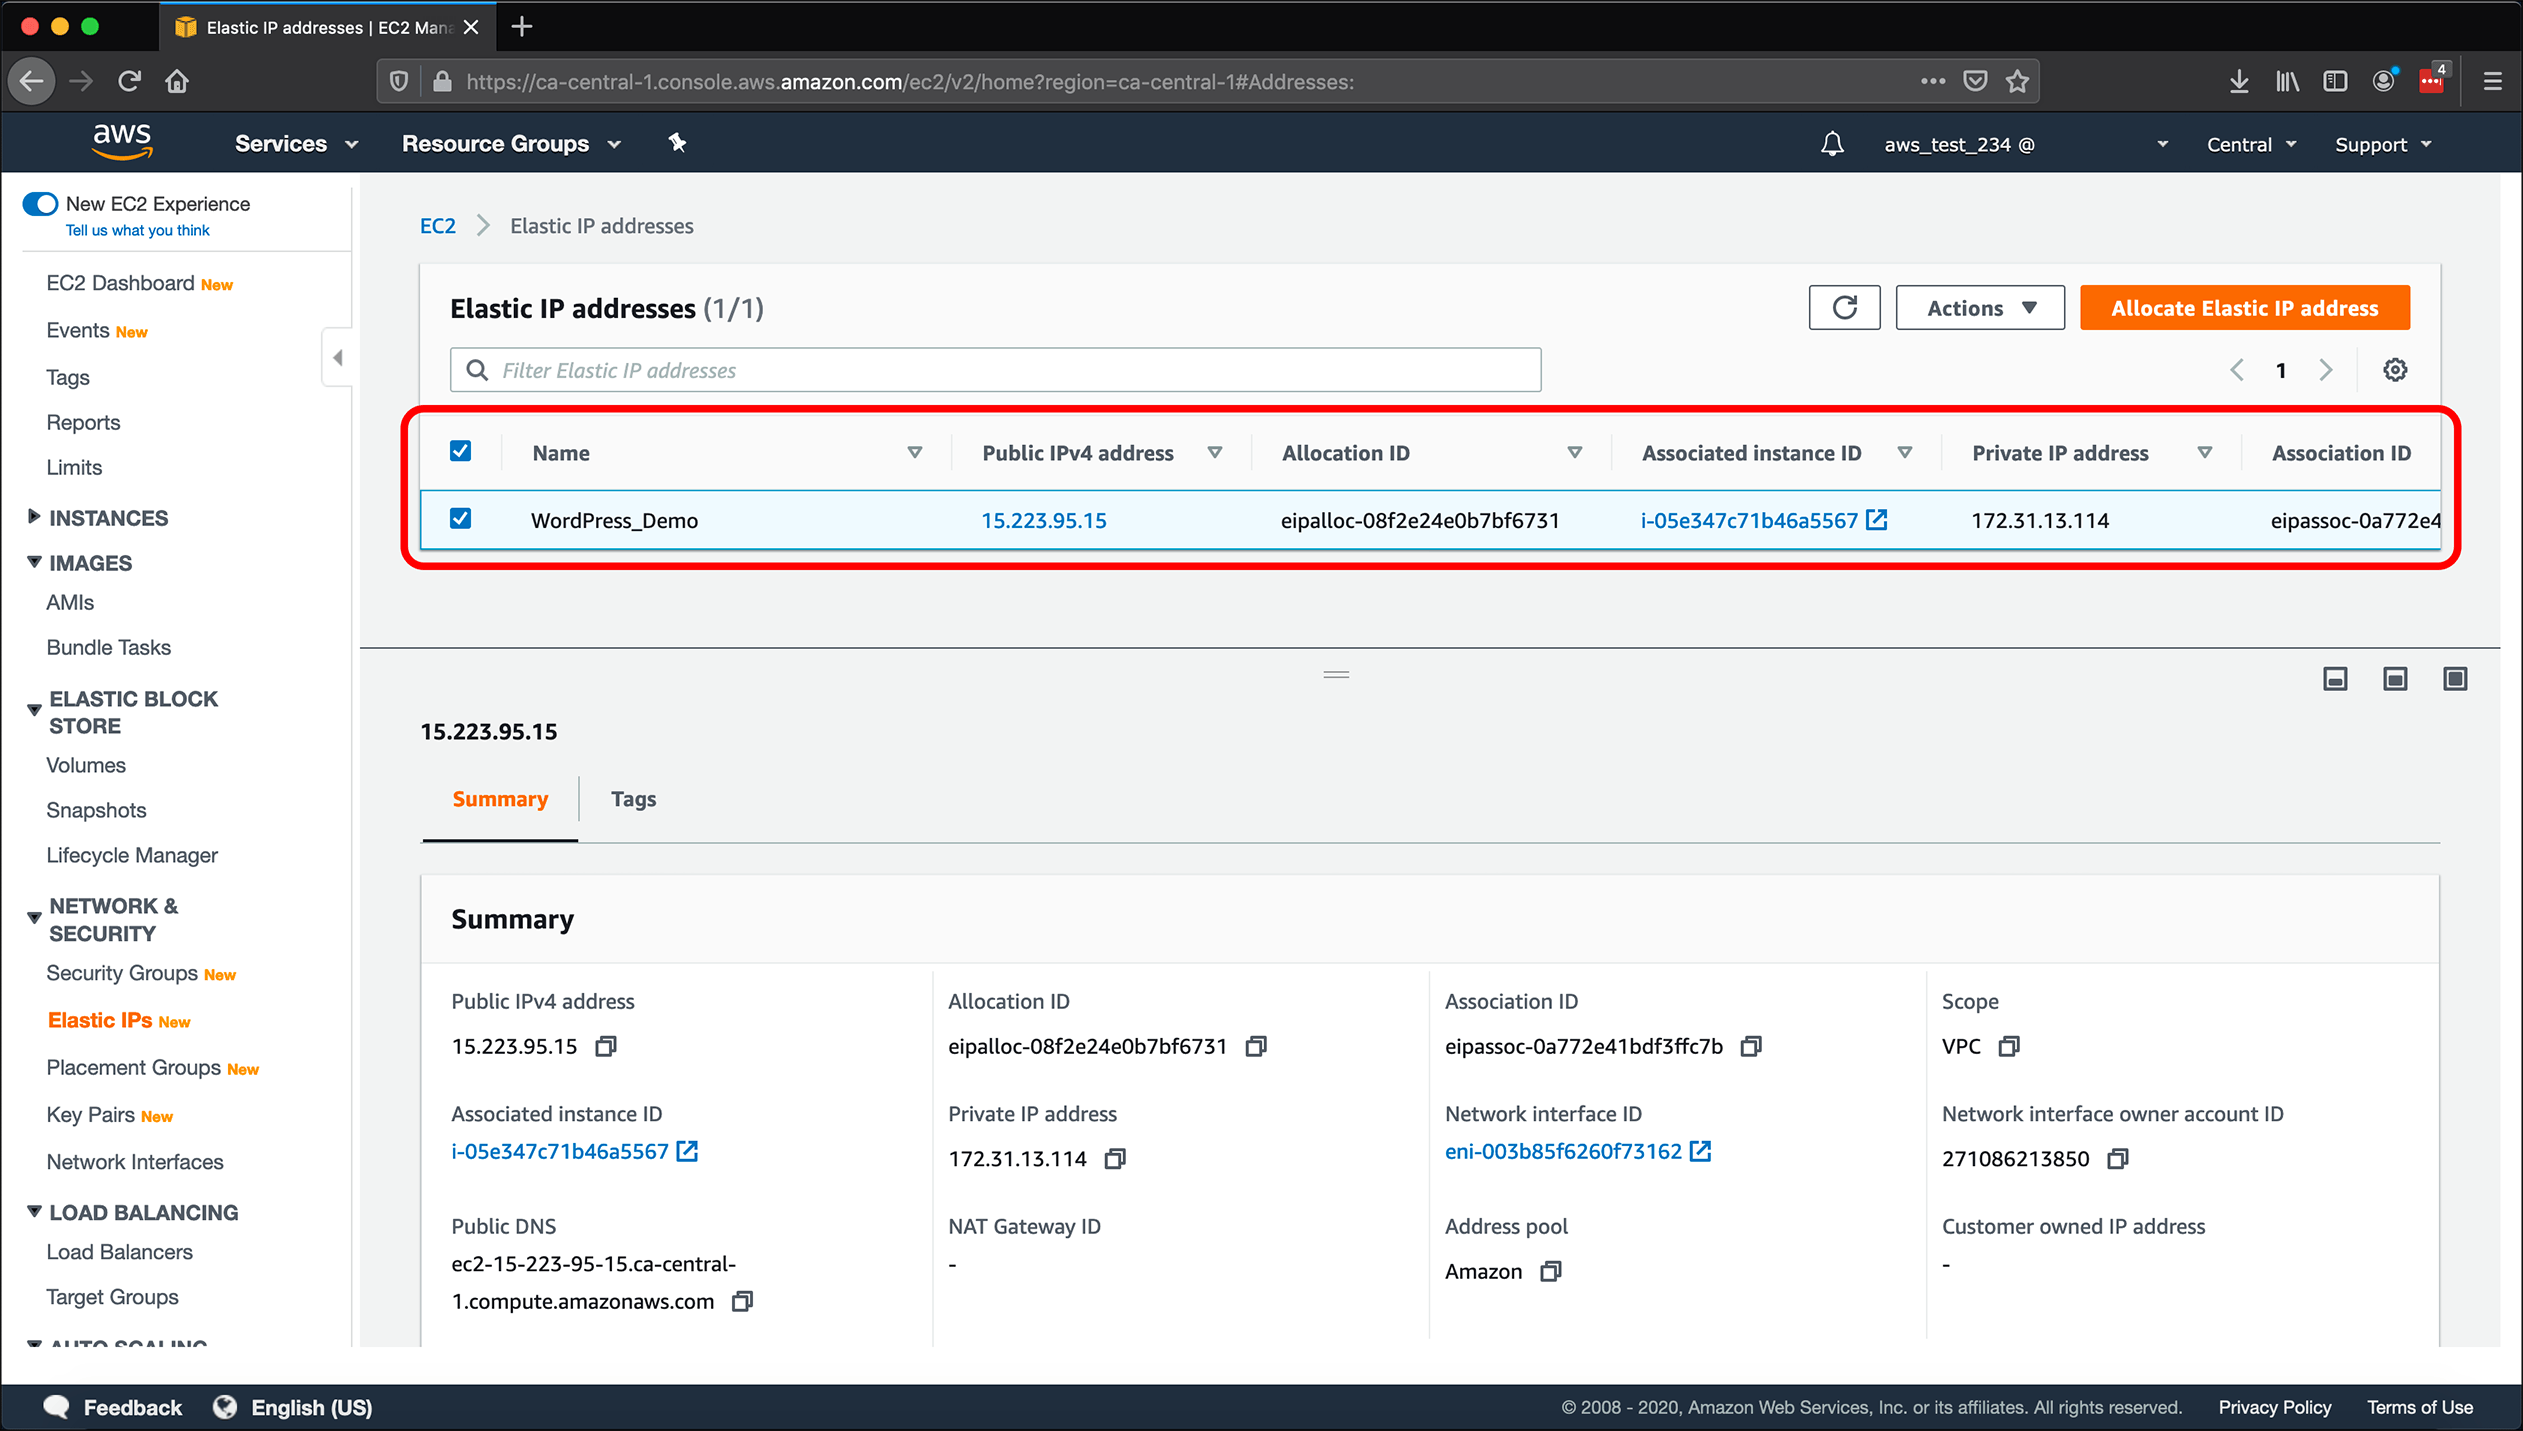
- You can now see the associated, named IP address in your list of Elastic IP addresses. As long as you have this Elastic IP address associated with an instance, that instance can be reached using the Elastic IP address.
Associate an Elastic IP with a Domain Name using Route 53
Once the EC2 instance is associated with an Elastic IP address, you can use that IP address to access the instance. You can also use that same Elastic IP address with AWS’s Route 53 service to associate the instance with a domain name.
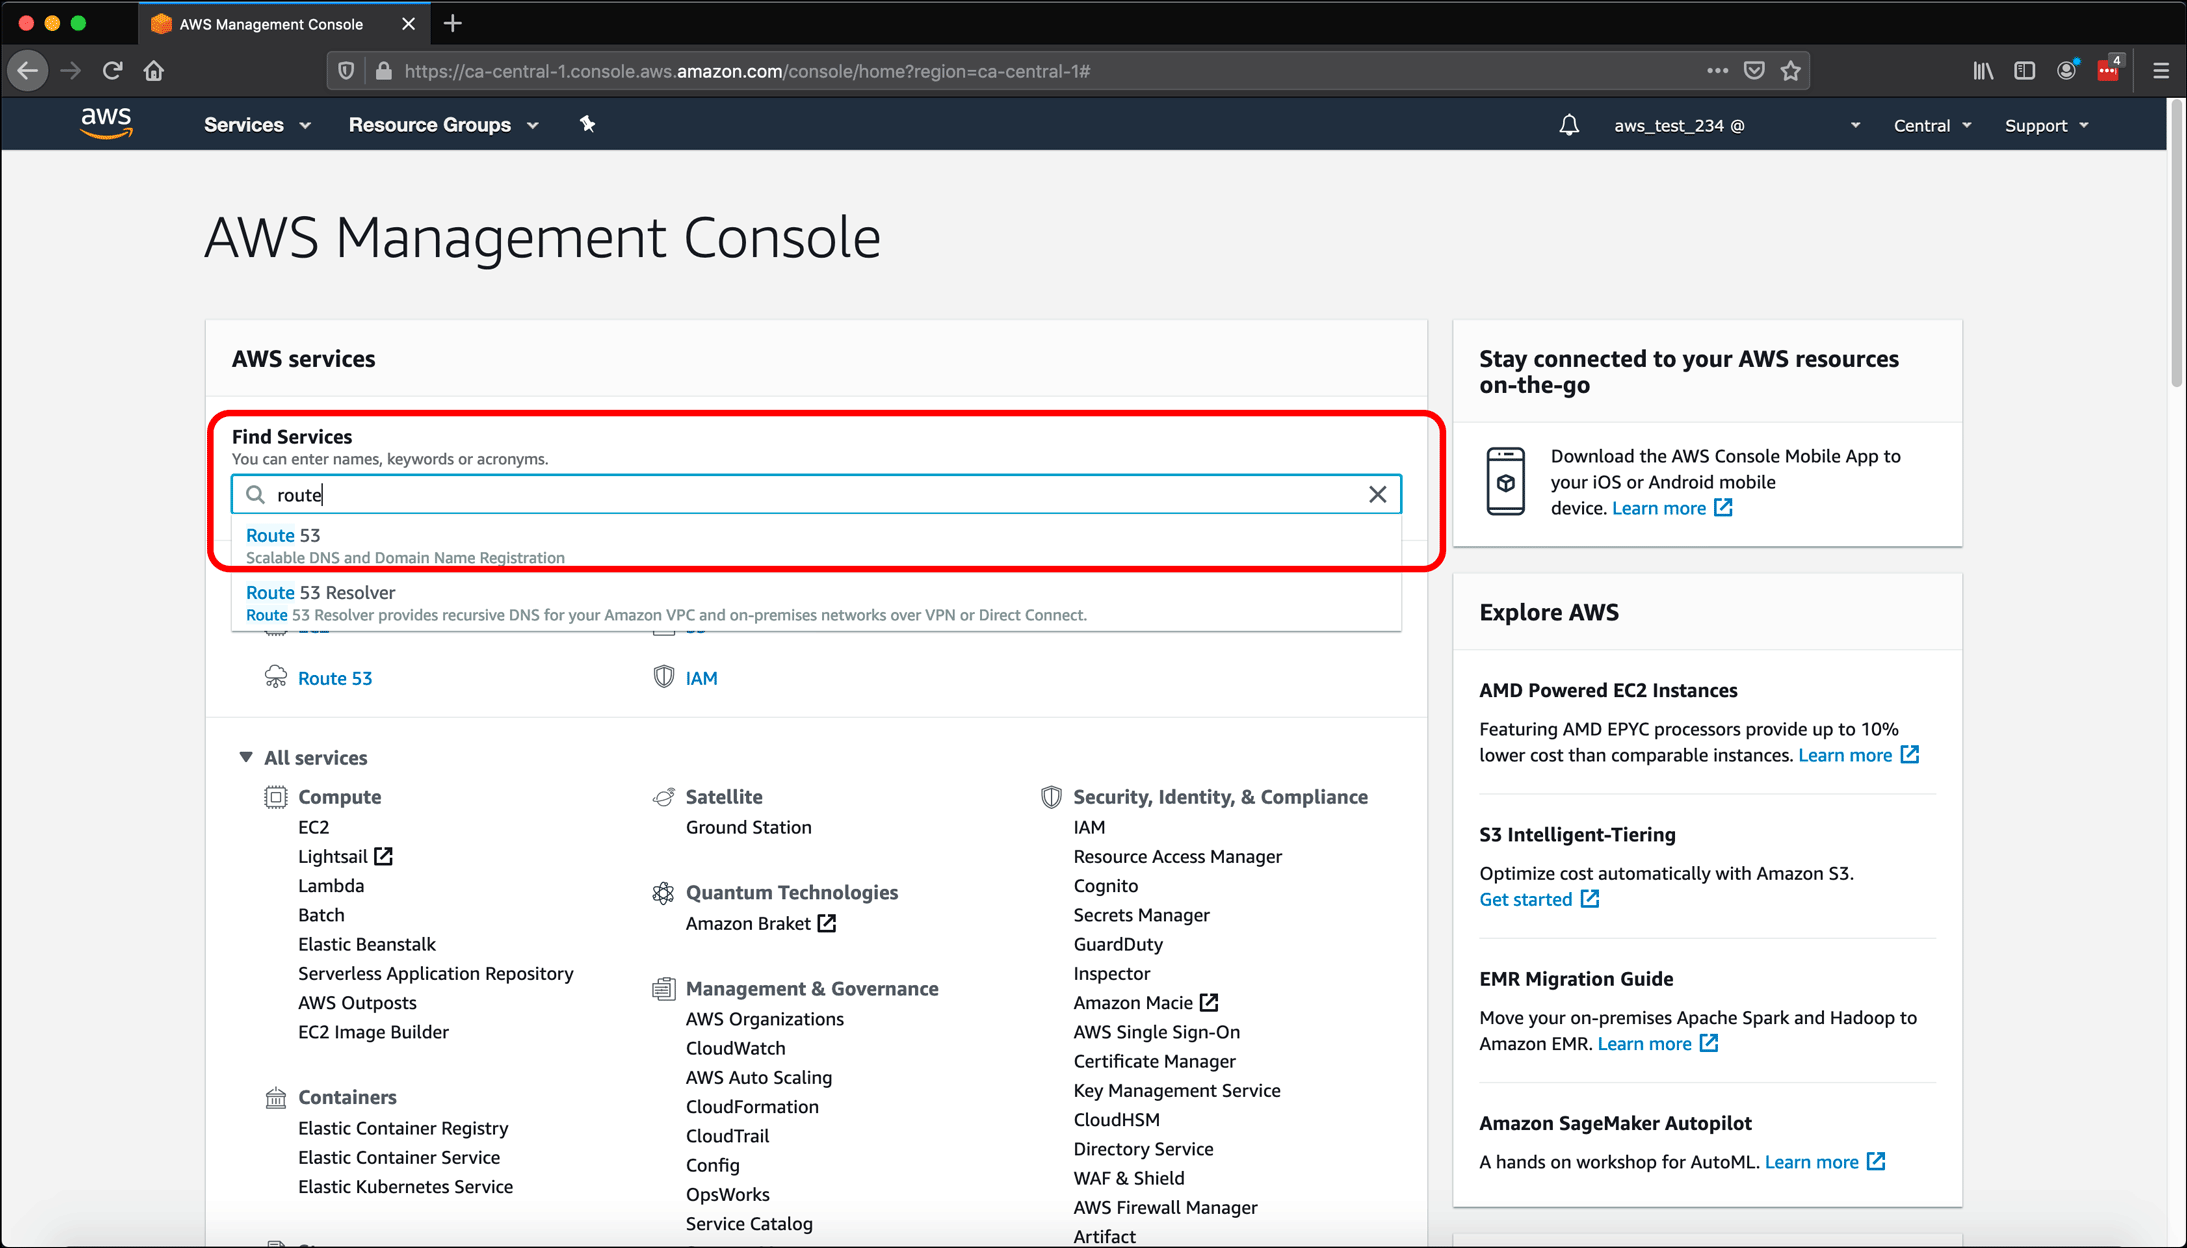
- From the AWS Management Console, type route 53 into the Find Services search box and click Route 53.
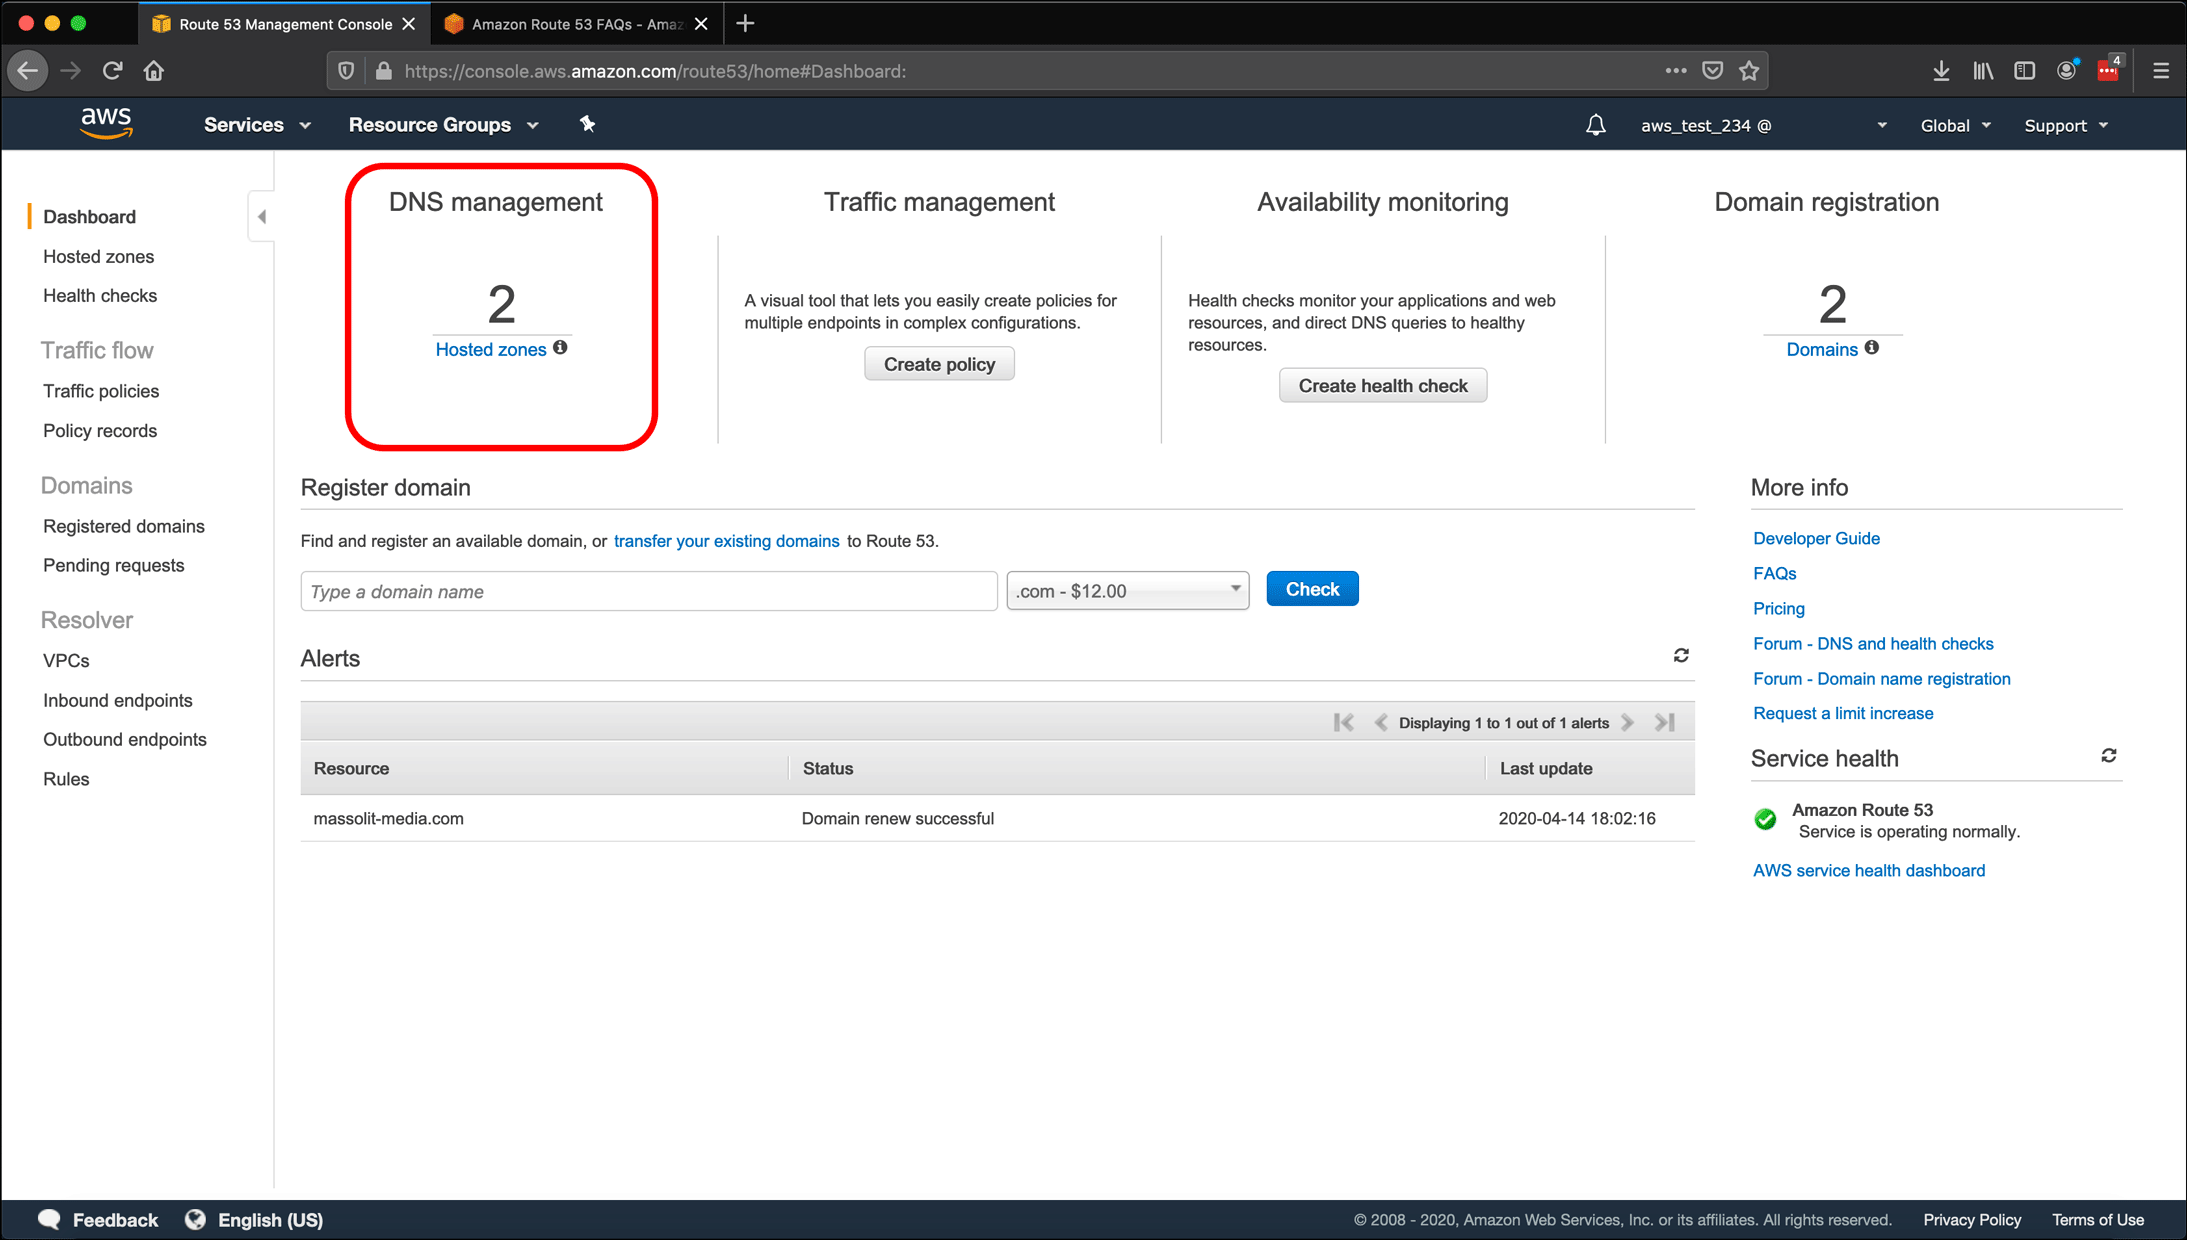
- Route 53 provides several services, but I am using it because it is AWS’s domain name management system. Since I want to associate my EC2 instance with a domain name, click the Hosted zones link under DNS management.
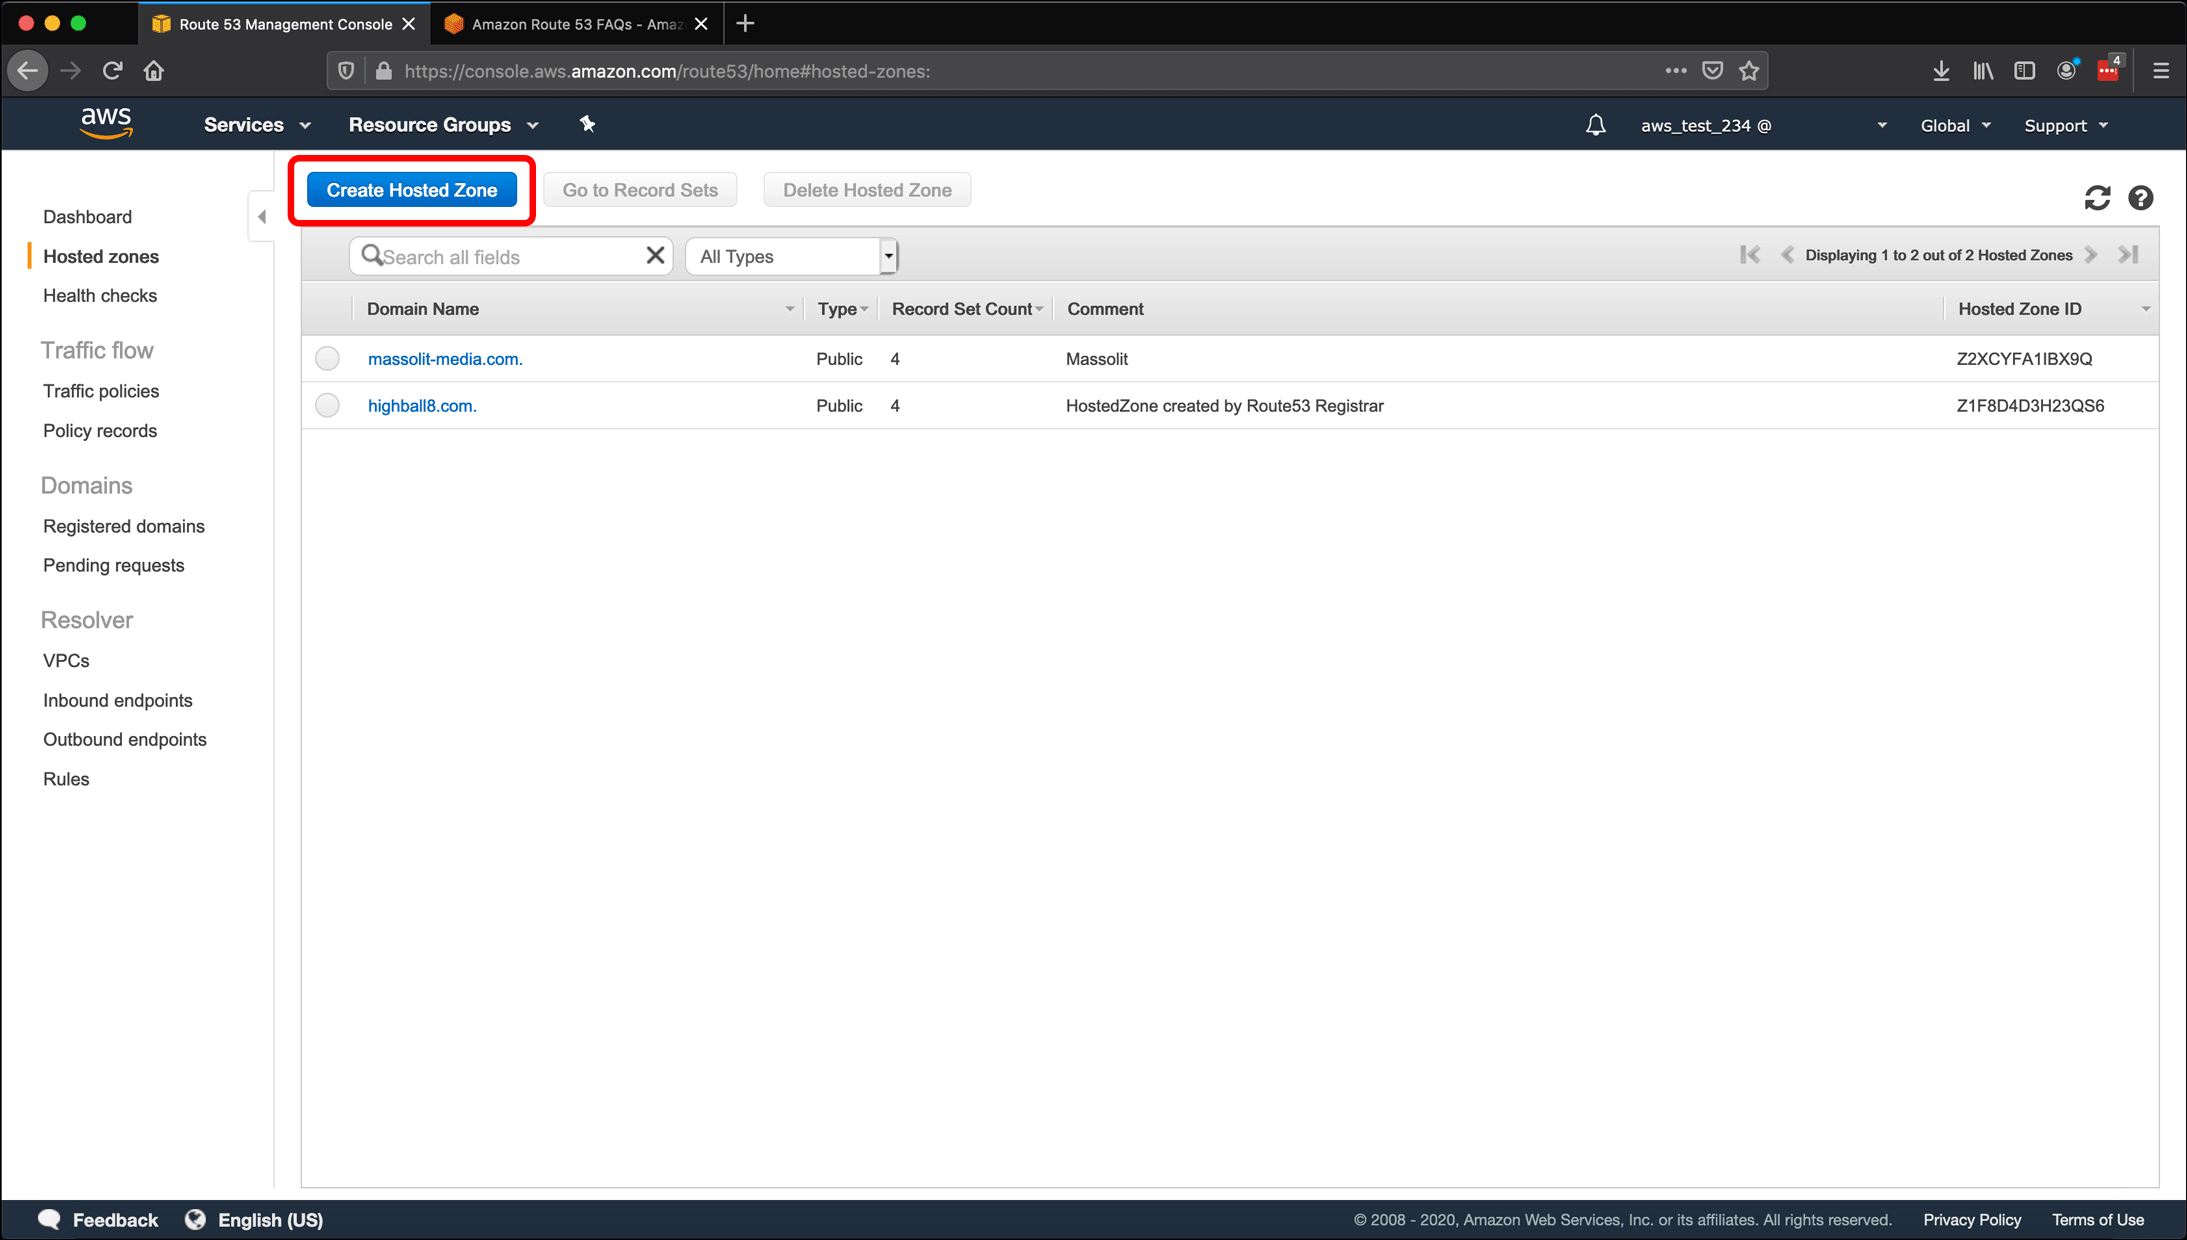
- In this screenshot, there are two hosted zones for the two websites I host with this account, including massolit-media.com. But to demonstrate, I can create a new hosted zone and repeat the process. Click Create Hosted Zone.
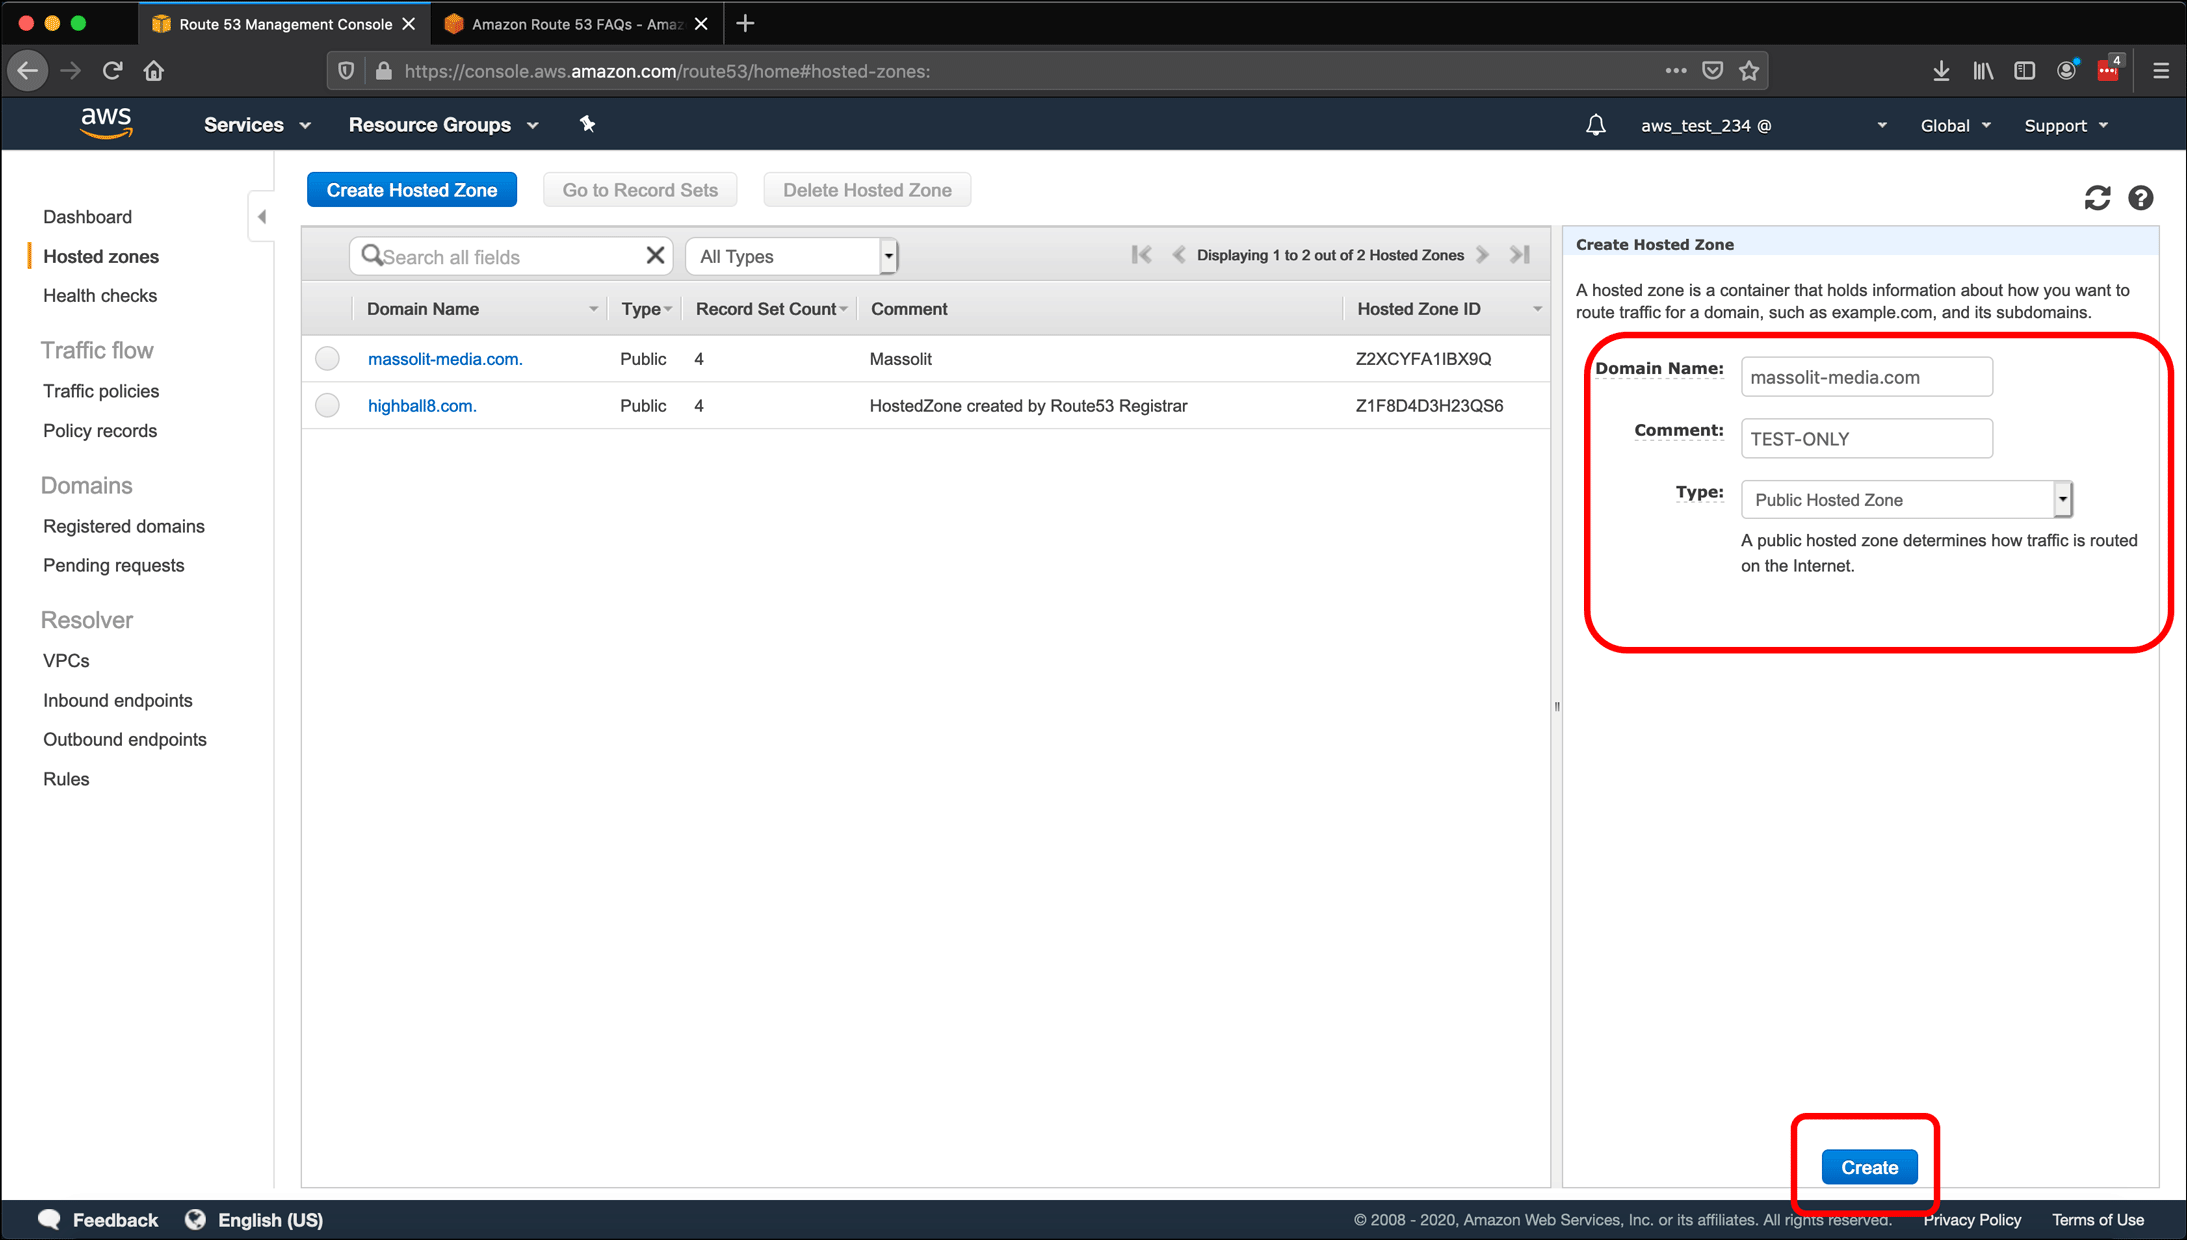
- The Create Hosted Zone pane appears on the right side of the screen. I enter massolit-media.com as the Domain Name (the name of the new hosted zone), and add a Comment, TEST-ONLY. I leave the Type as the default Public Hosted Zone.
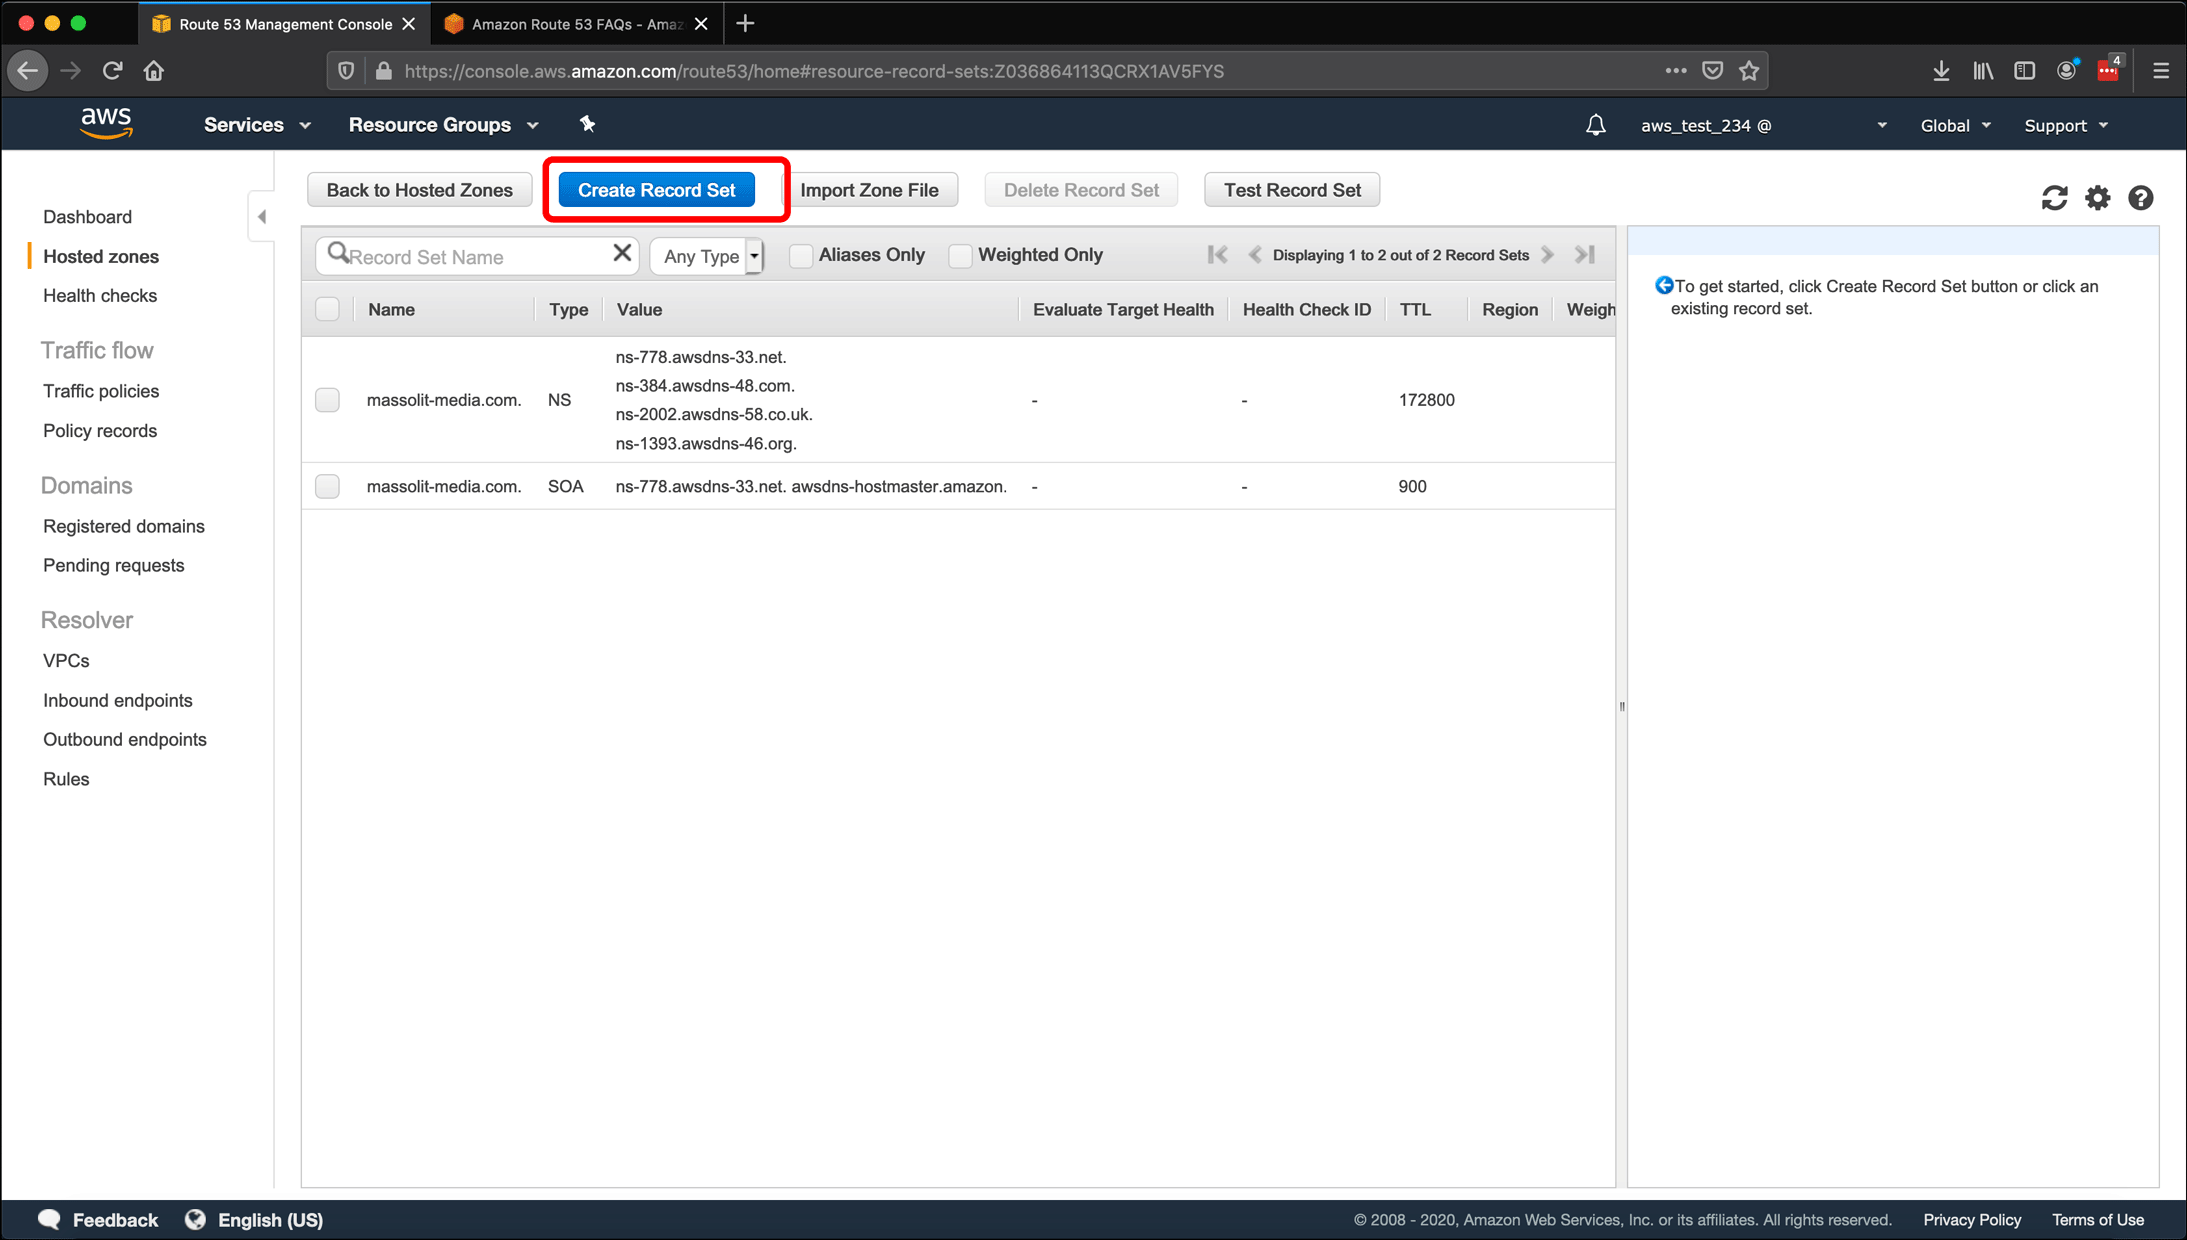
- Route 53 automatically populates the hosted zone with four name servers, which appear in this screenshot on the first row with Type: NS (a DNS record type of NS, or name server). The second row contains another DNS record, SOA, or Start of Authority, which provides administrative information about the domain name to the DNS system. Click Create Record Set.
- In the Create Record Set pane, you will see a Name: field, which has a text box followed by your domain name followed by a period, or the “trailing dot.” In this screenshot, the text box is followed by massolit-media.com., where the . you see after .com represents the end of the fully qualified domain name – just like the period at the end of a sentence. There is also a Type: field for the DNS record type. It defaults to A – IPv4 address; if this is not the value, use the drop-down to select that type.
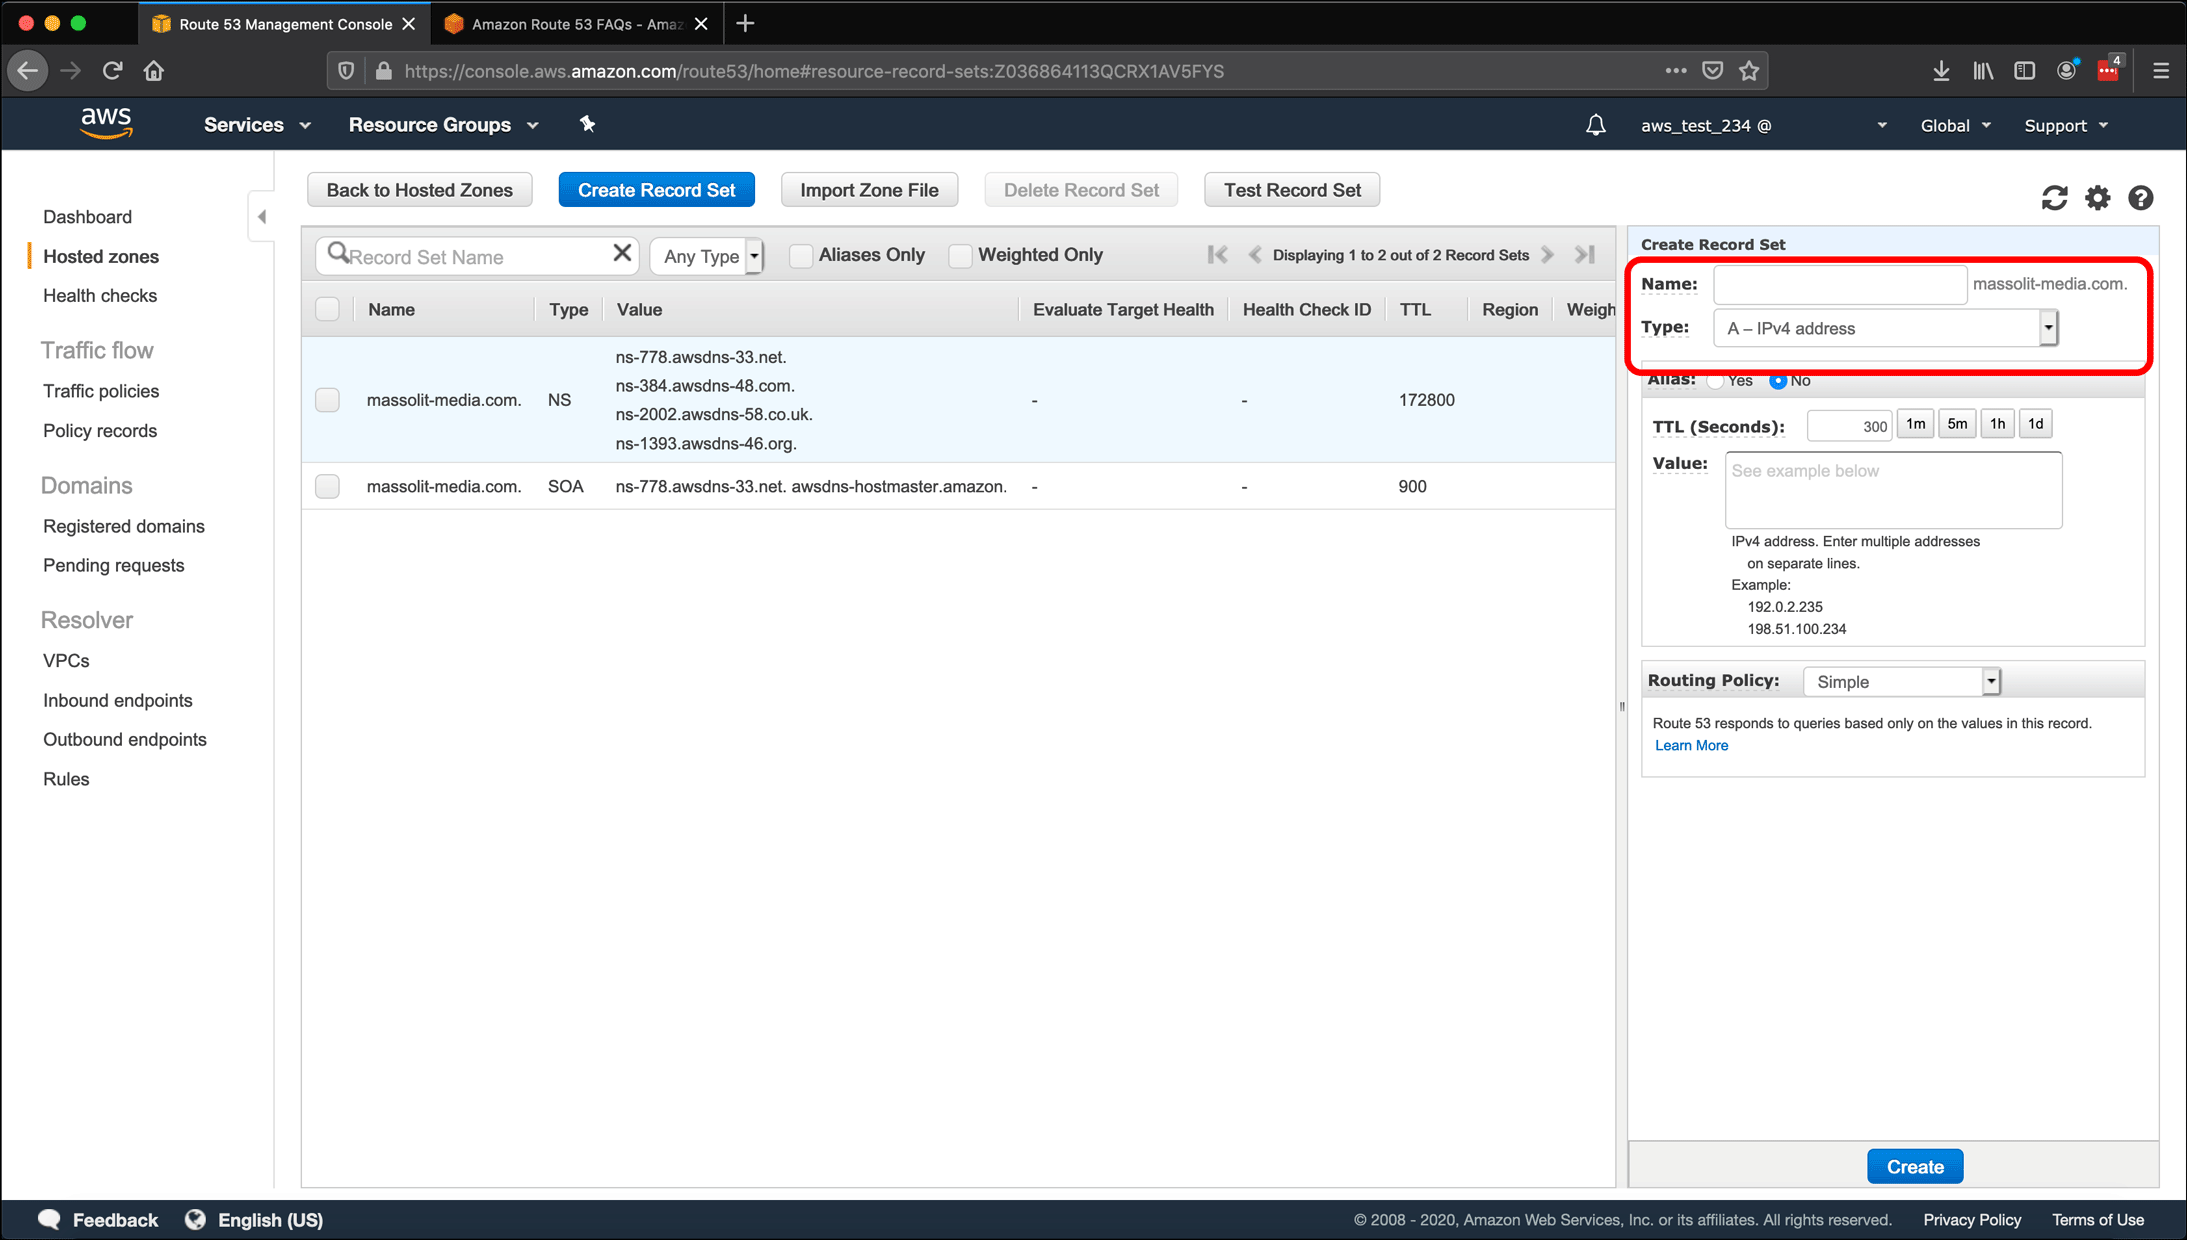
- Enter the Elastic IP address into the Value: field. This is where we tie our EC2 instance and the Elastic IP address we associated with it to our domain name. Click Create.

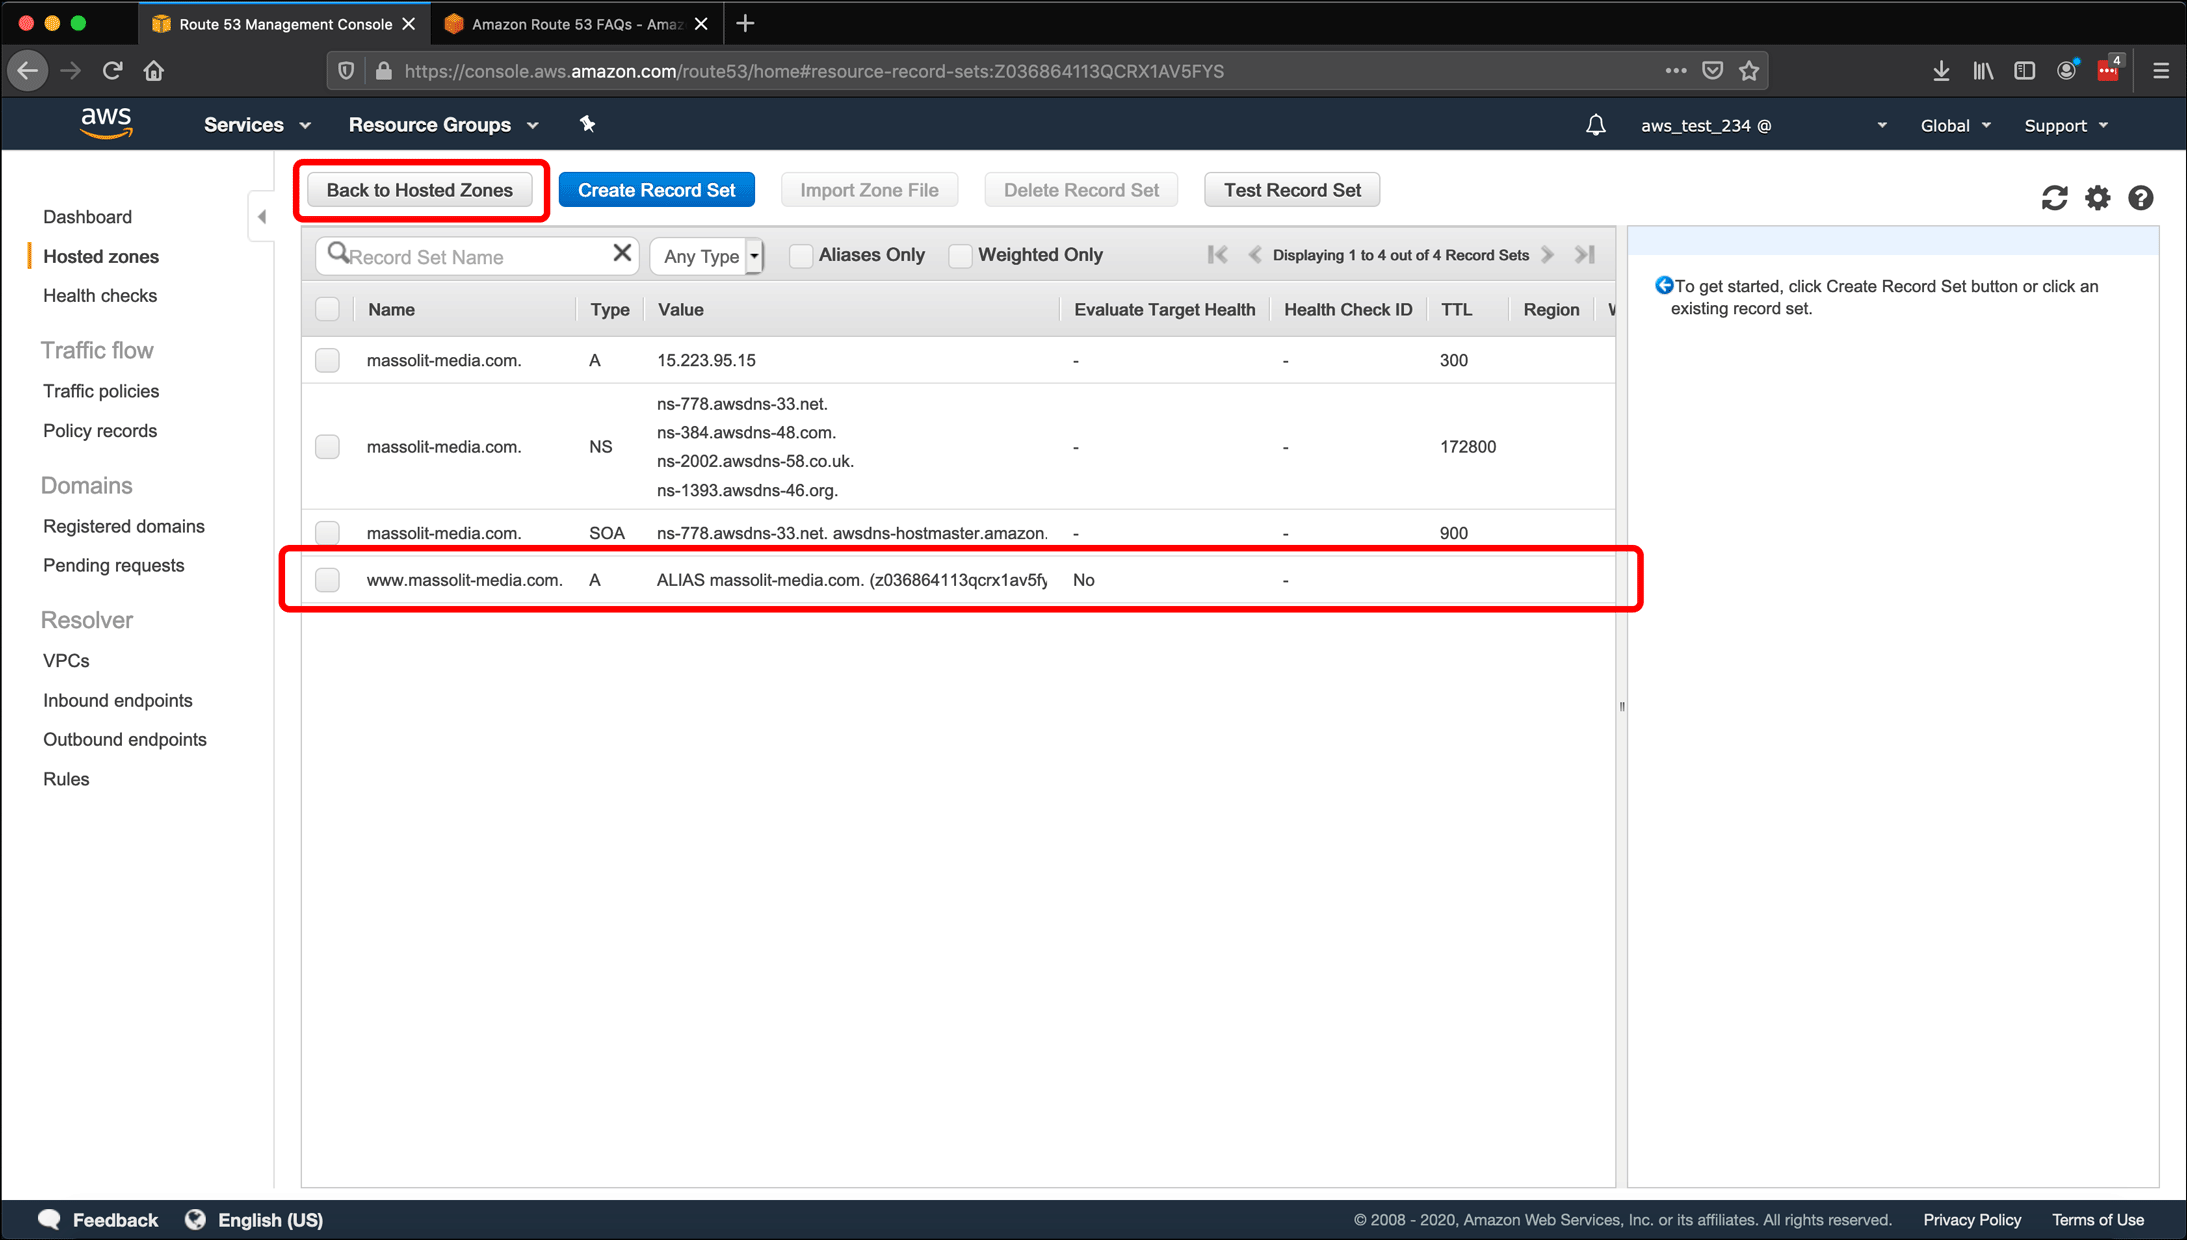
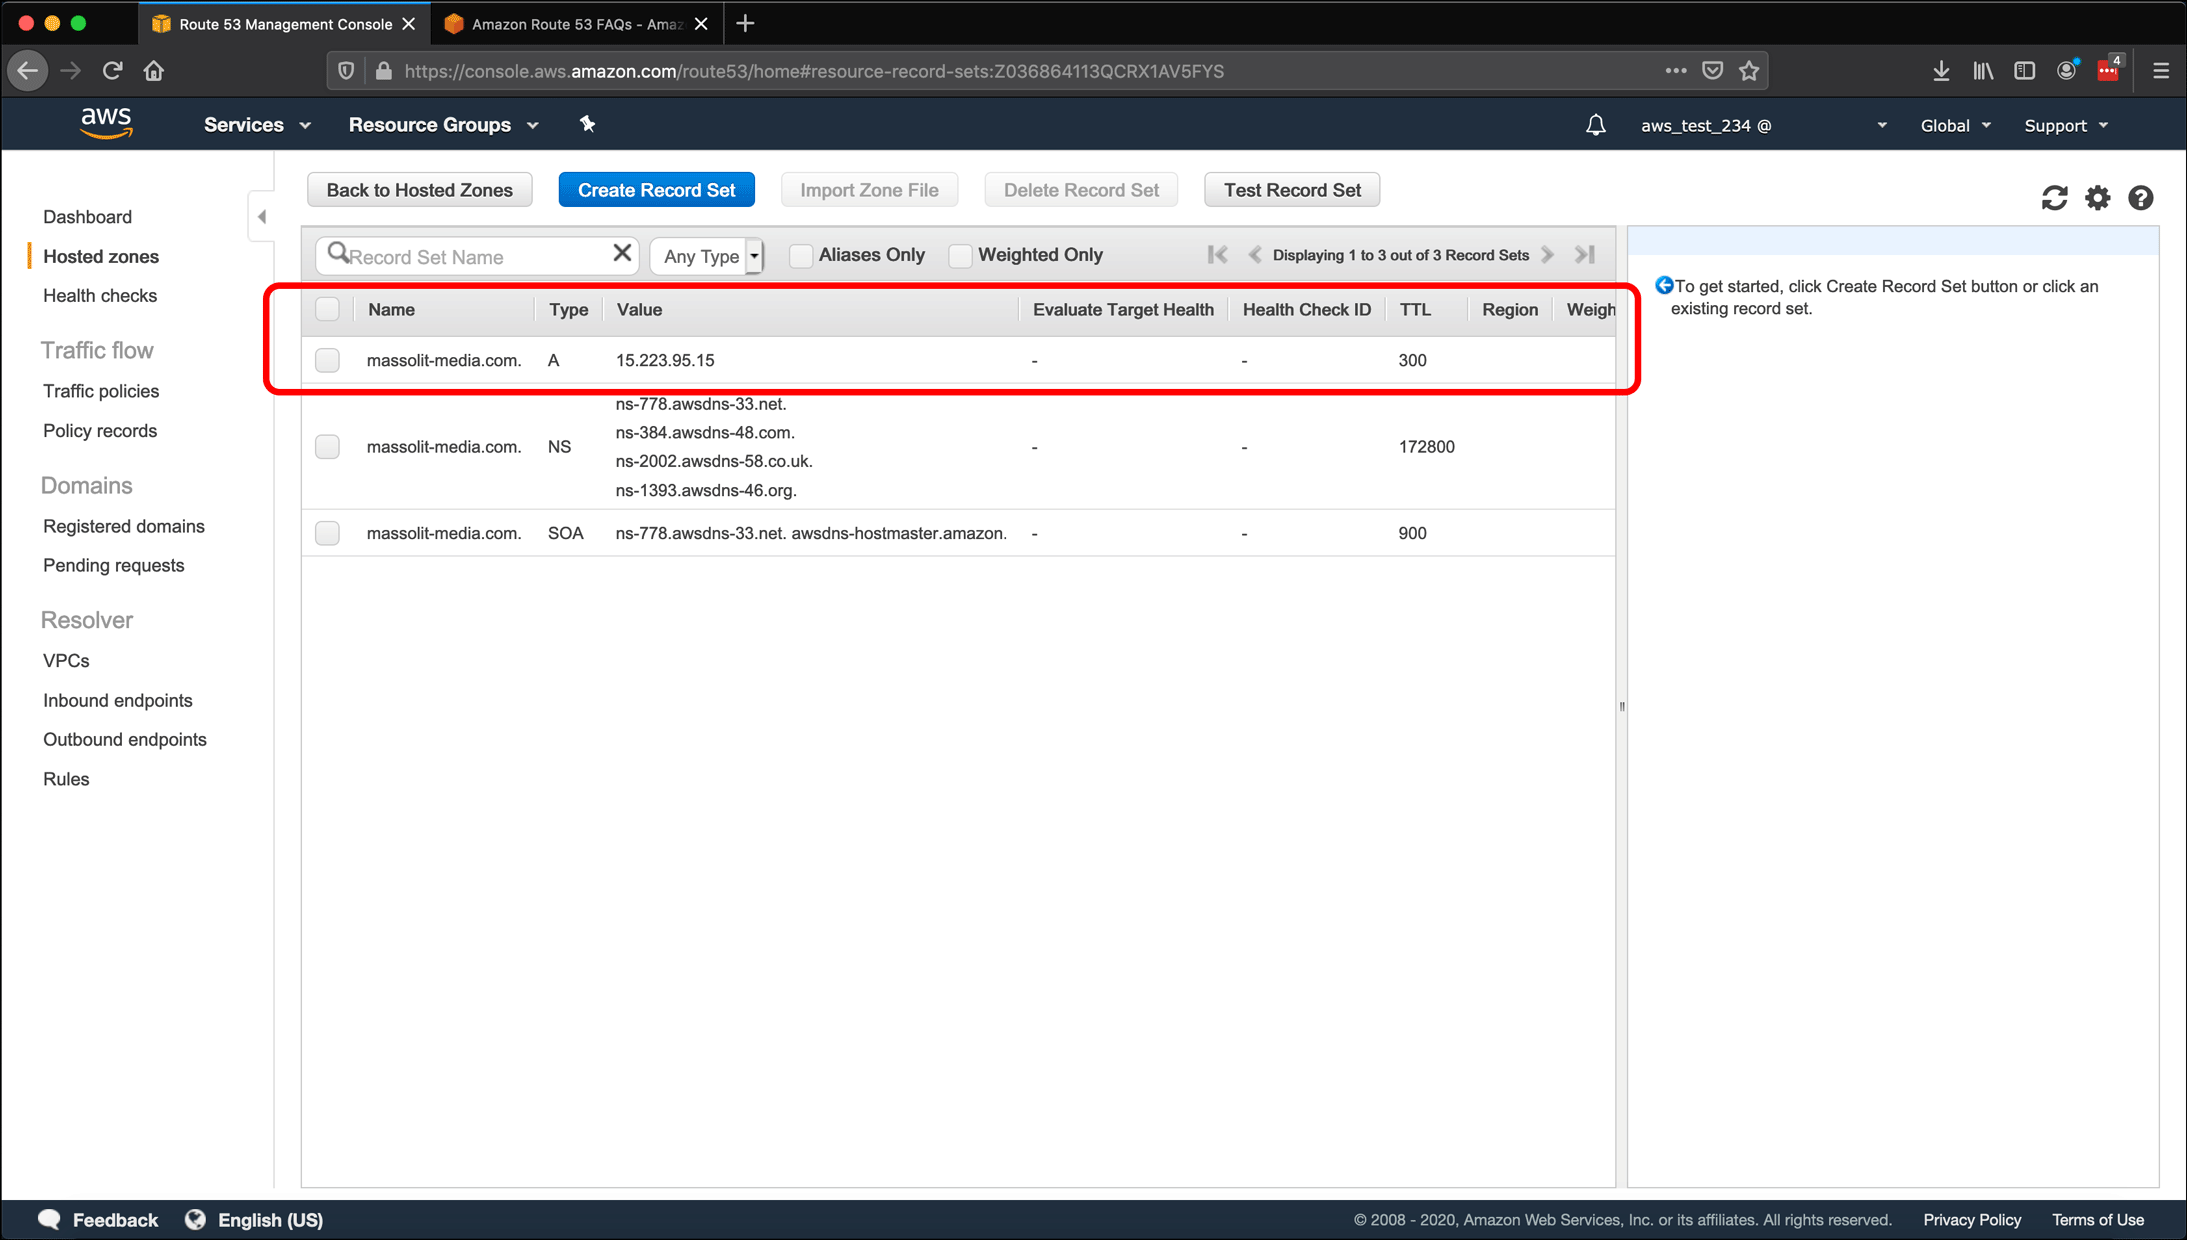
- Back on the Hosted zones dashboard you can see your new record set for your domain name. It’s an A record and the Elastic IP address appears in its Value field, meaning the DNS system will point massolit-media.com. to 15.223.95.15, which is the public IP address for your EC2 instance and for your WordPress site you are hosting on it.
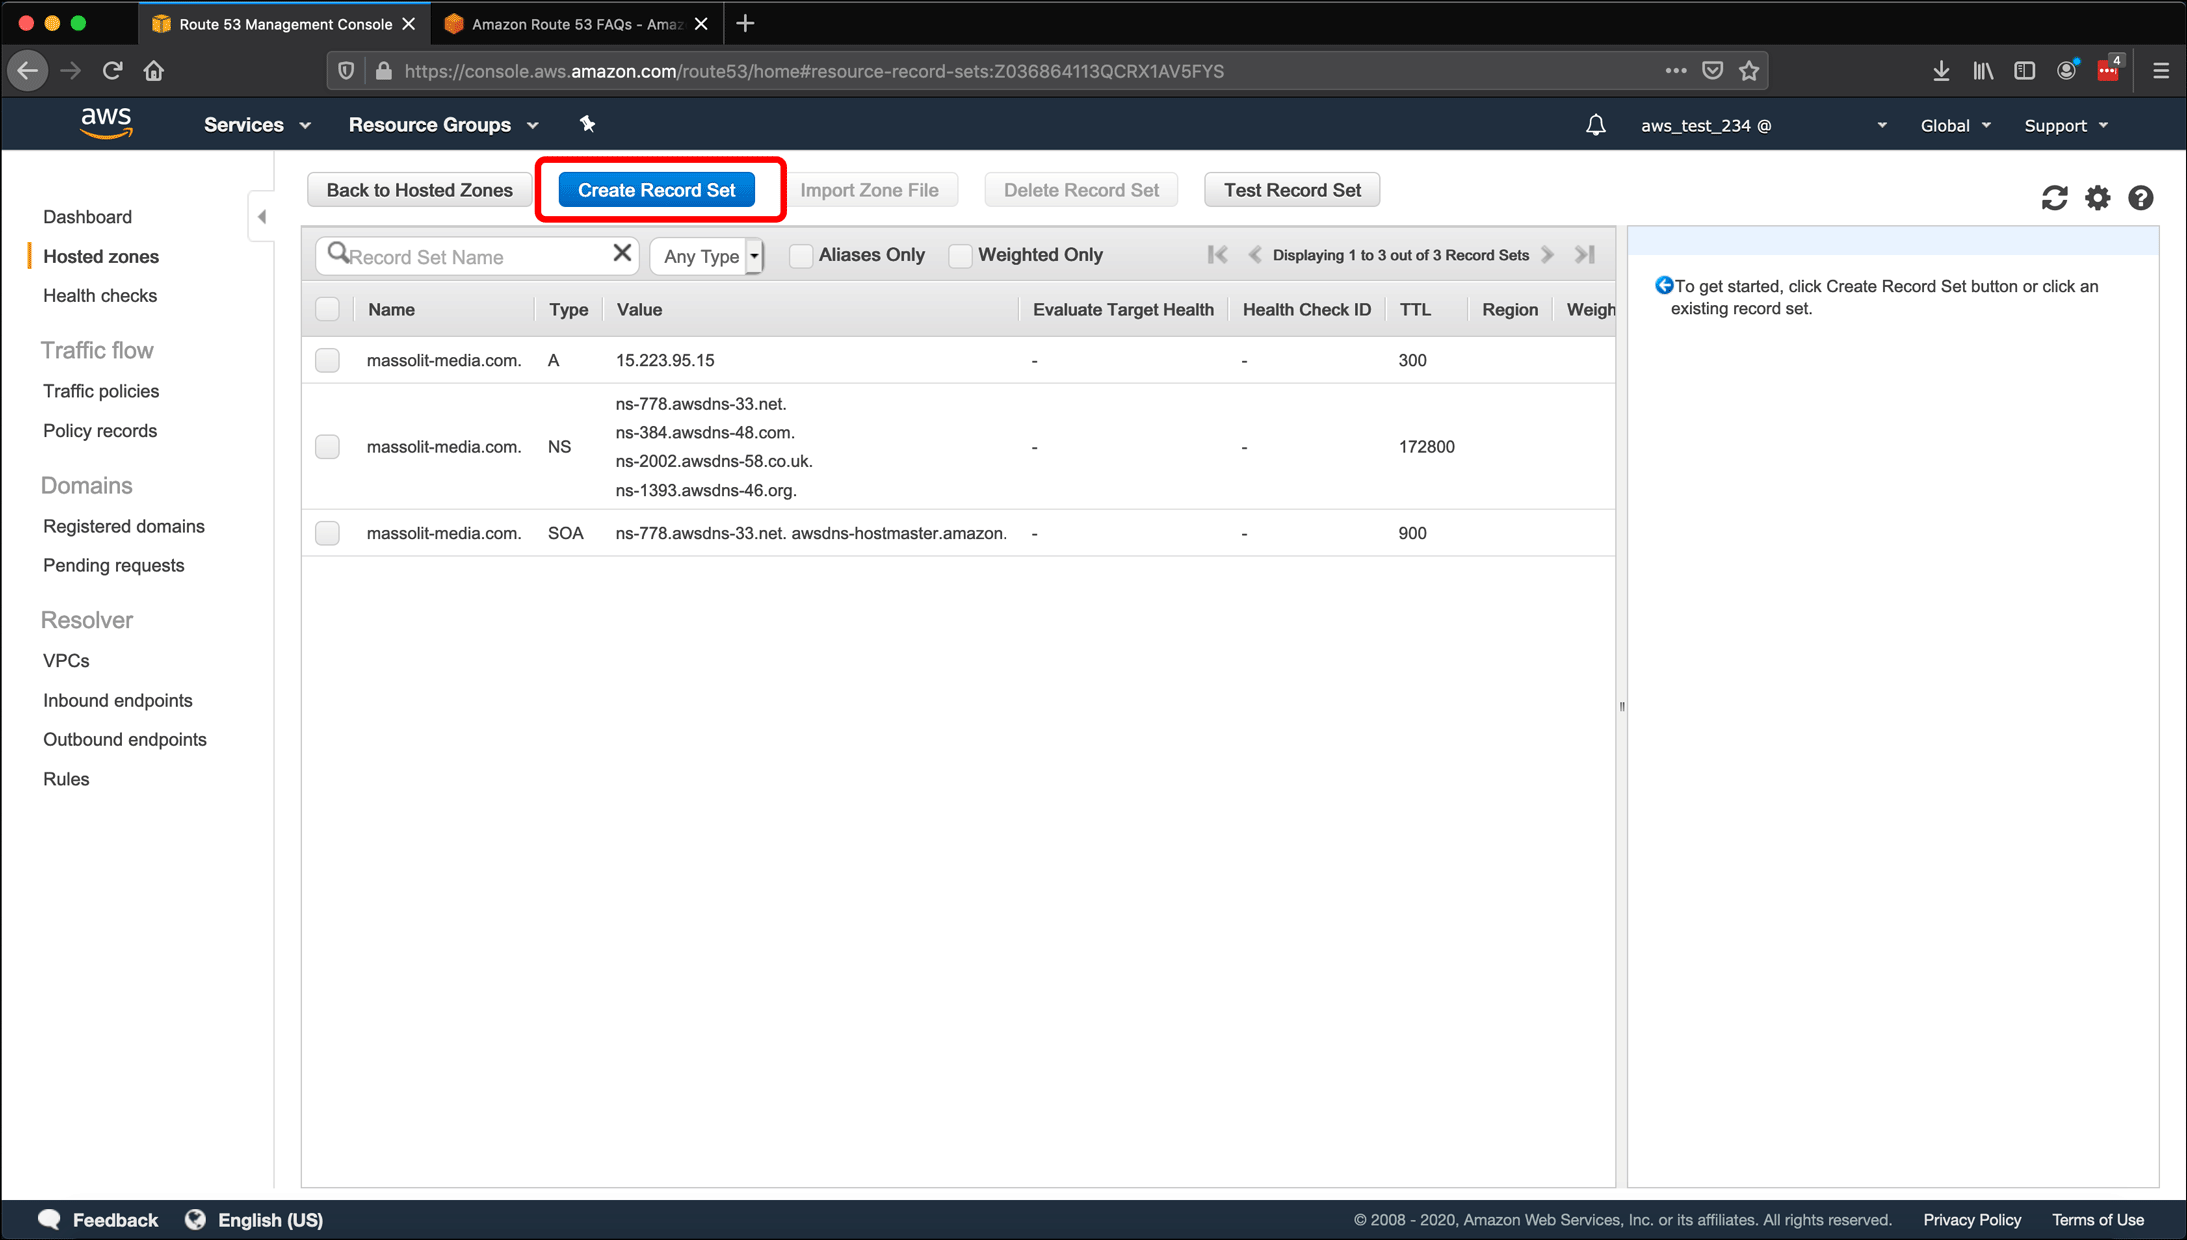
- I’m not sure how critical it is, but I also want to make sure my domain name can be reached in the event that somebody types www. before the domain name. Click Create Record Set.
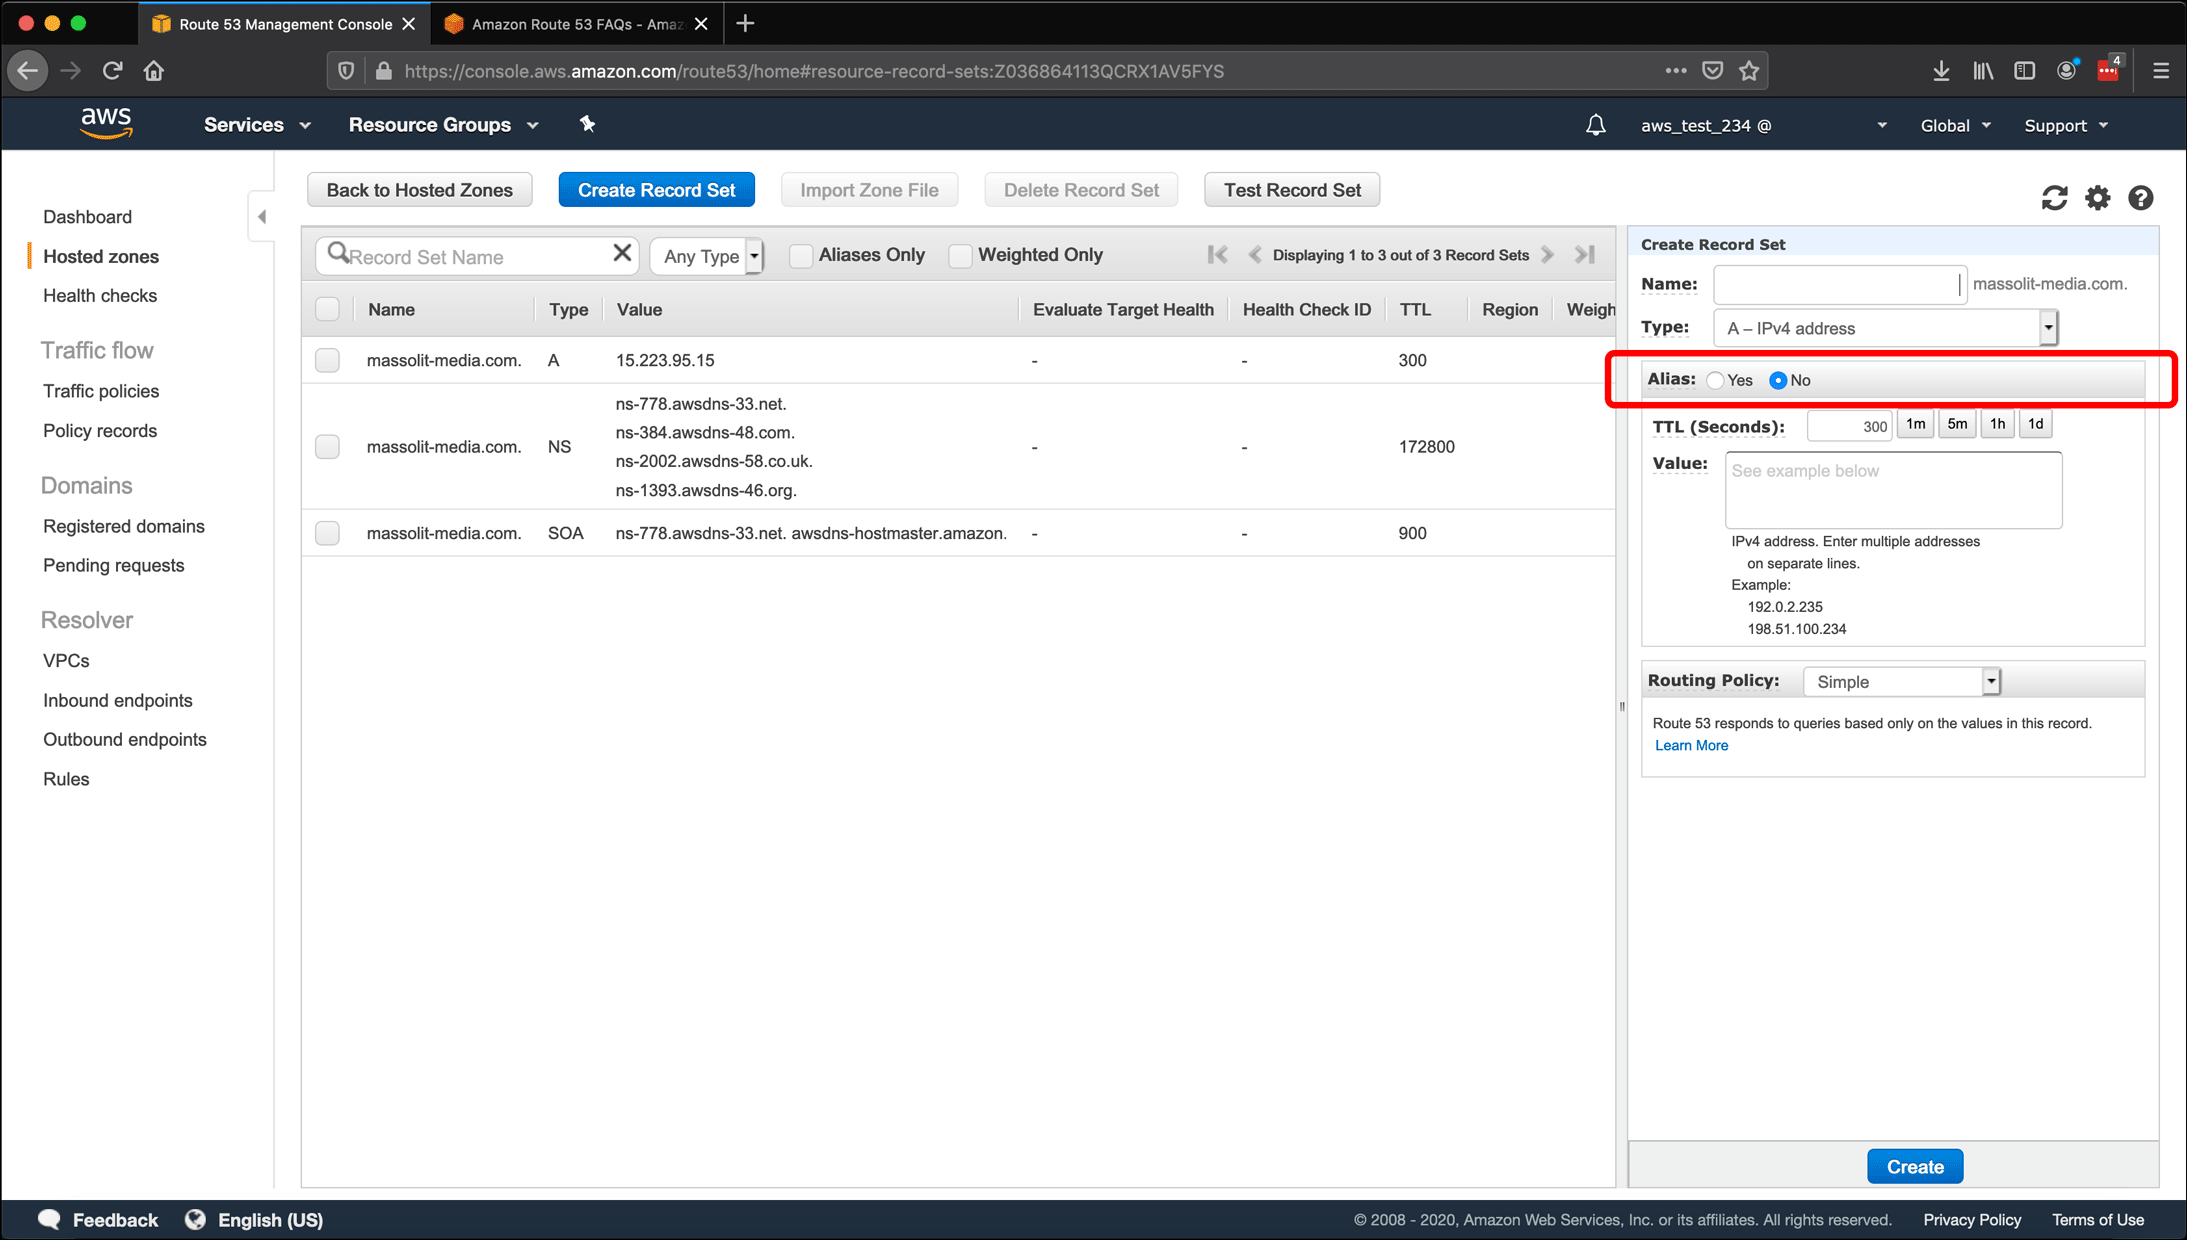
- The Create Record Set pane opens on the right side of the screen. The radio button for Alias: defaults to No. Click Yes.
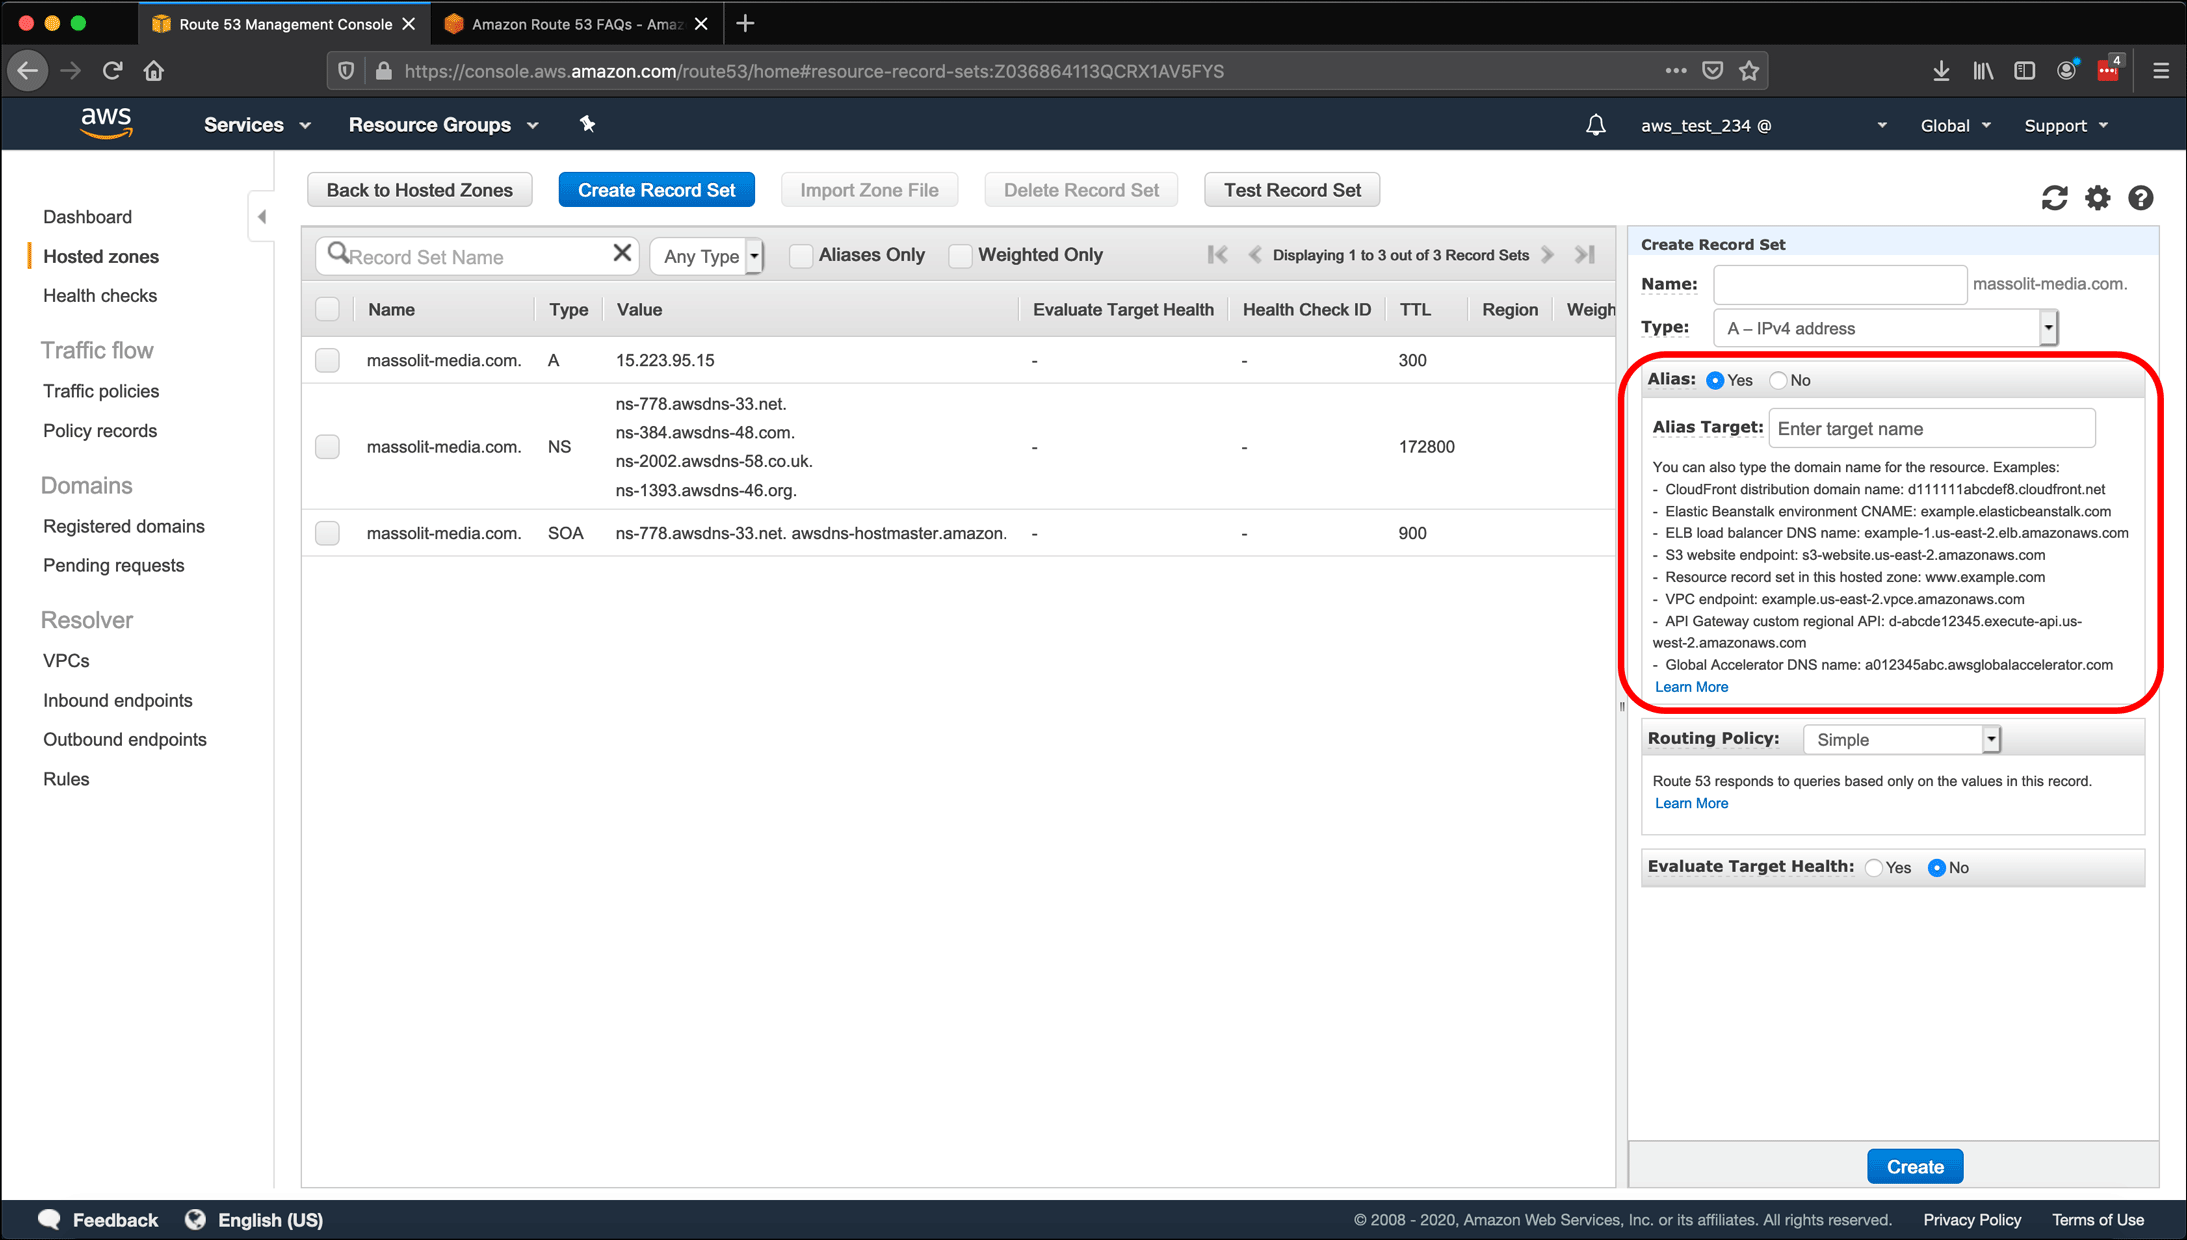
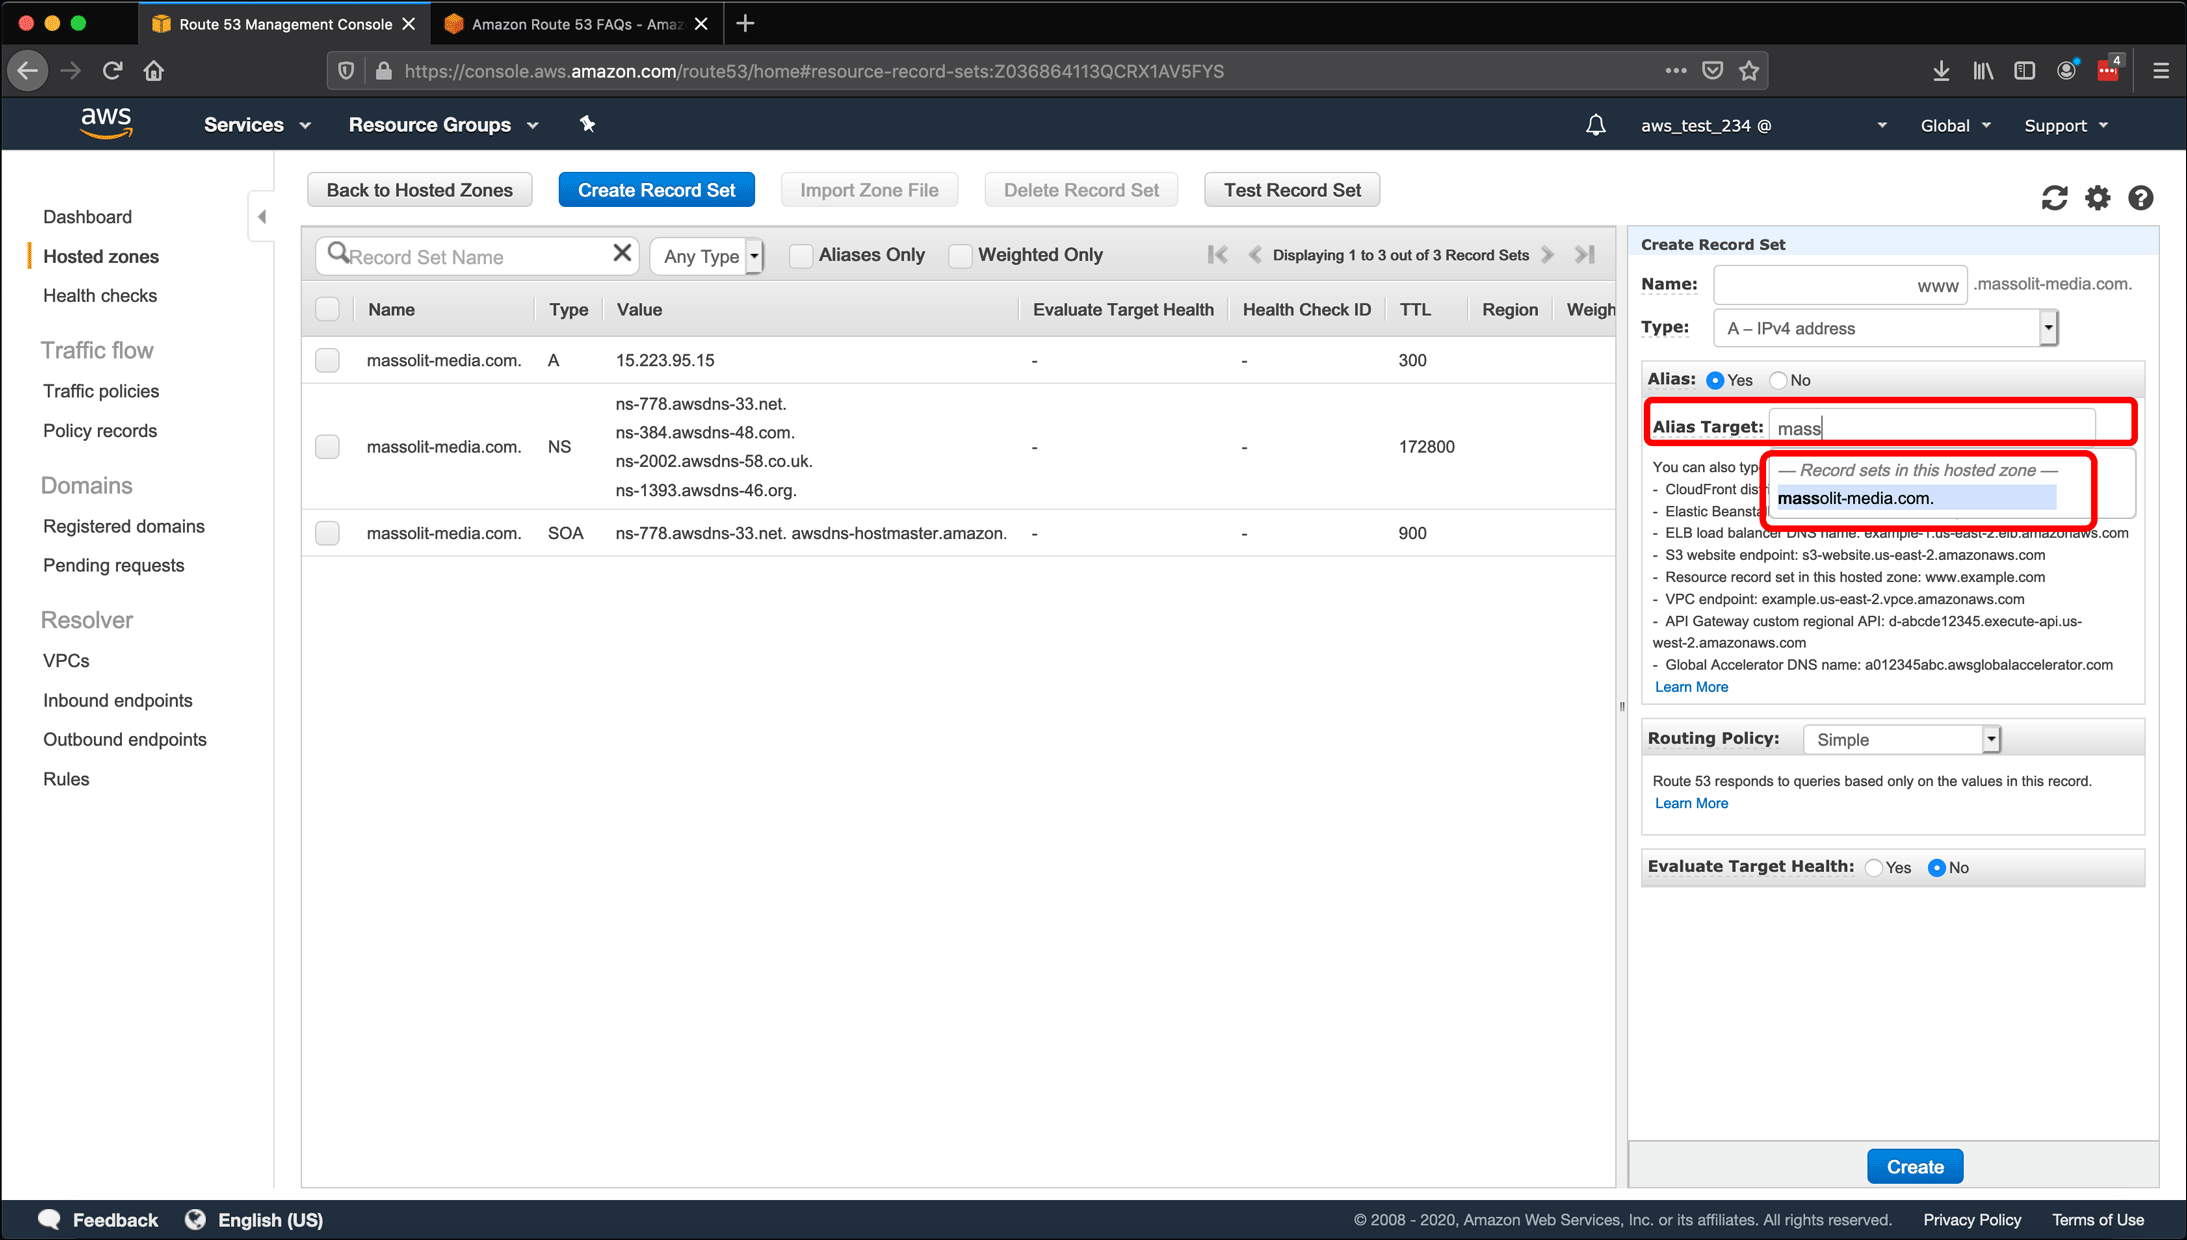
- The Alias: section expands to include an Alias Target: text field and lists the AWS resources that can be selected.
- Click in the text field and start typing the Name of the record set for your A record. Route 53 should suggest the domain name under Record sets in this hosted zone. Click the suggested search result, which in this case is massolit-media.com..
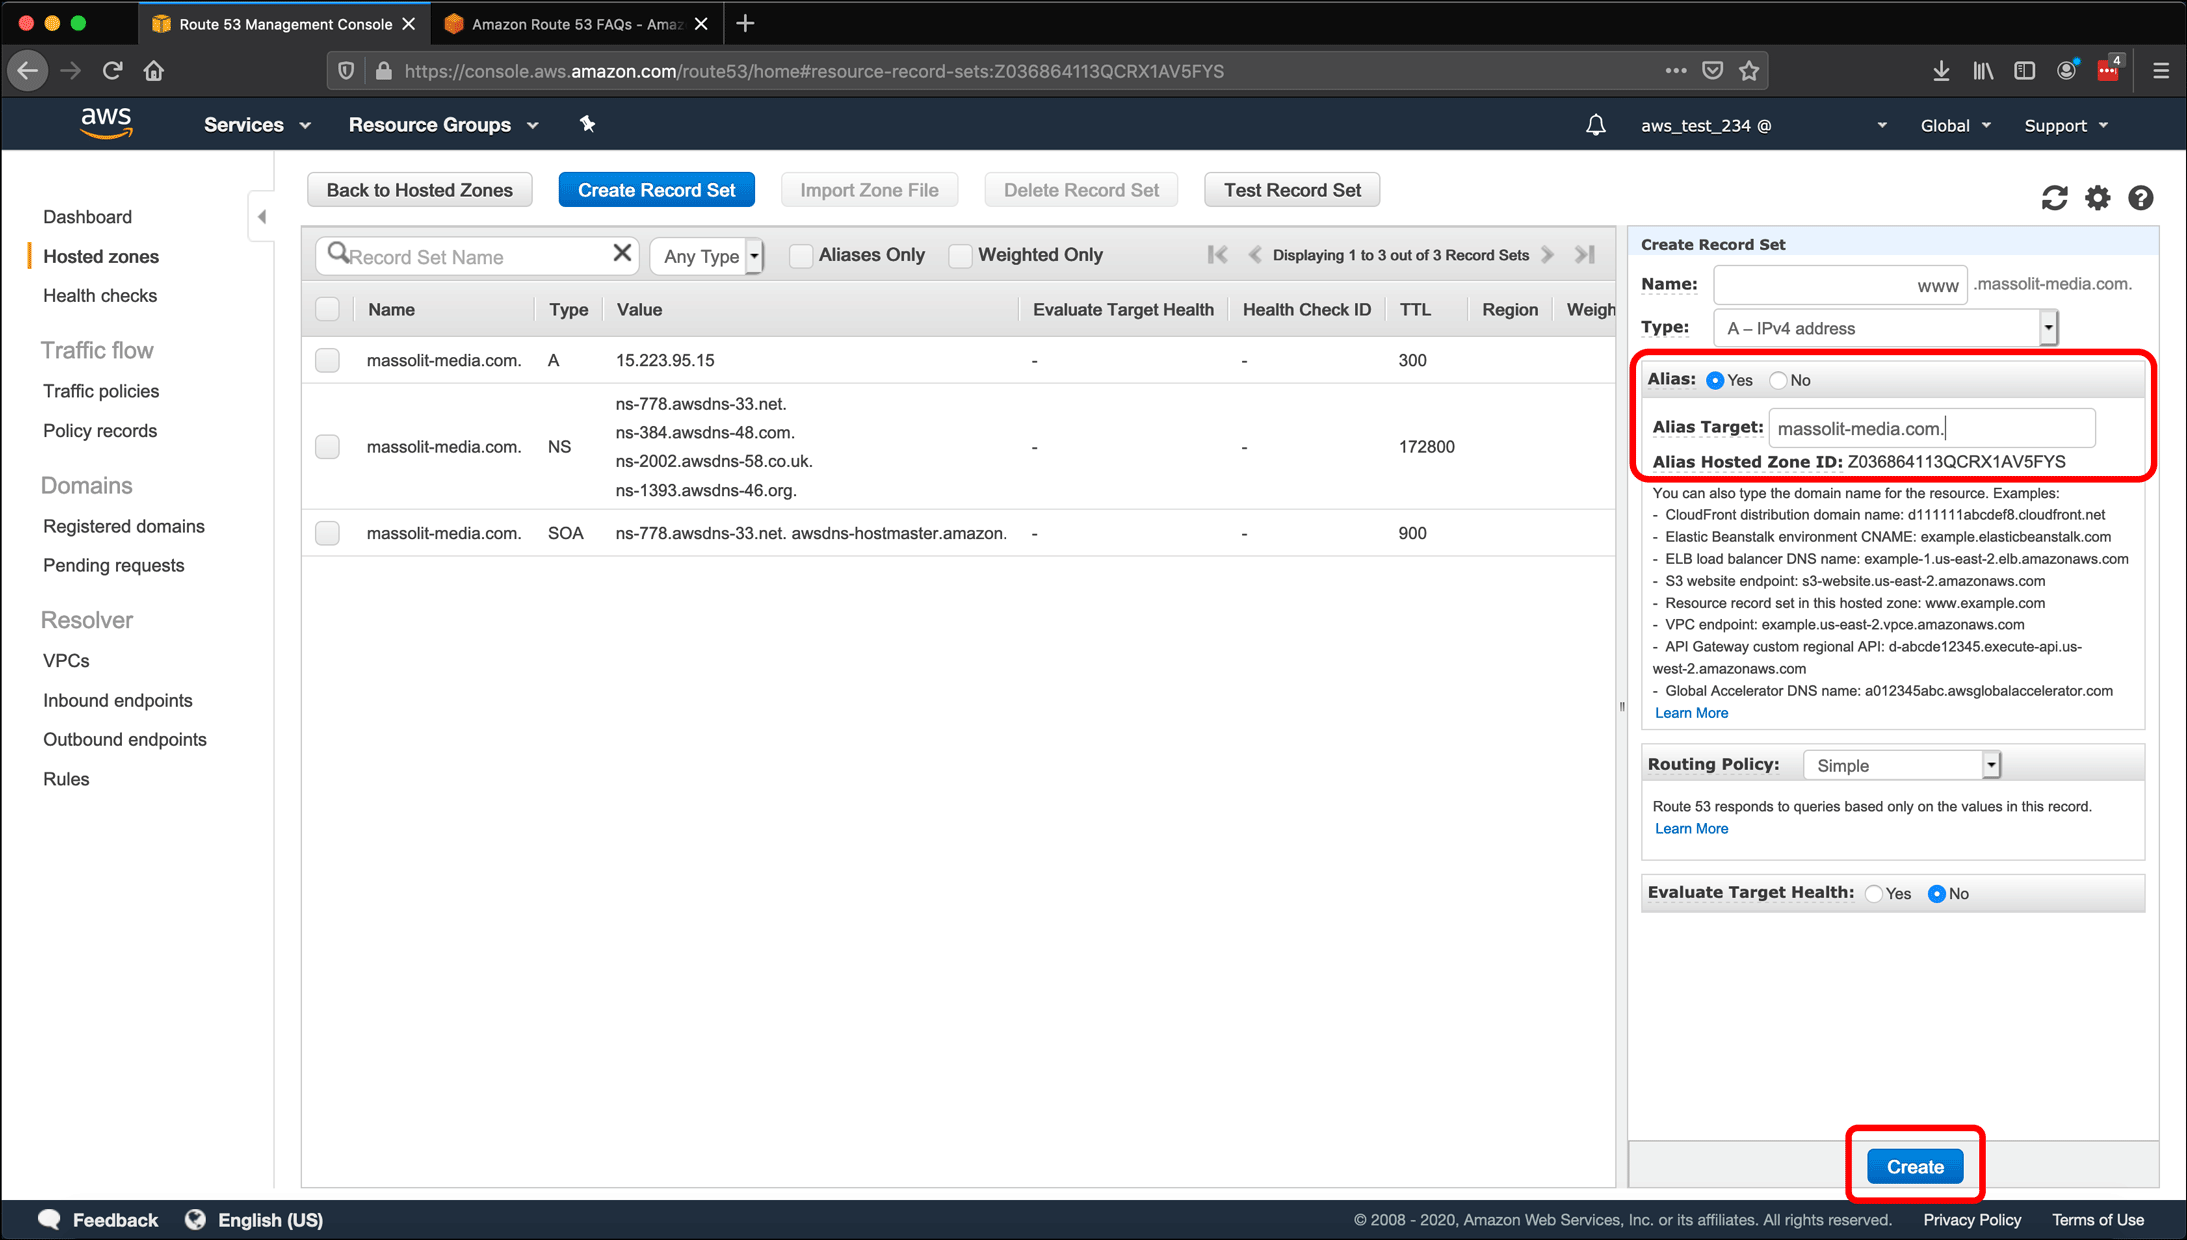
- The domain name appears in the Alias Target: field, and an Alias Hosted Zone ID appears underneath it. Click the Create button to create the alias.
- The new record set normally appears at the bottom of the list. Its Name includes www. before the domain name, it is an A record, and the Value field identifies it as an ALIAS of the first A record you created for the Elastic IP. Click Back to Hosted Zones to return to the list of hosted zones.