

Update: May 2020
This article was originally created in 2018 and completely updated in May 2020. I will not be updating it again going forward.
This is the first tutorial in my series Introduction to Hosting WordPress on Amazon Web Services (AWS).
In this post I am going to walk through the steps for launching an EC2 instance in Amazon Web Services (AWS). I will be launching an Amazon Machine Image (AMI) from the AWS Marketplace that is specifically created to run a WordPress site. The image is provided by Bitnami, a software company that specializes in deploying open-source software. I am using Firefox on a Mac, but these steps are platform- and browser-agnostic. You need an AWS account and the ability to log in to that AWS account as either the root user, or, if you have set up separate IAM (Identity and Access Management) accounts, then an IAM account with admin privileges.
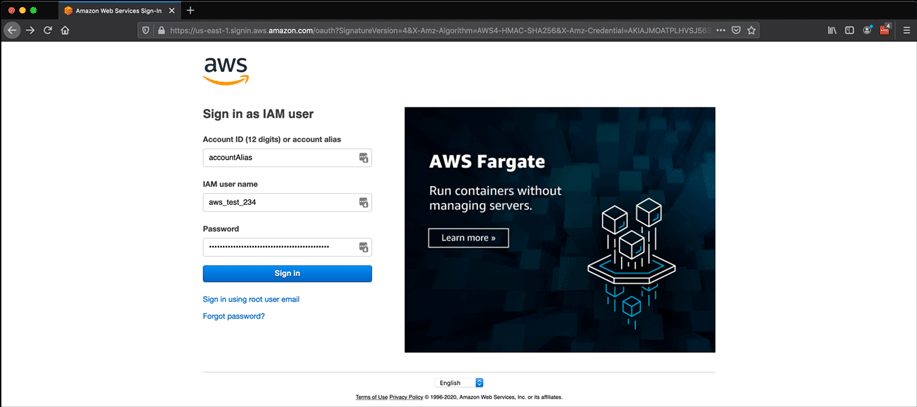
- Log in to your AWS account.
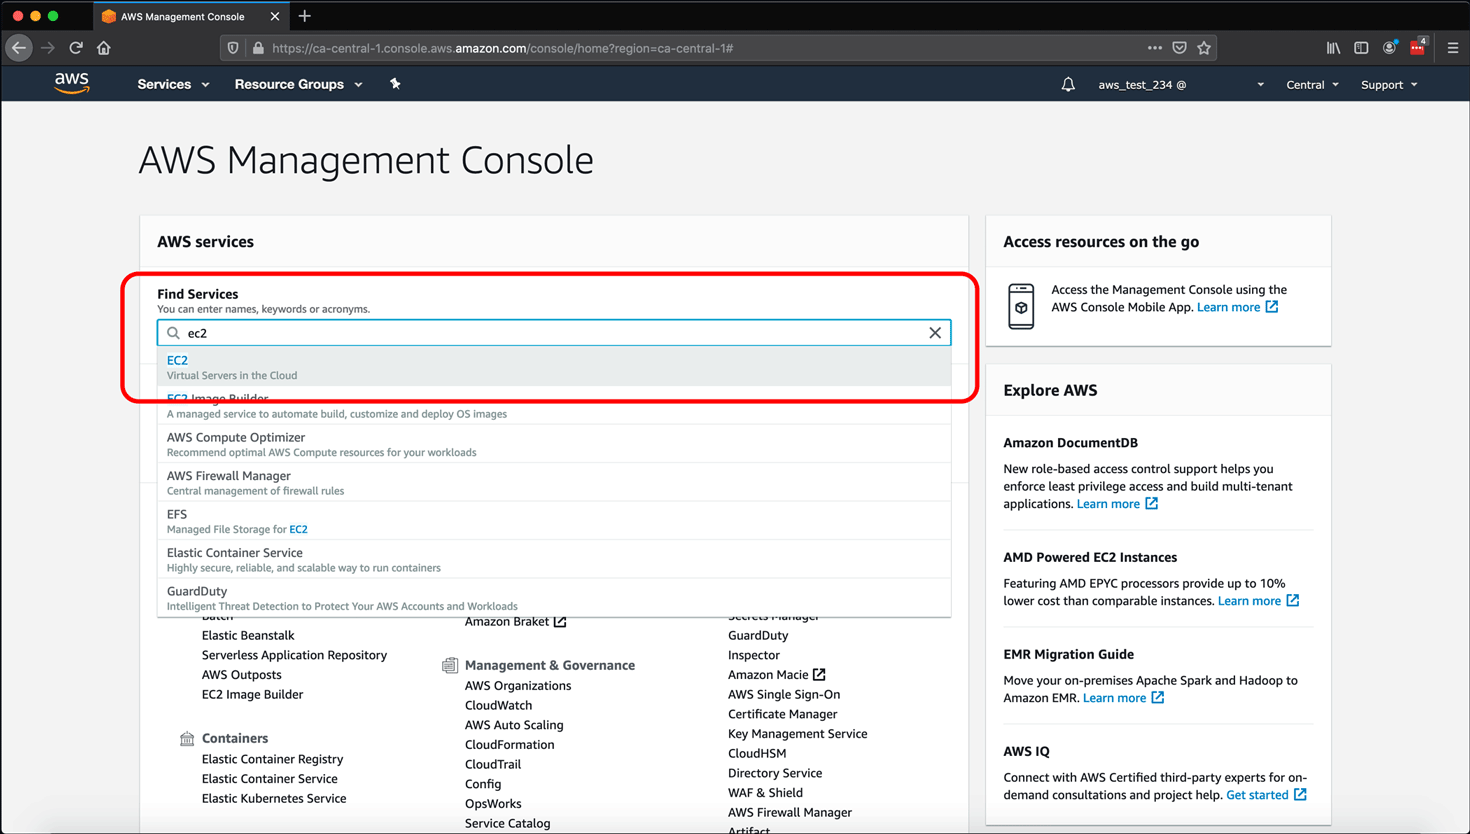
- From the AWS Management Console, type EC2 into the Find Services search box.
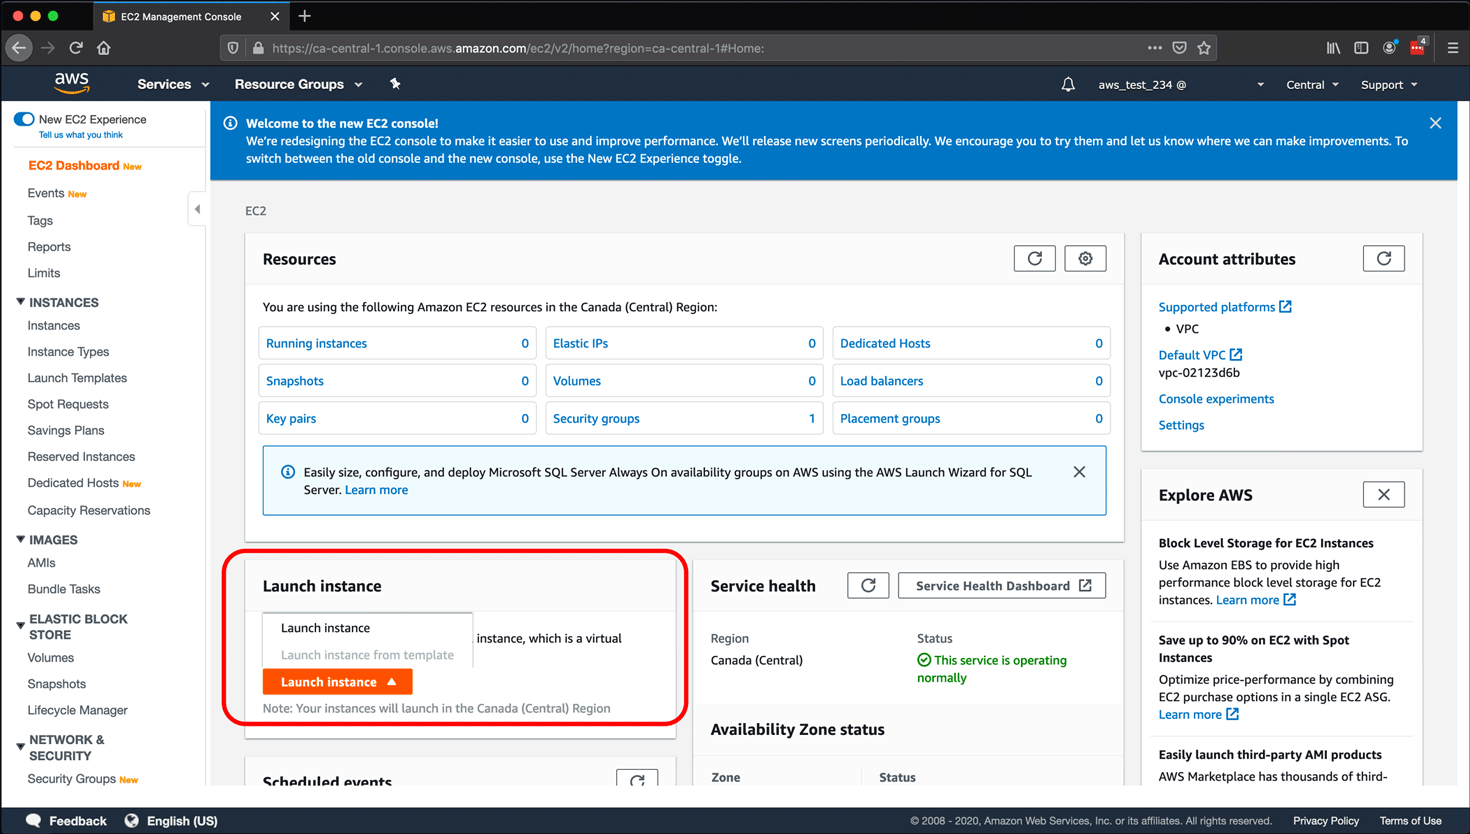
- Click the Launch Instance button and select the Launch Instance option.
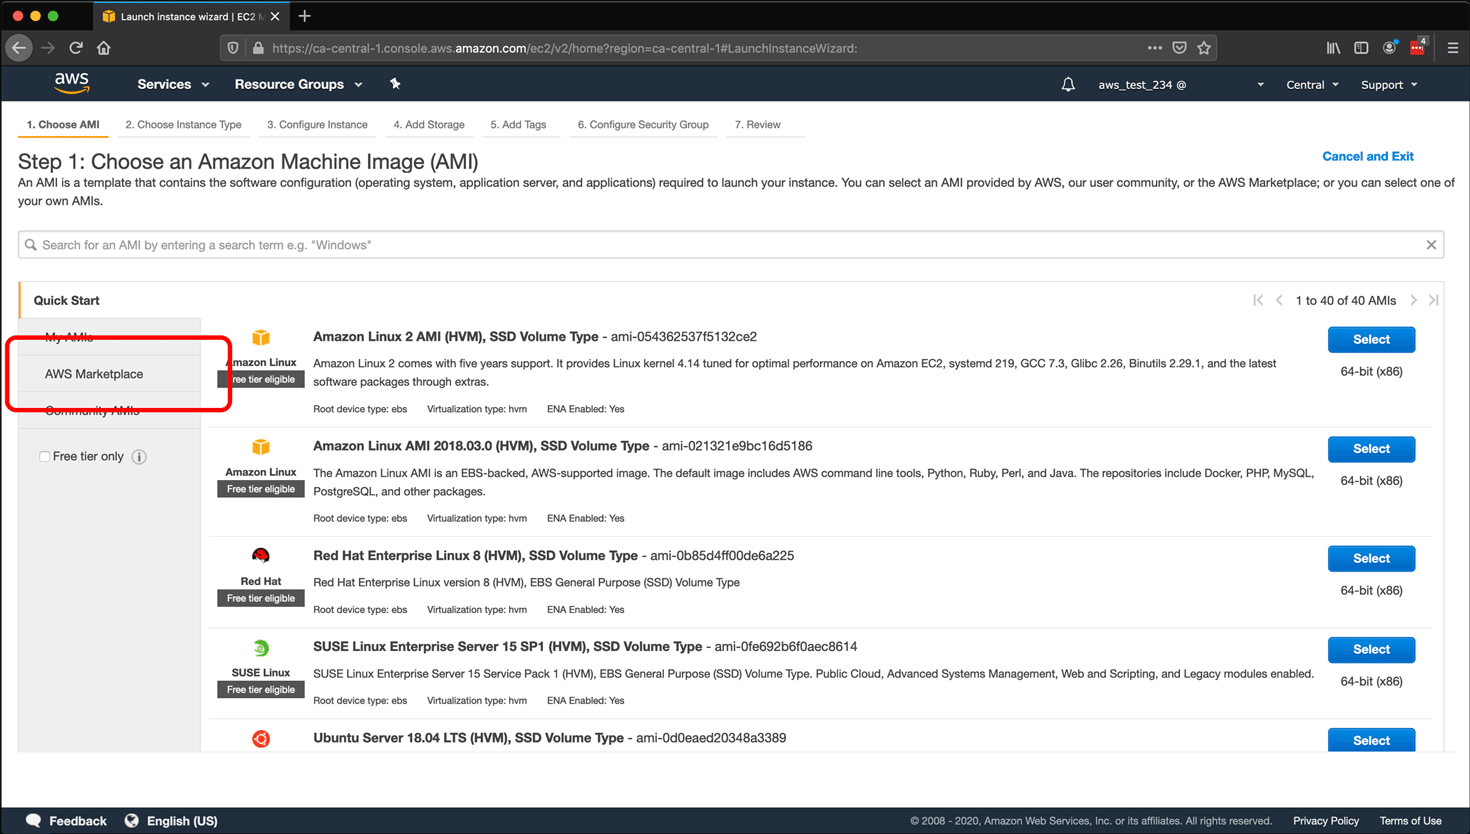
- Click AWS Marketplace under Quick Start on the Step 1: Choose an Amazon Machine Image (AMI) screen.
- Type wordpress in the search box and press
Enter.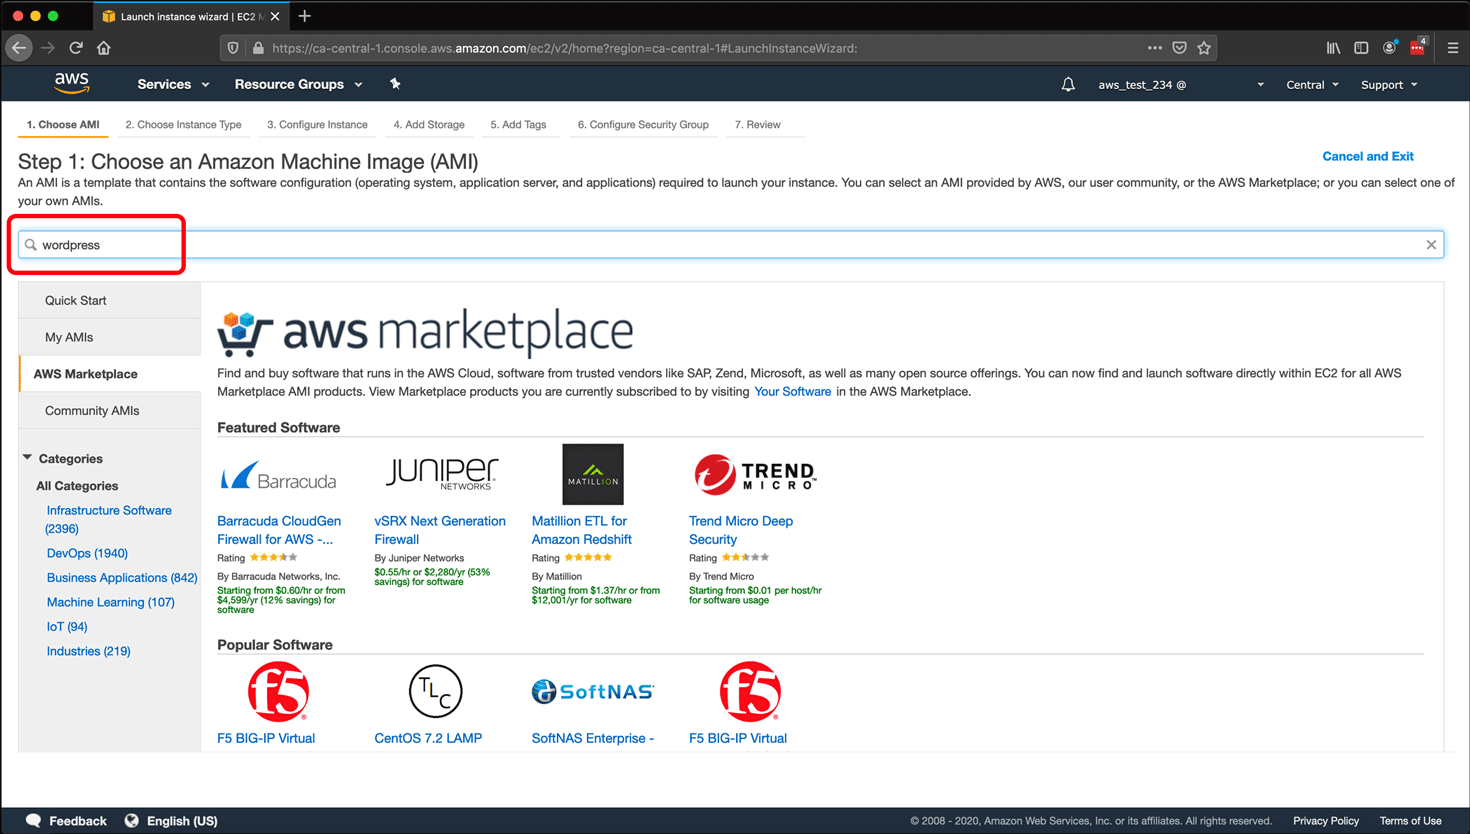
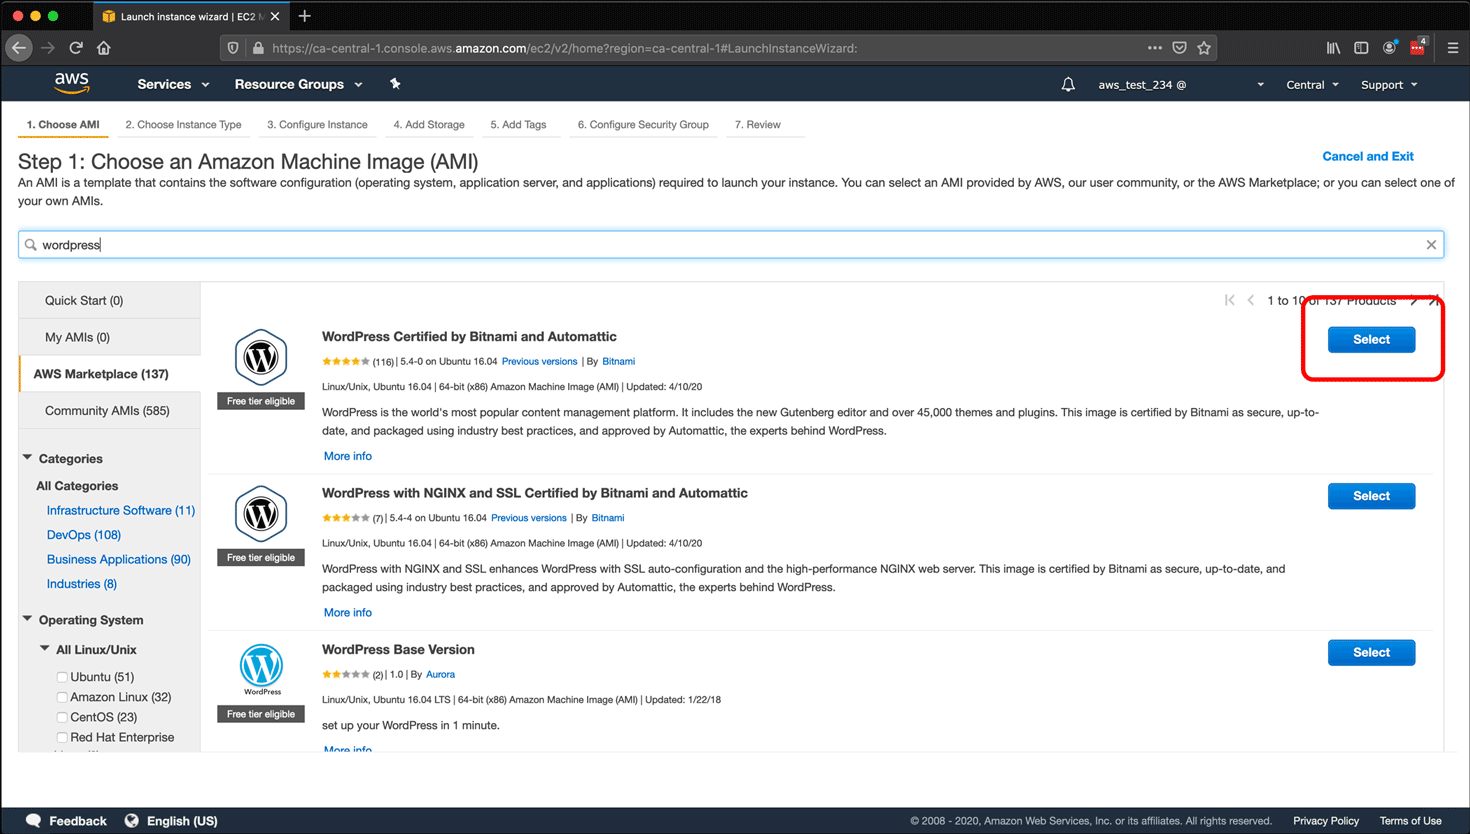
- When the search results load, find WordPress Certified by Bitnami and Automattic (it will usually be the first search result). Click the Select button on the right side of the screen.
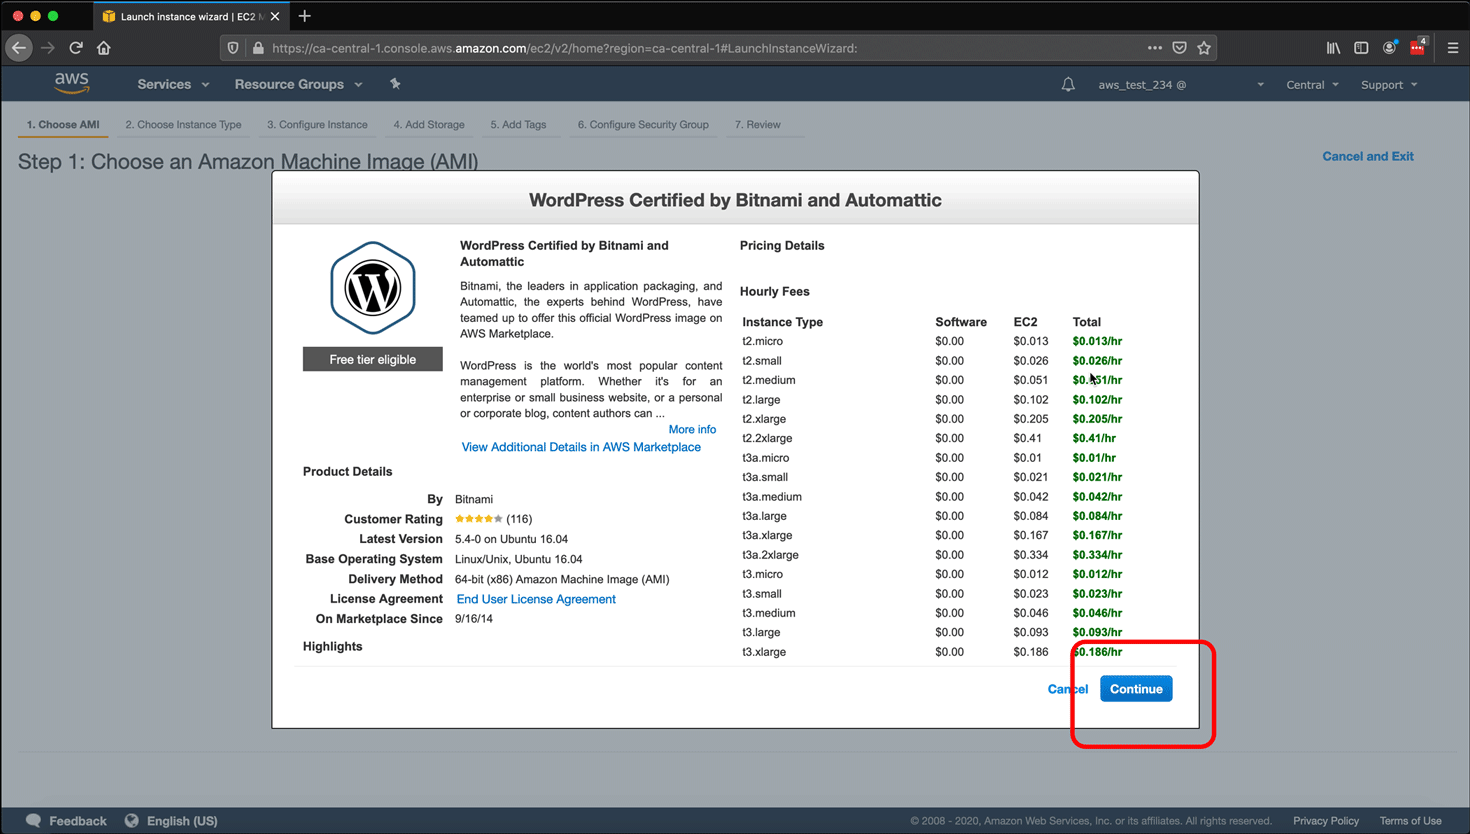
- A WordPress Certified by Bitnami and Automattic pop-up contains a description of the image along with Product Details and Pricing Details. Click Continue.
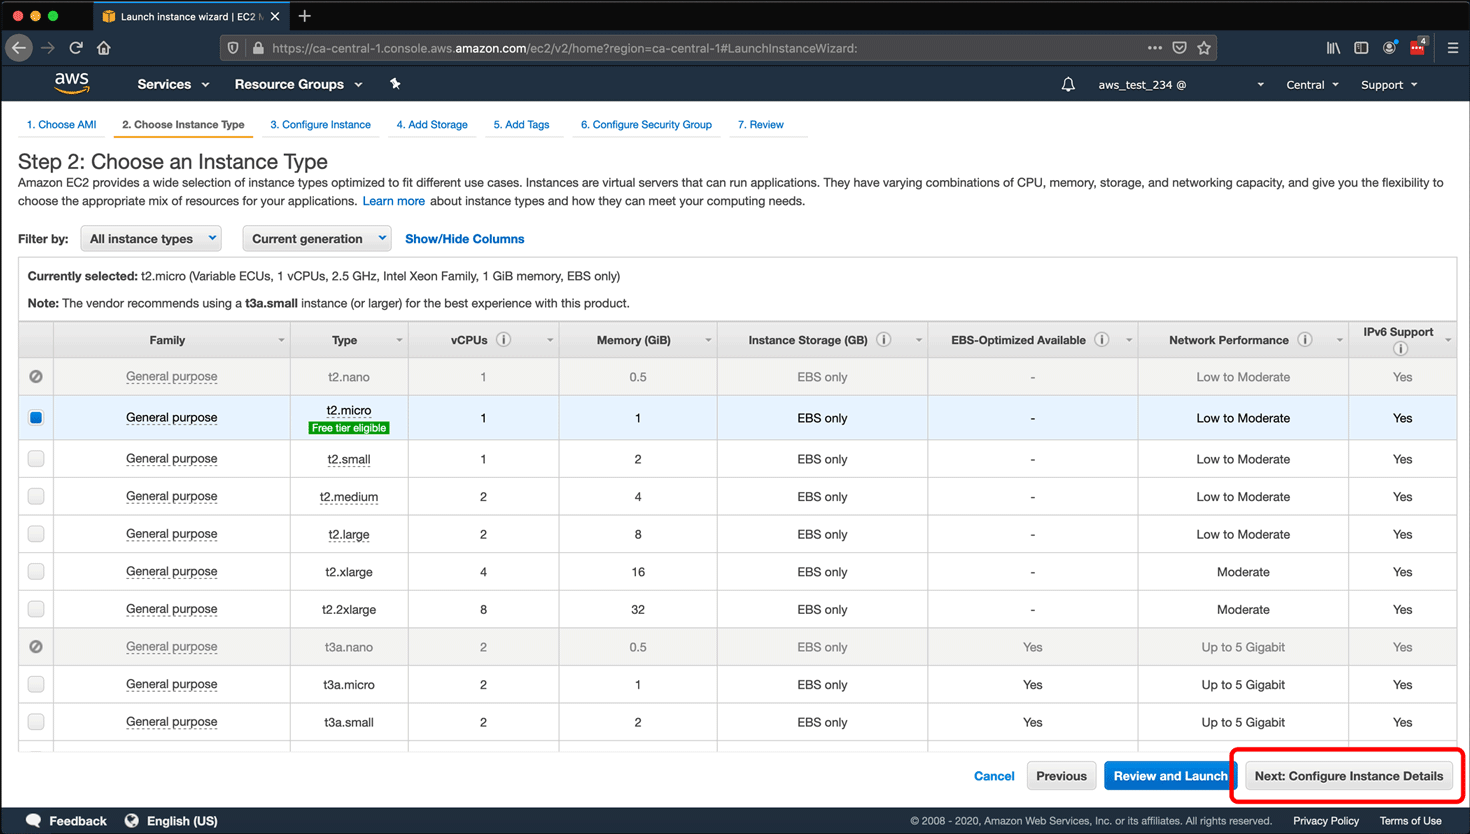
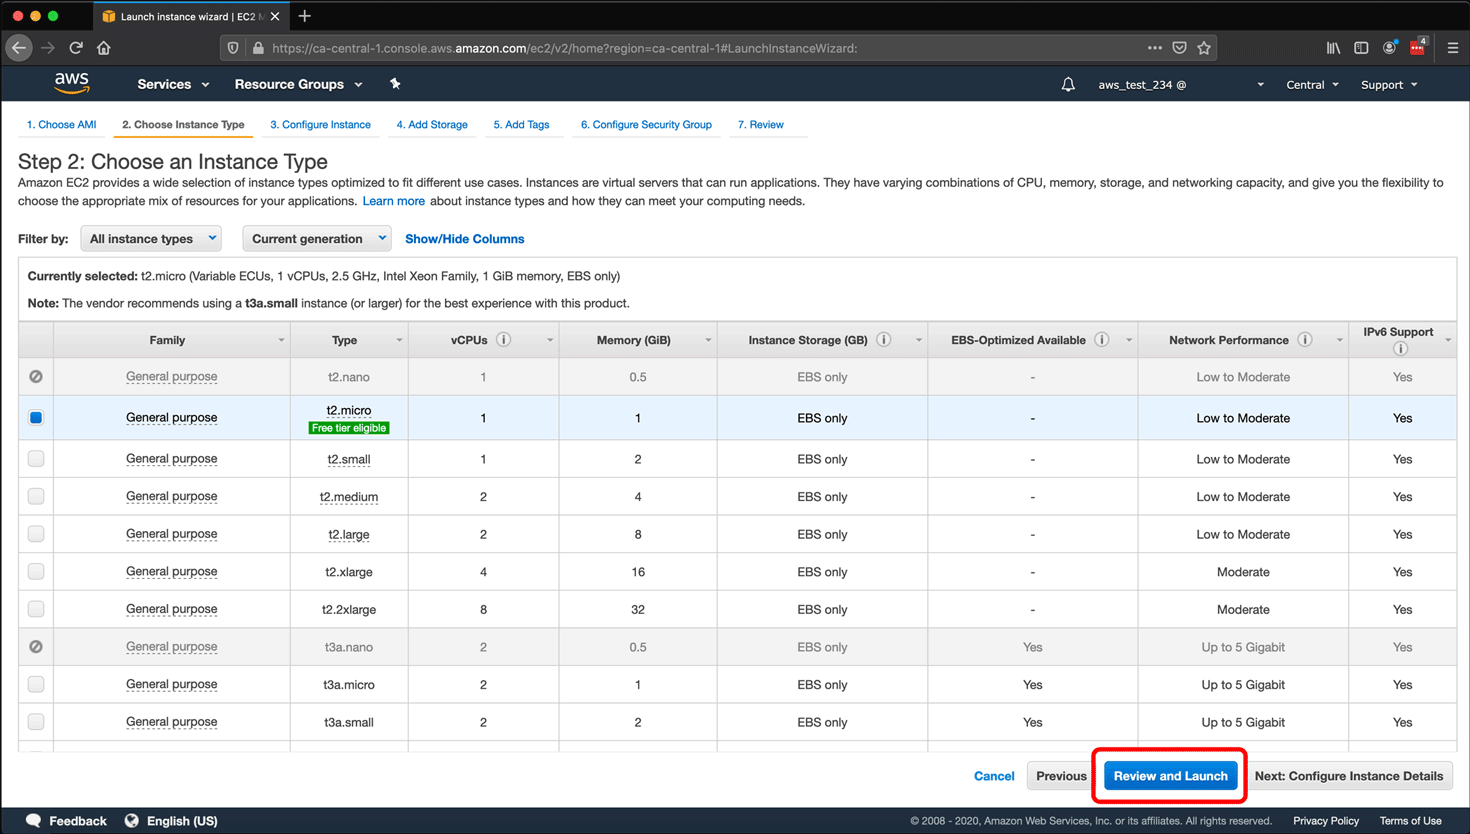
- On the Step 2: Choose an Instance Type screen, select the box for the Type of instance that matches your performance requirements. I am using t2.micro. After selecting the Type, click Next: Configure Instance Details.
- Click Review and Launch to skip configuration and accept all of the image’s defaults.
- Click Review and Launch to skip configuration and accept all of the image’s defaults.
- The Step 3: Configure Instance Details page contains important configuration settings. This is just for demonstration, so leave the defaults and click Next: Add Storage.

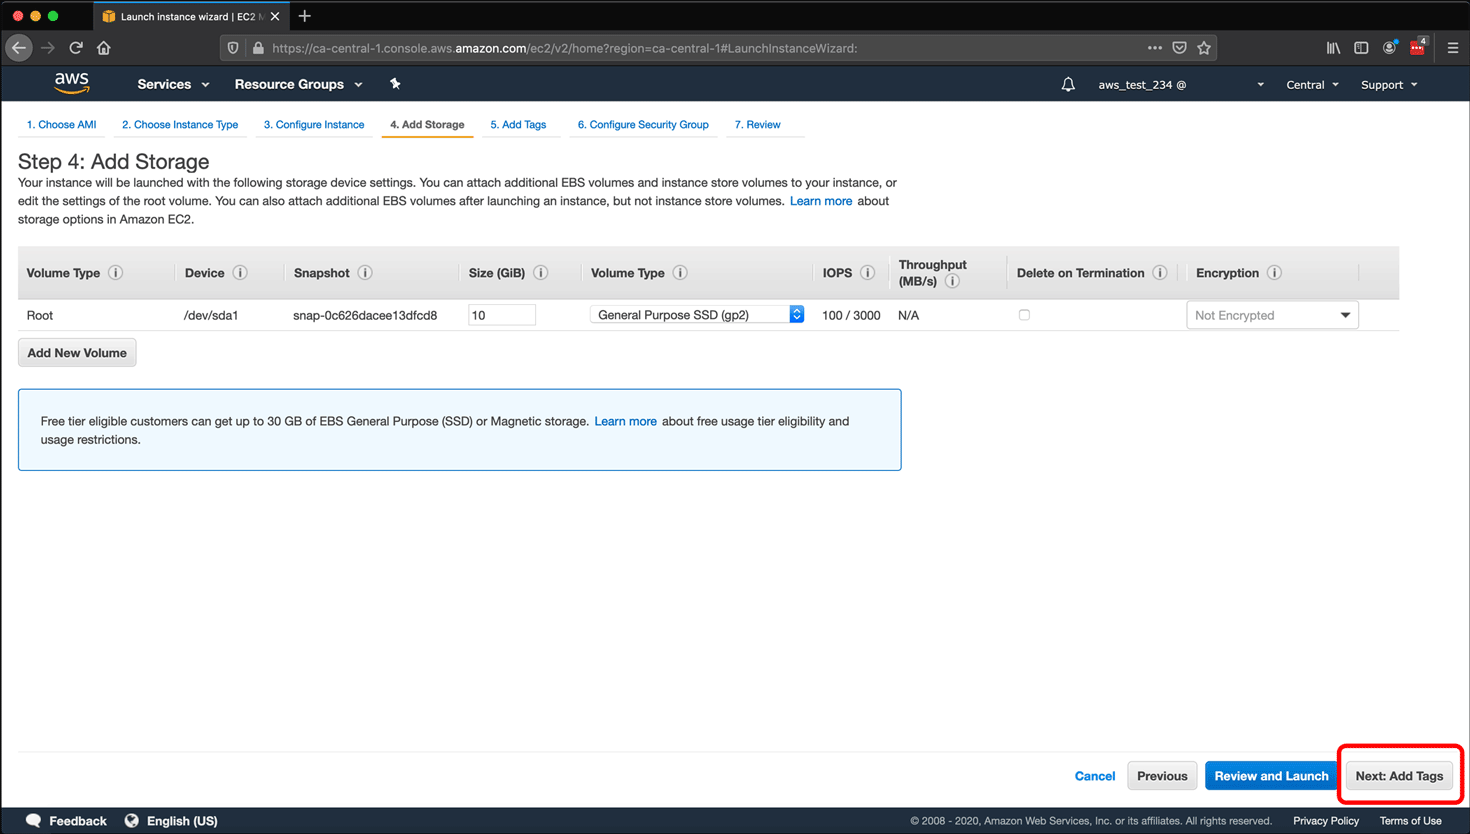
- Step 4: Add Storage screen allows you to customize the EC2 EBS (Elastic Block Storage) volume. EBS Volumes provide the persistent storage – the hard drive – for your virtual machine. This WordPress image ships with a single storage volume set to 10GB of memory. You can change the volume size in the text field under Size (GiB) or add additional storage volumes by clicking Add New Volume. Leave the defaults and click Next: Add Tags.
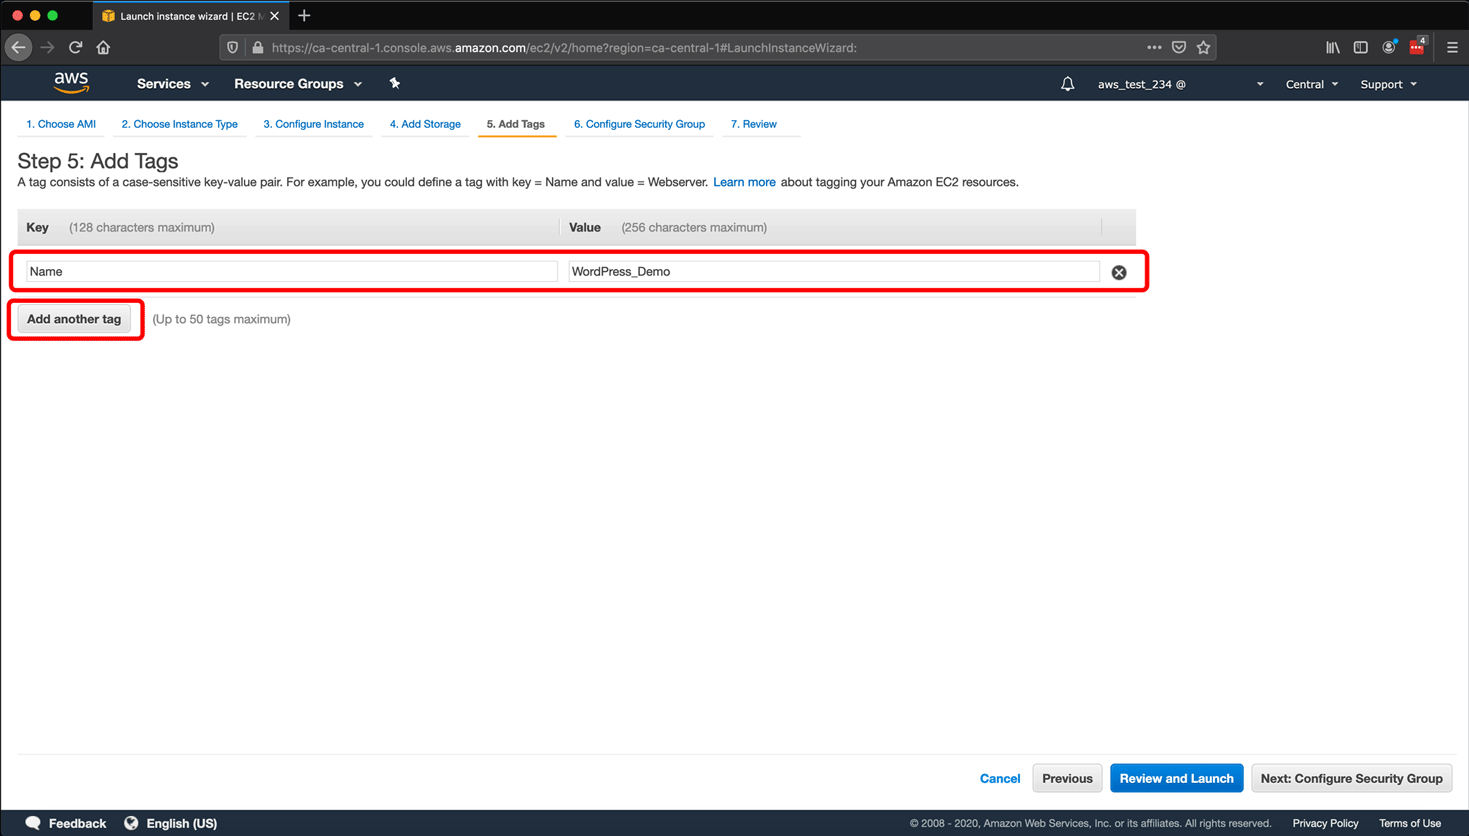
- AWS allows you to tag resources with key/value pairs. Click Add Tag.

- I always add a Name to my AWS resources, so for the first tag, add Name as the Key and WordPress_Demo as its Value, then click Add another tag.
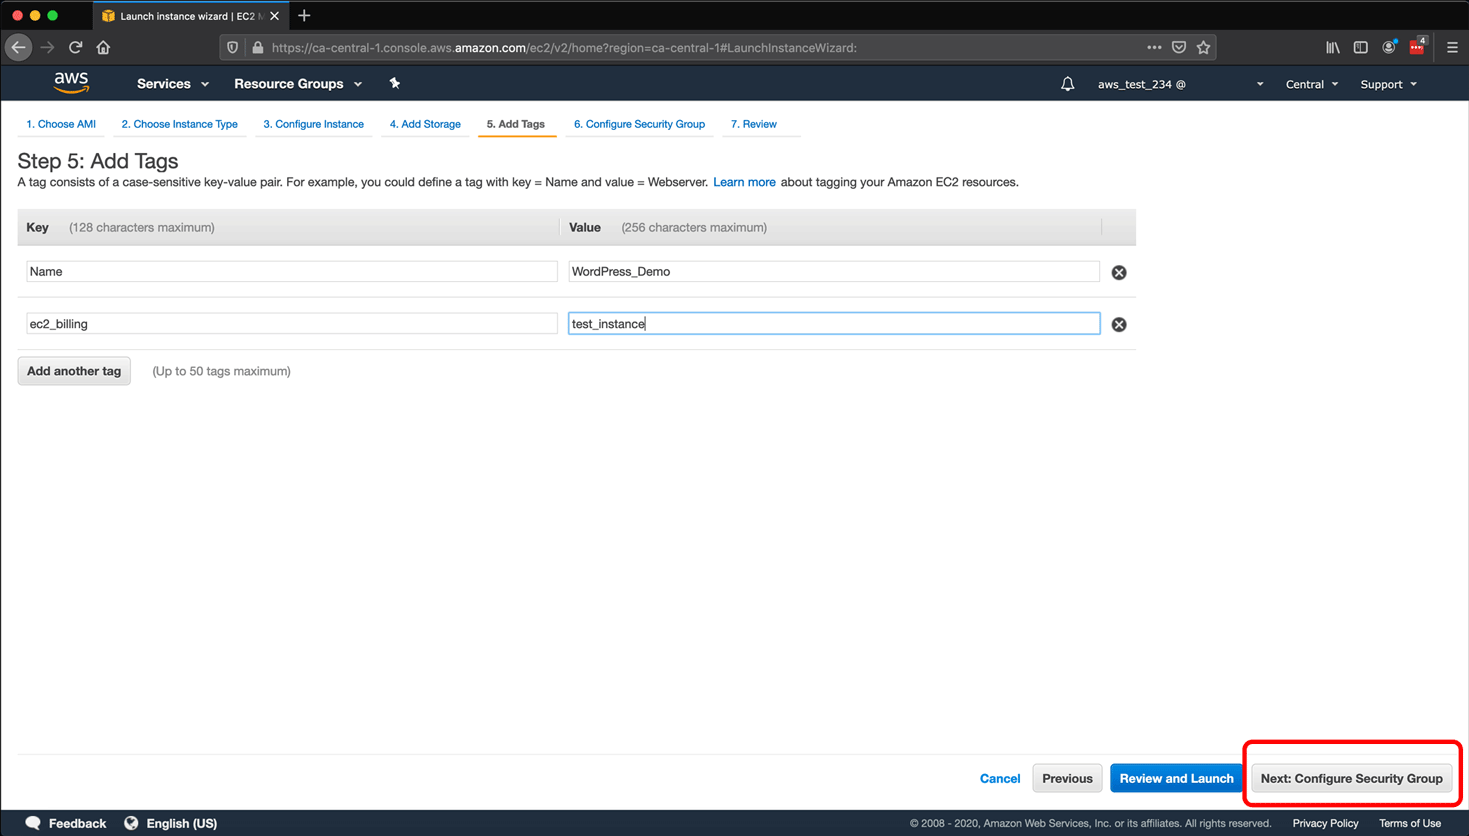
- Tags can be used to organize resources to track your AWS usage and billing, so add an ec2_billing key with a value of test_instance. After adding tags, click Next: Configure Security Group.
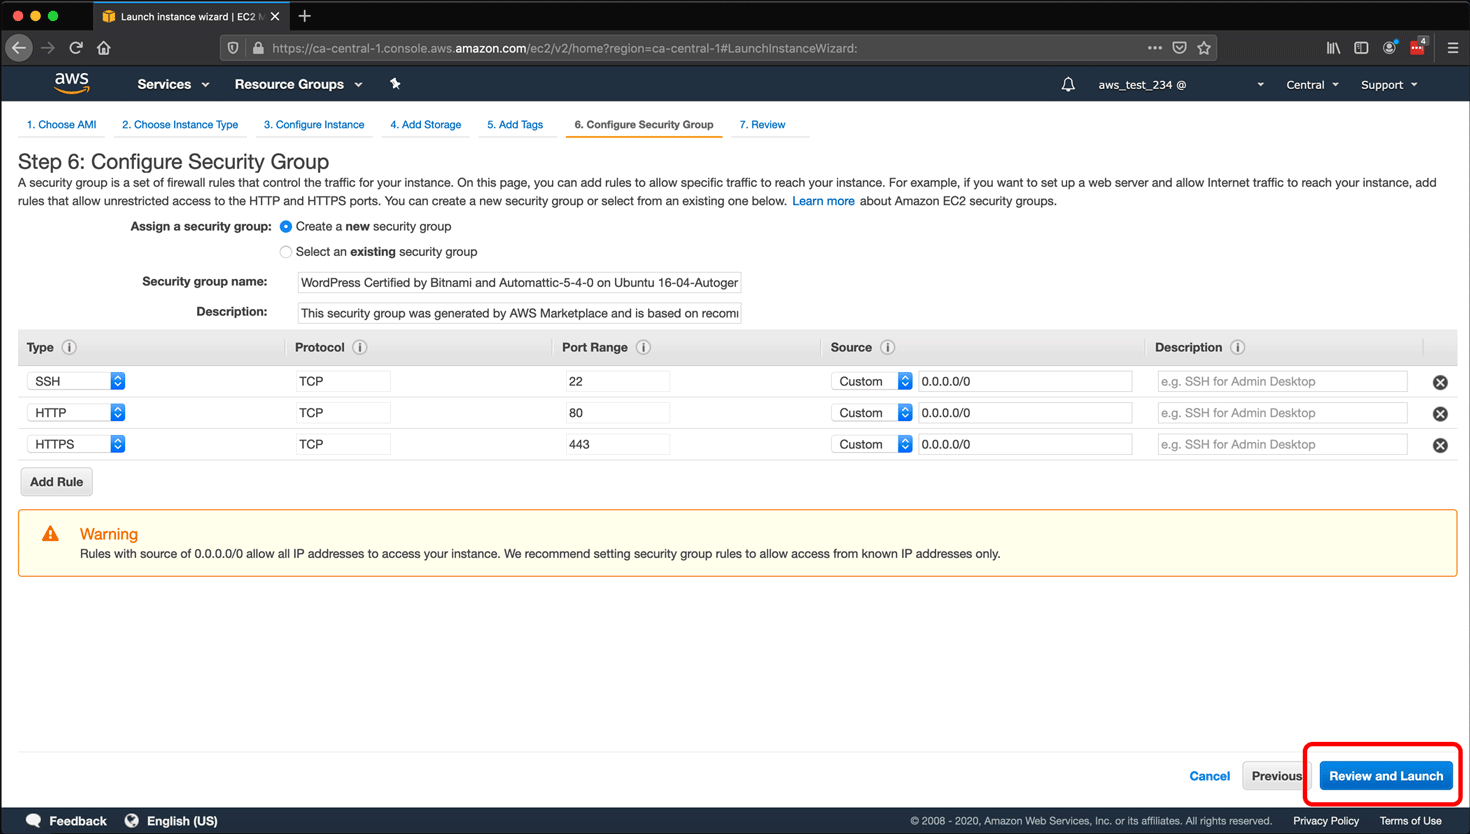
- A security group is an AWS virtual firewall that allows or drops traffic by IP address, port, or both. This image includes a default security group that allows any IP address to connect to the instance over SSH (port 22), HTTP (port 80), and HTTPS (port 443). Leave the defaults and click Review and Launch.
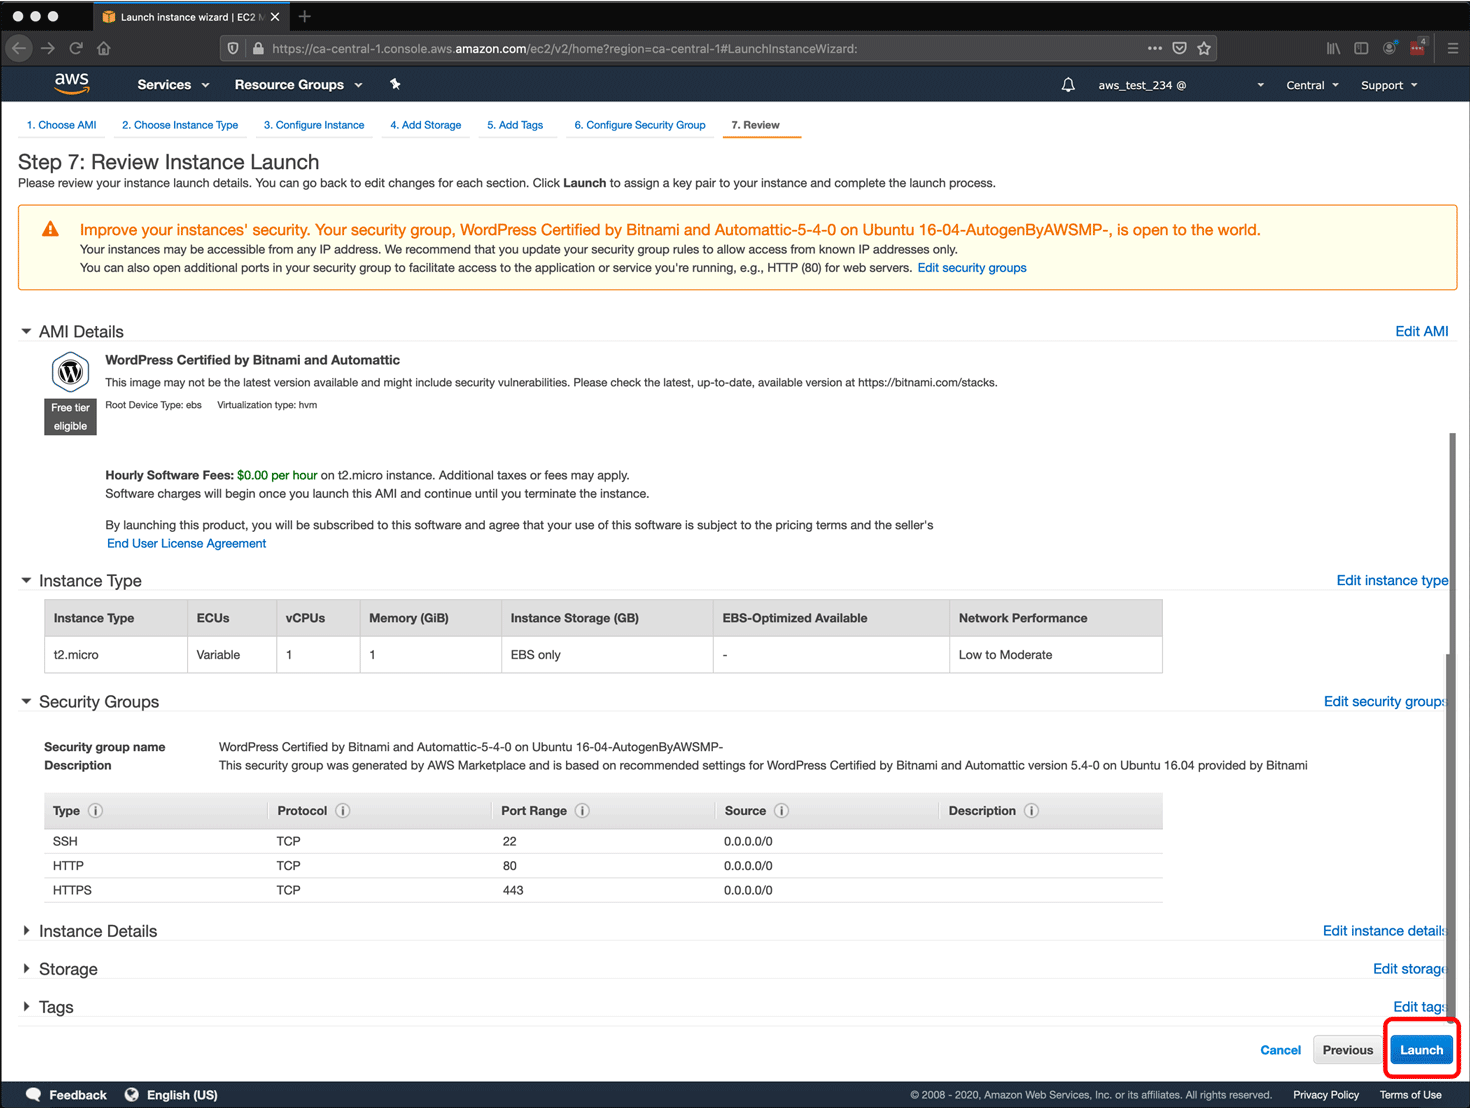
- On the Step 7: Review Instance Launch page, click Launch.
- A Select an existing key pair or create a new key pair pop-up will appear. Click the Choose an existing key pair drop-down.
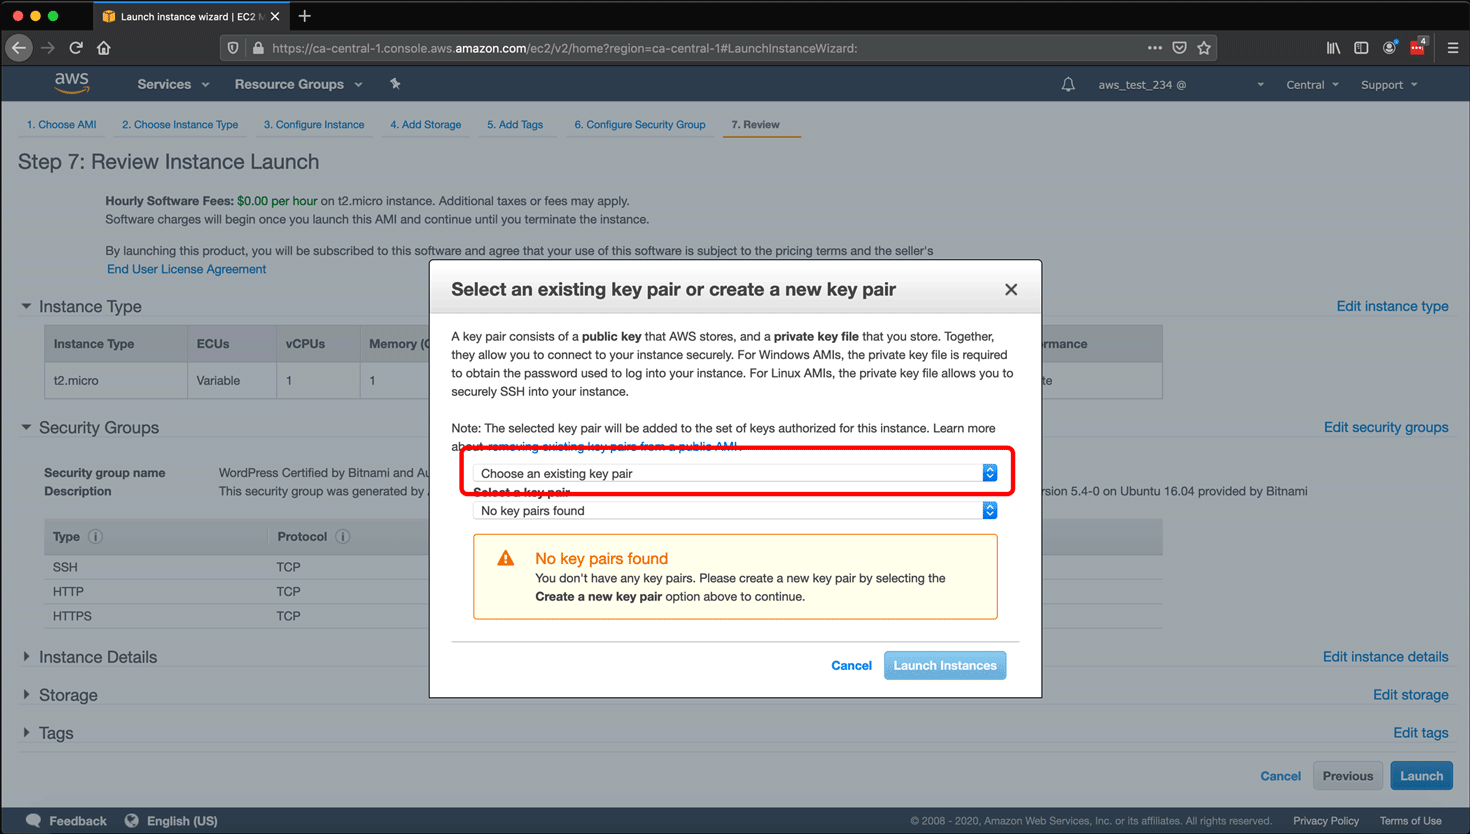
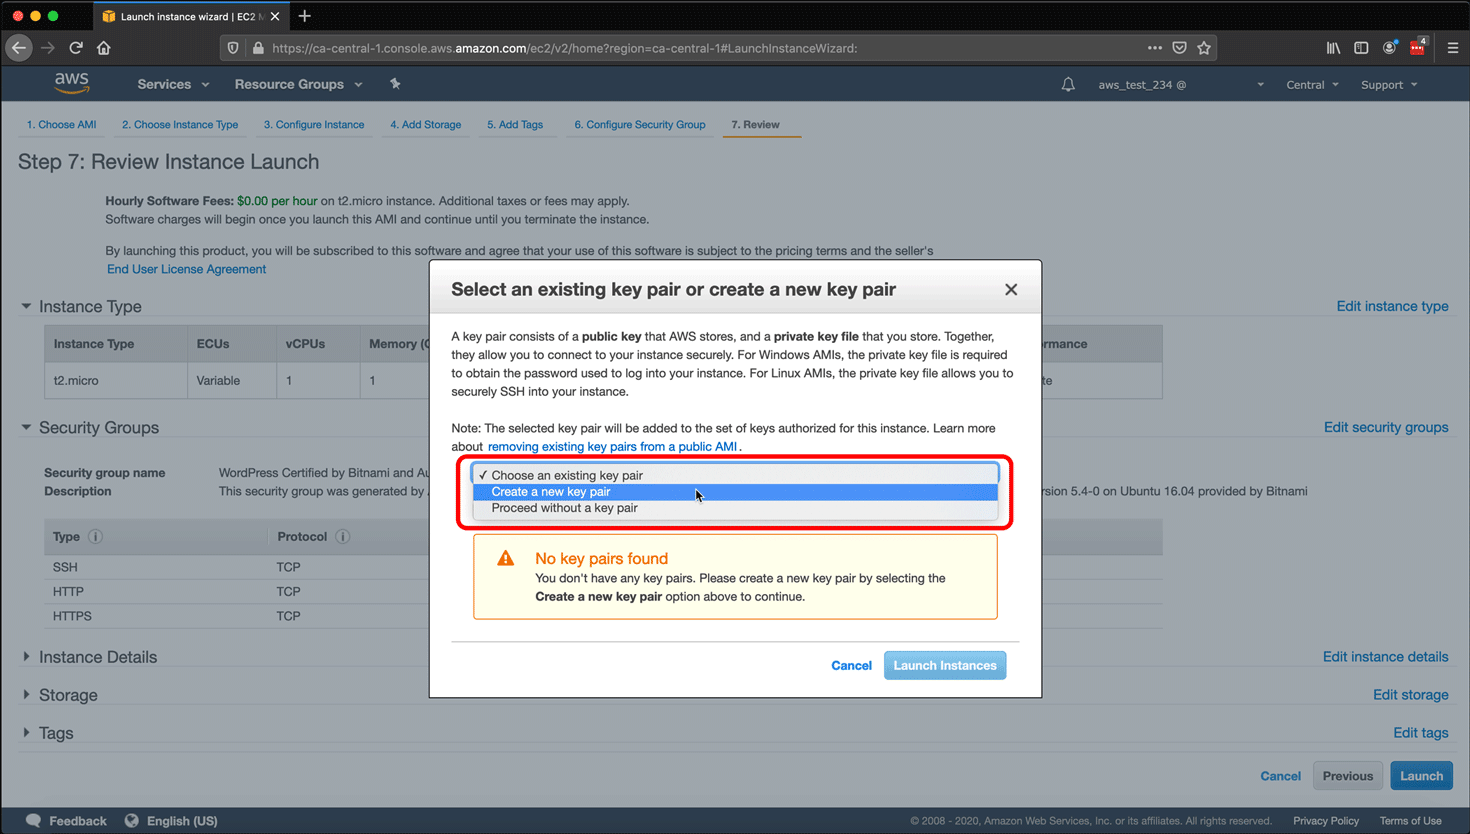
- Select Create a new key pair from the drop-down menu.
- Type in a Key pair name and click Download Key Pair. But first, let’s talk about what we are doing:
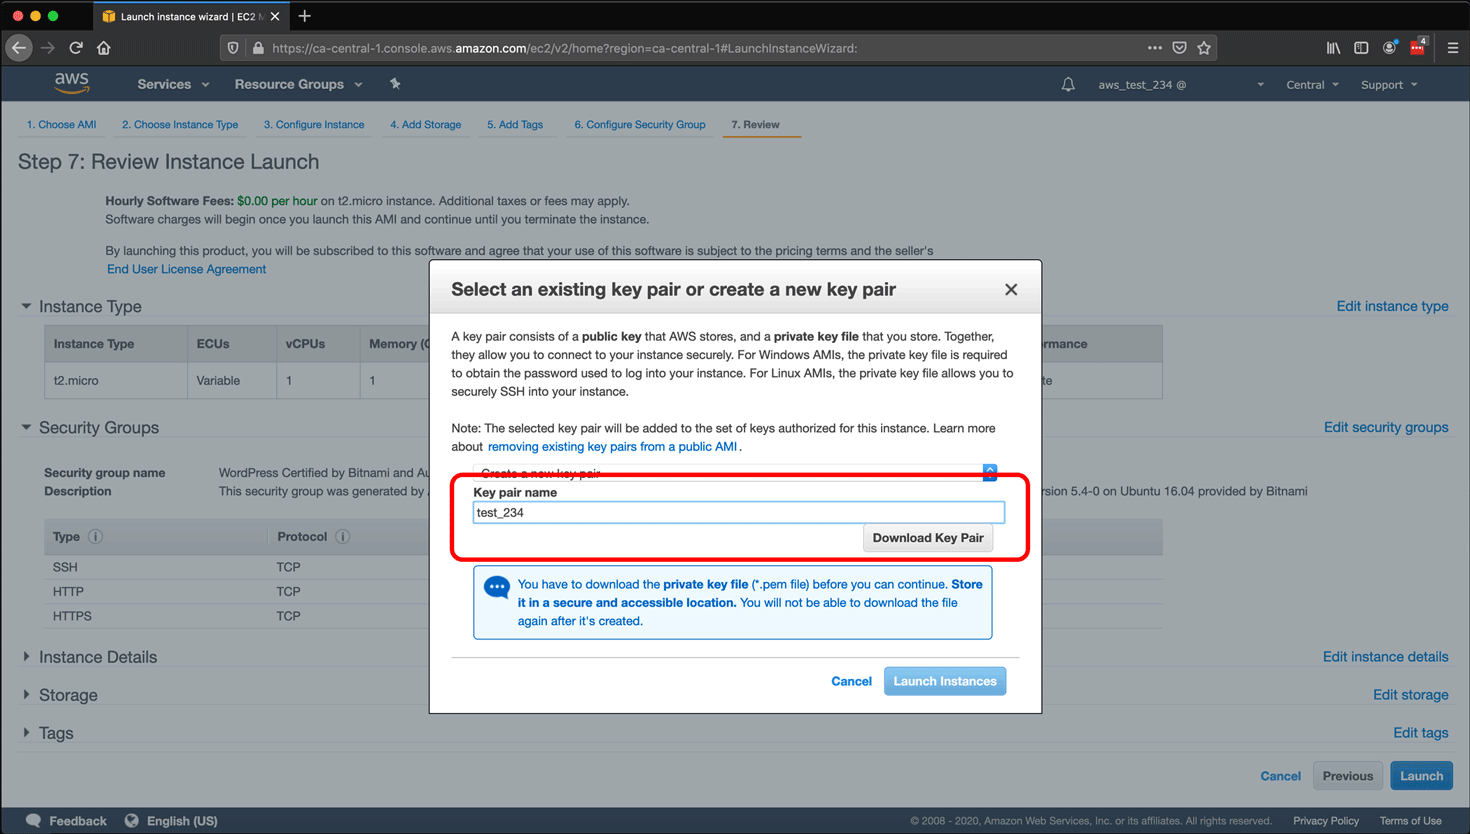
- If you are not familiar with public-key cryptography and its role in systems administration… you’re going to need to learn about that. The important thing to know is that AWS is going to create a public key and put that on the server.
- When you click Download Key Pair, you’re downloading the private key to your computer. The private key’s format is a .pem file.
- The .pem file is your private key used to connect to your EC2 instance over services like SSH and SFTP. This is an essential tool for managing the instance and your WordPress installation.
- Do not share the private key.
- Keep the private key very safe. Consider backing it up securely. If you lose the private key, you will not be able to manage the instance through services like SSH.
- After clicking Download Key Pair, download the .pem file using your browser and click Launch Instance.

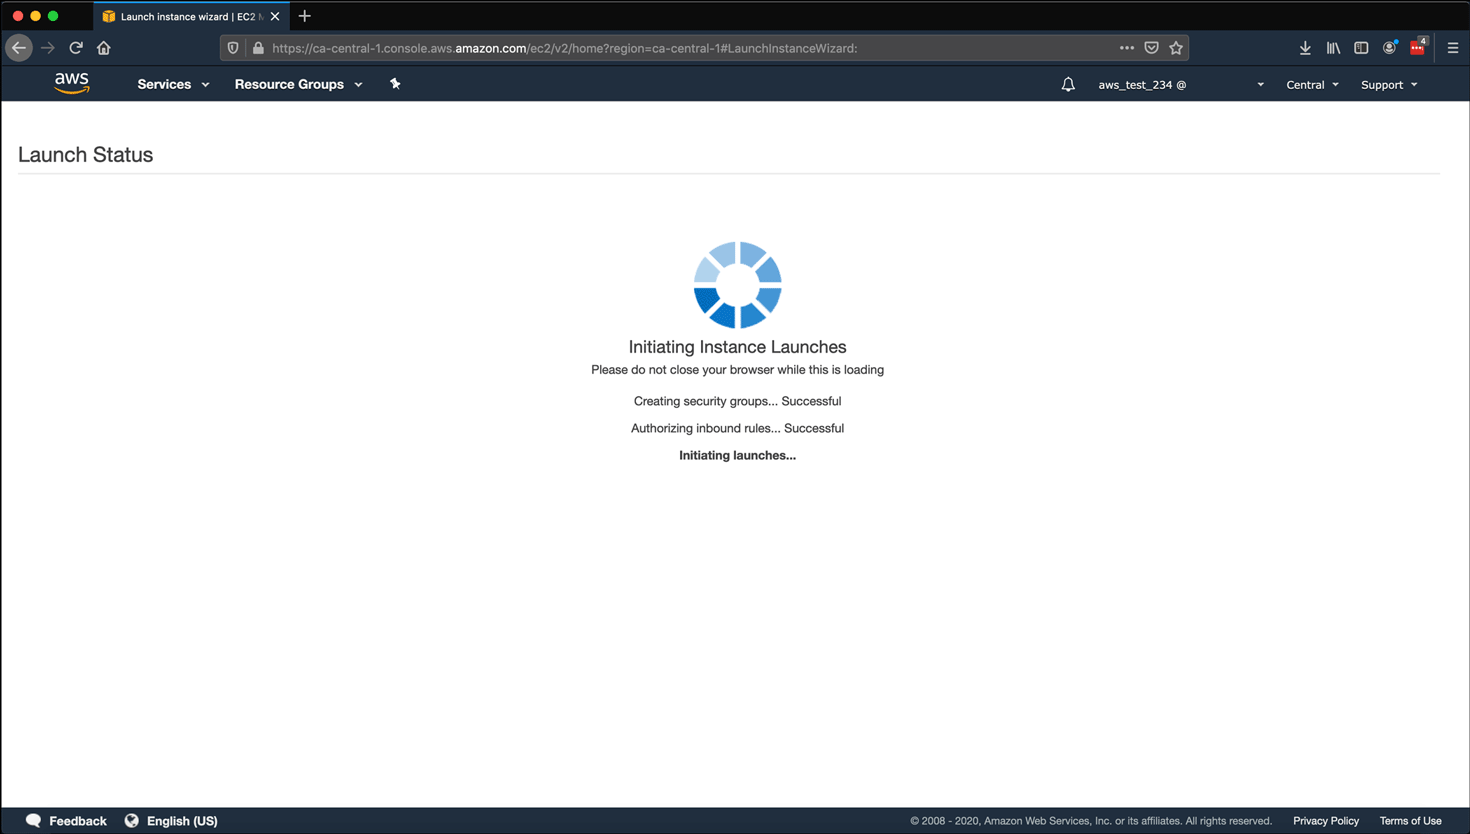
- Your instance is launching. You will see an Initiating Instance Launches while your instance “spins up.”
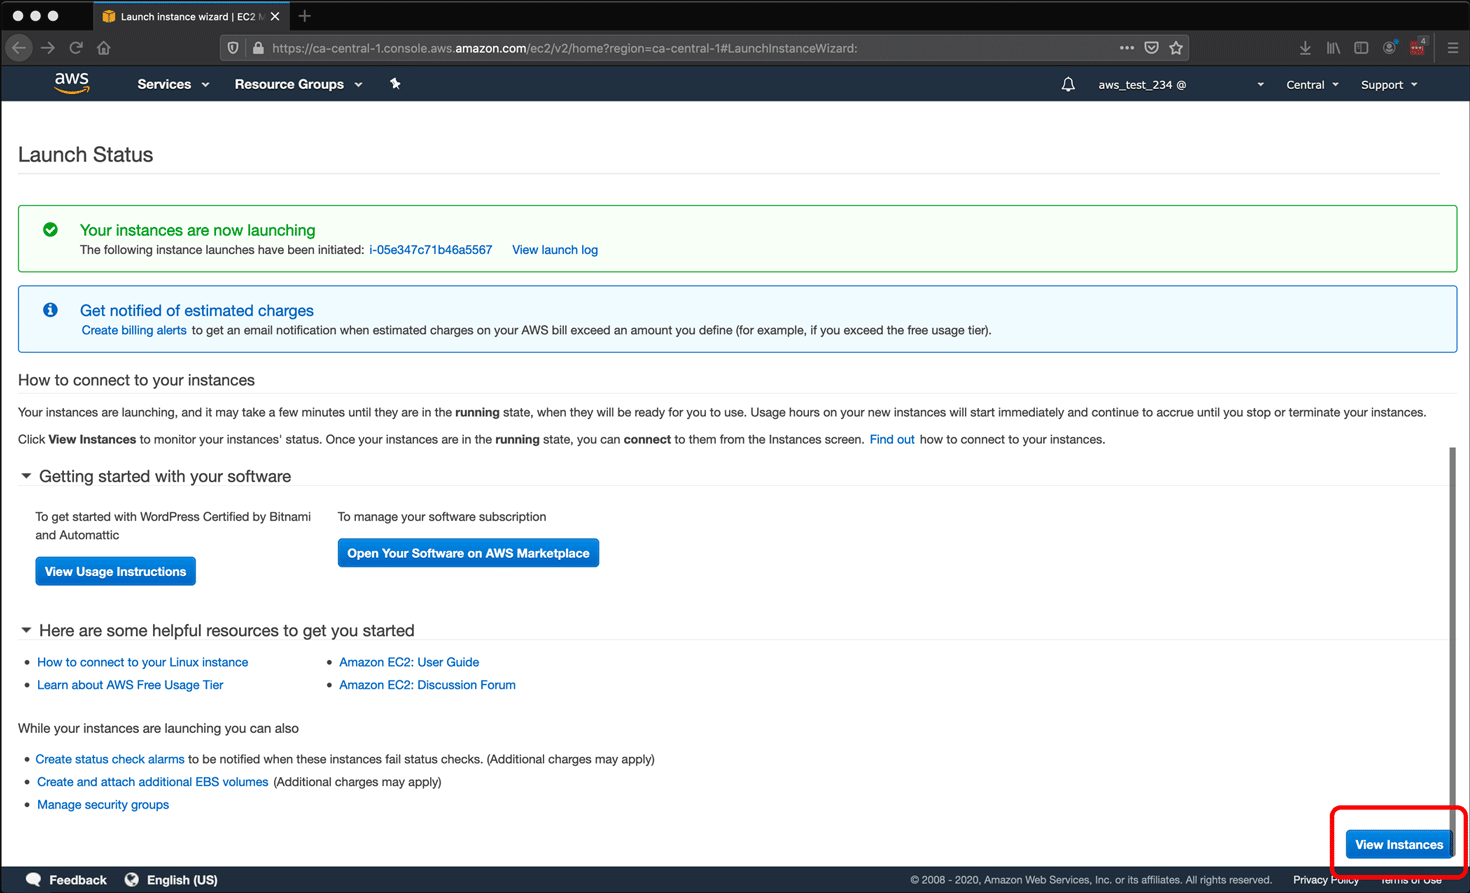
- When the instance has launched, you will see an acknowledgement that the launch was successful. Scroll down and click View Instances to return to the EC2 Management Console.
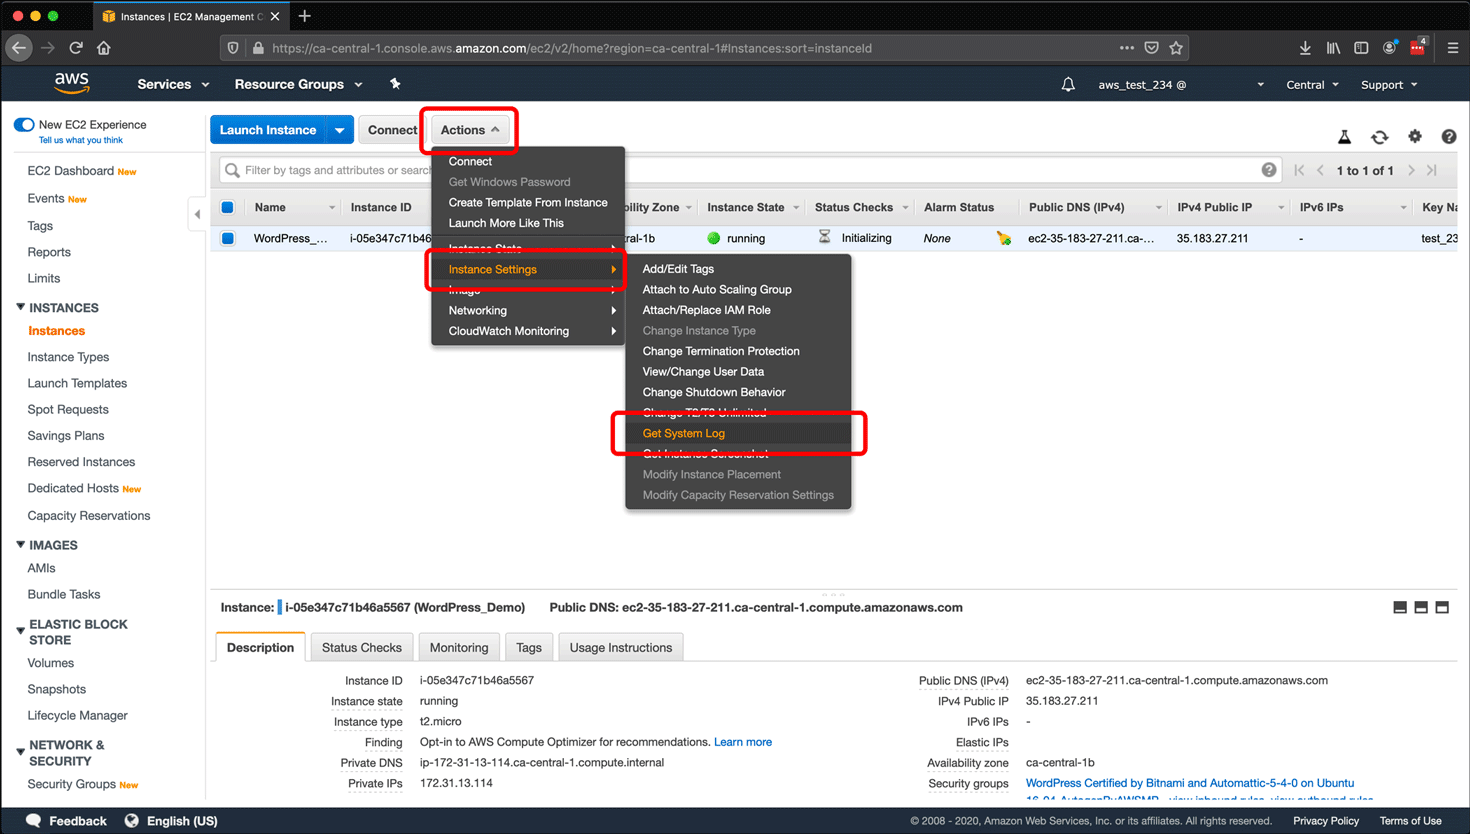
- You are returned to Instances on the EC2 Dashboard. Select the checkbox for the instance you just created.

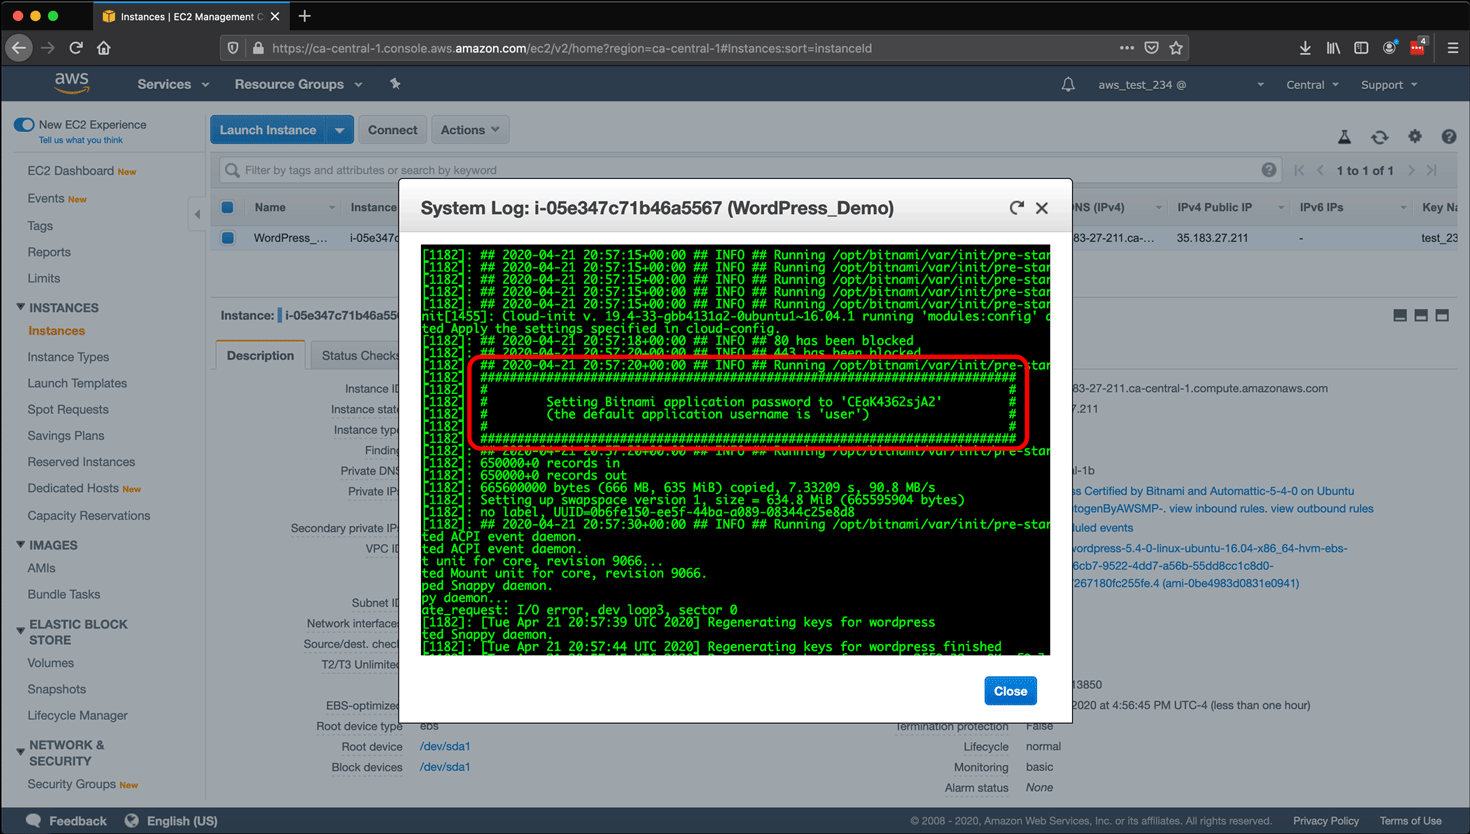
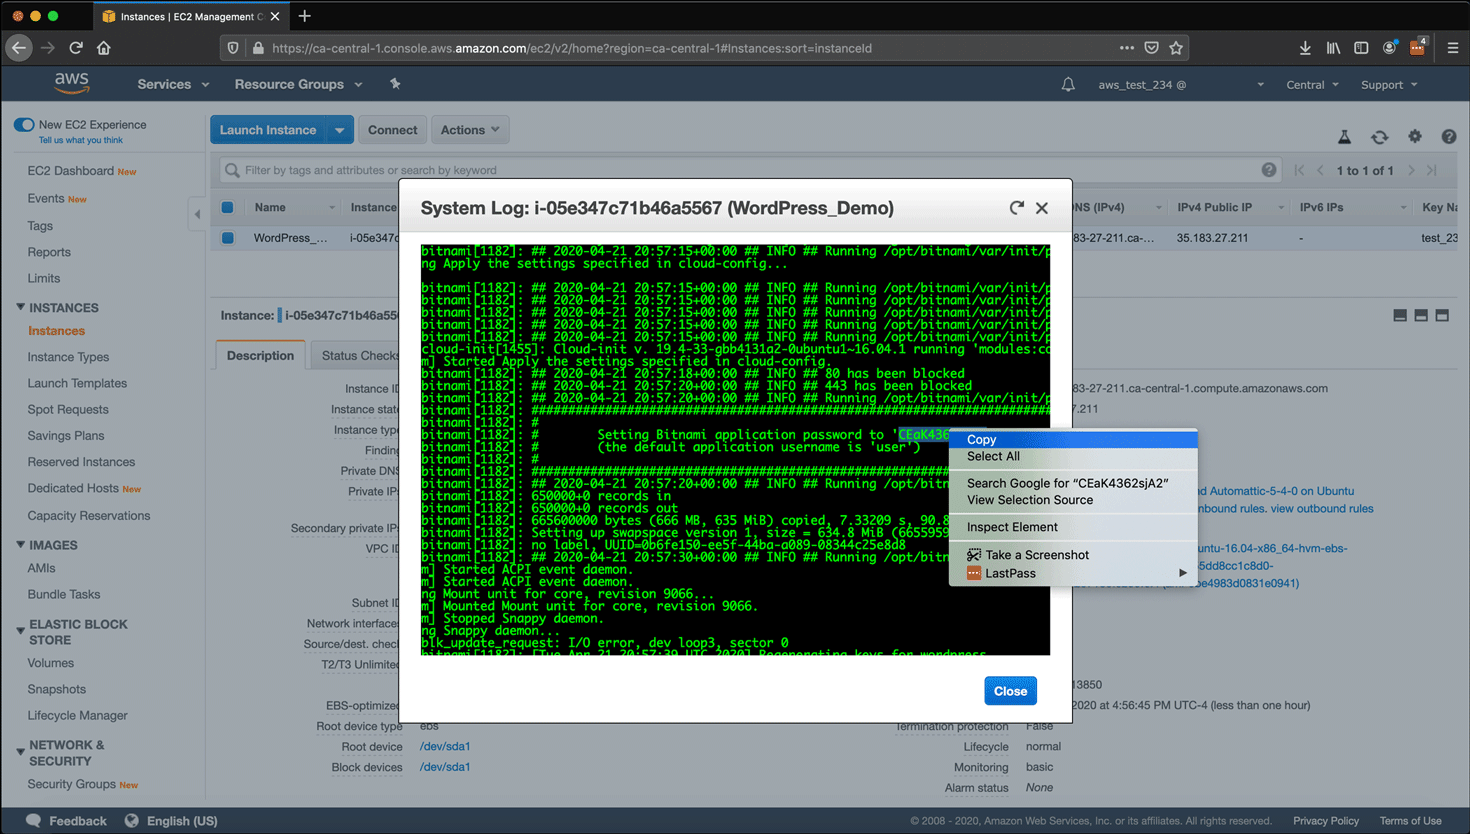
- Click Actions, then Instance Settings, then Get System Log.
- In the System Log pop-up, scroll down the log and find a block of text that is boxed in with
#characters and find this text:Setting Bitnami application password to ‘xxxxxxxxxxxxxx’(the default application username is ‘user’)- The
‘xxxxxxxxxxxxxx’will be is a randomly generated alphanumeric string that is your password for many admin privileges on the instance; the default username will always beuser. - Copy this password, take a screenshot of it, or both. Like your key pair, it is very important that you keep and protect the password. If you lose it, you lose the privileges you need to manage the server and your WordPress database. They are also the credentials you use to log in to WordPress for the first time.
- After keeping that password in a safe place, click Close.
- The
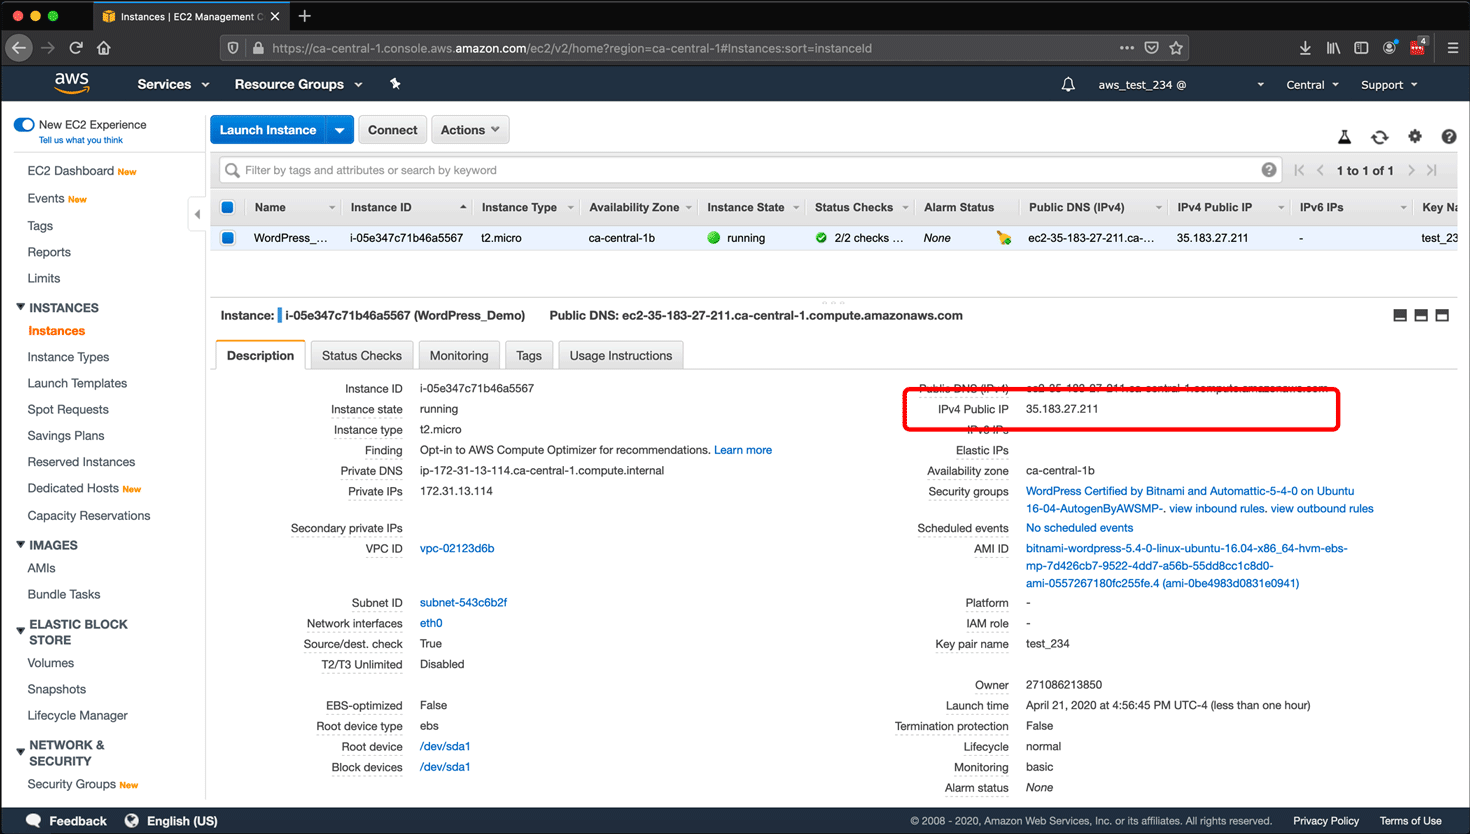
- Now it is time to visit the new WordPress site. With the instance still selected, look for the Description tab and find the IPv4 Public IP field, which shows your instance’s IP address. Click the IP address and a copy icon will appear. Copy the address.
- Open a new tab in your browser, paste the IP address into the address bar, and press
Enter. Your new WordPress site’s home page should load.
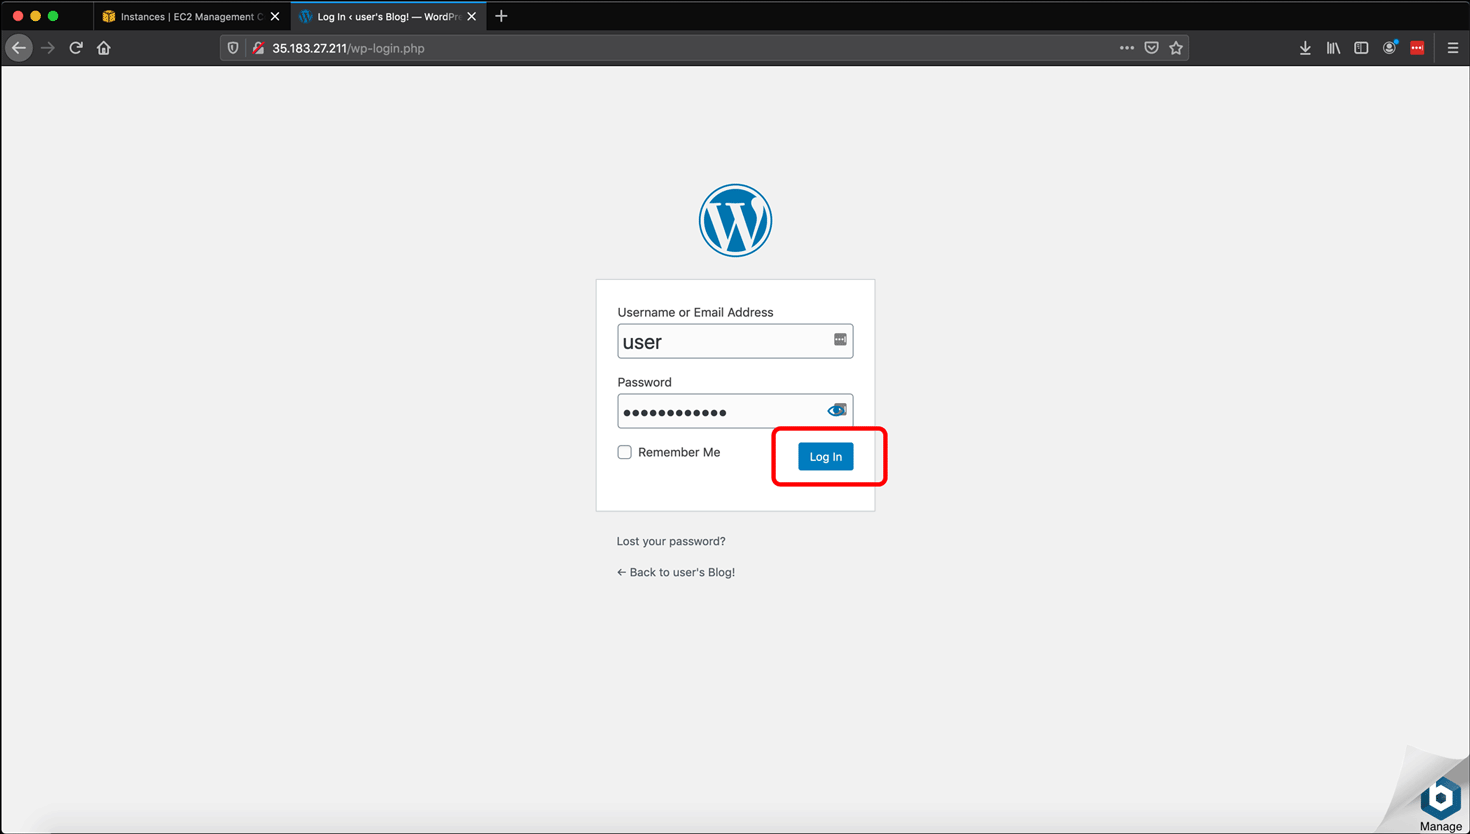
- Click in your browser’s address bar and type /wp-login.php after the IP address to create the default login URL for all WordPress sites. Press
Enter.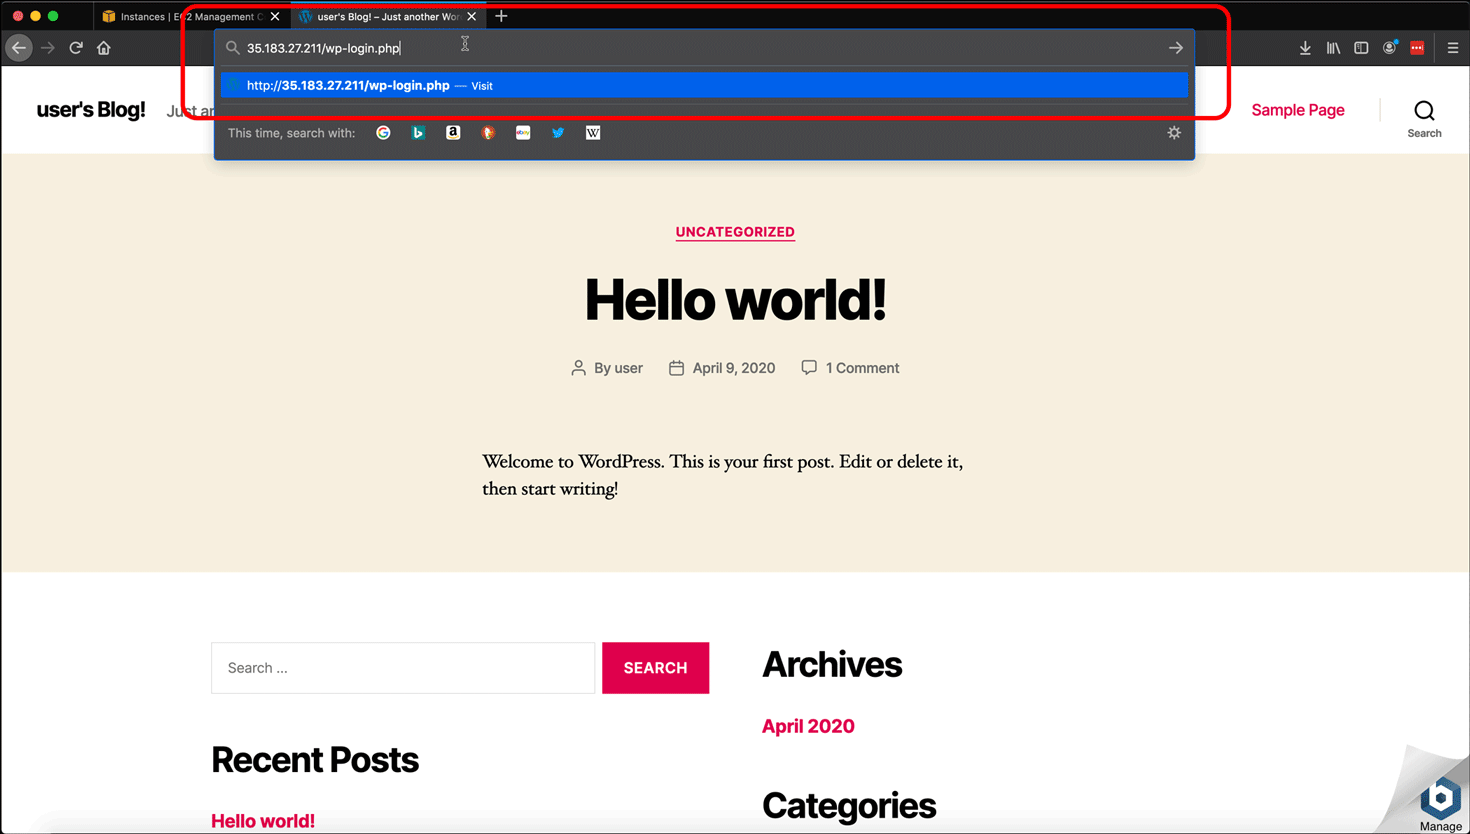
- The new WordPress site’s login page loads.
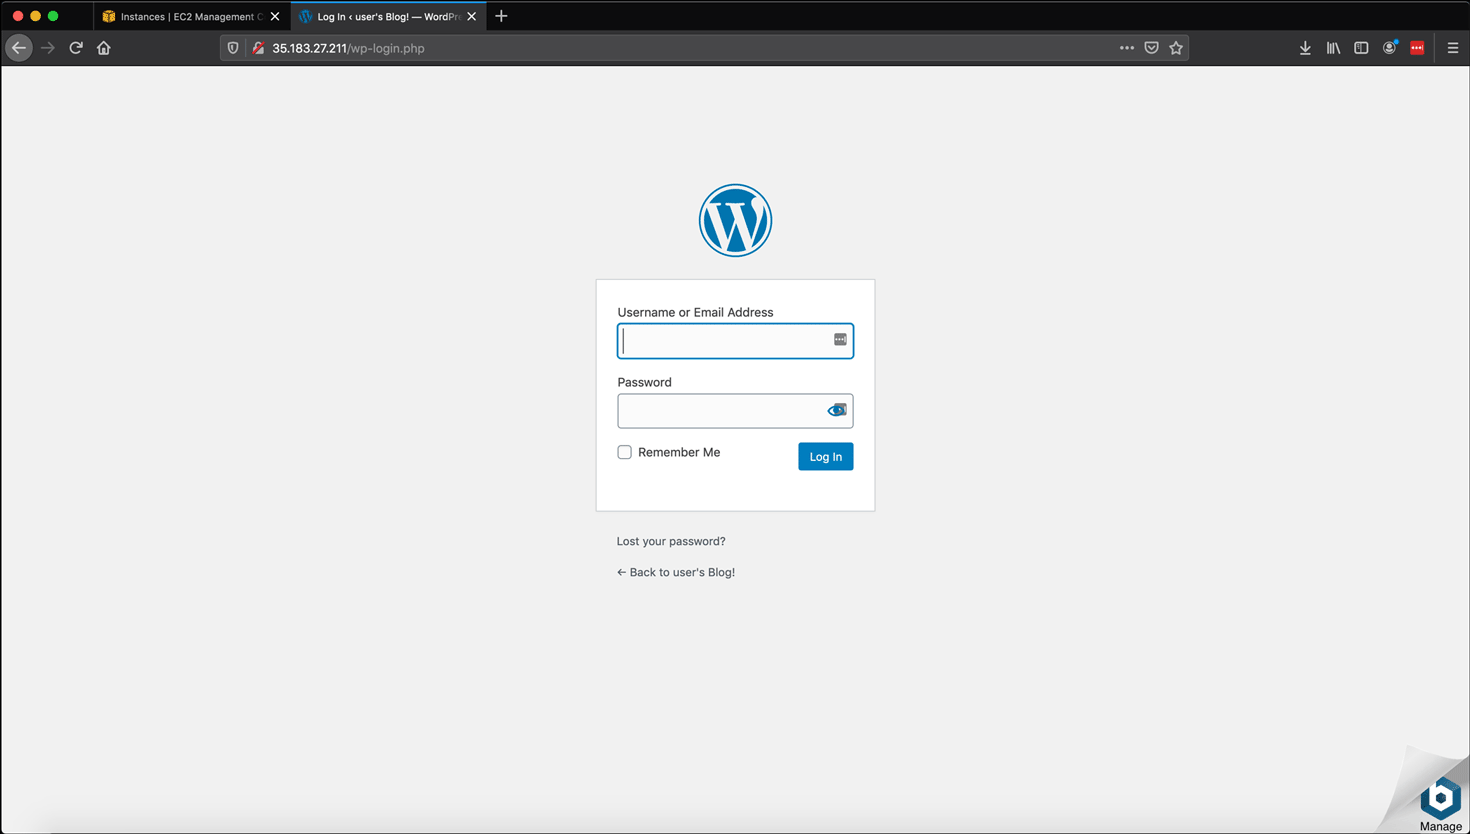
- Remember the EC2 System Log pop-up and the password? We are using that same password.
- Enter your credentials: the username is user and the password is from the EC2 System Log.
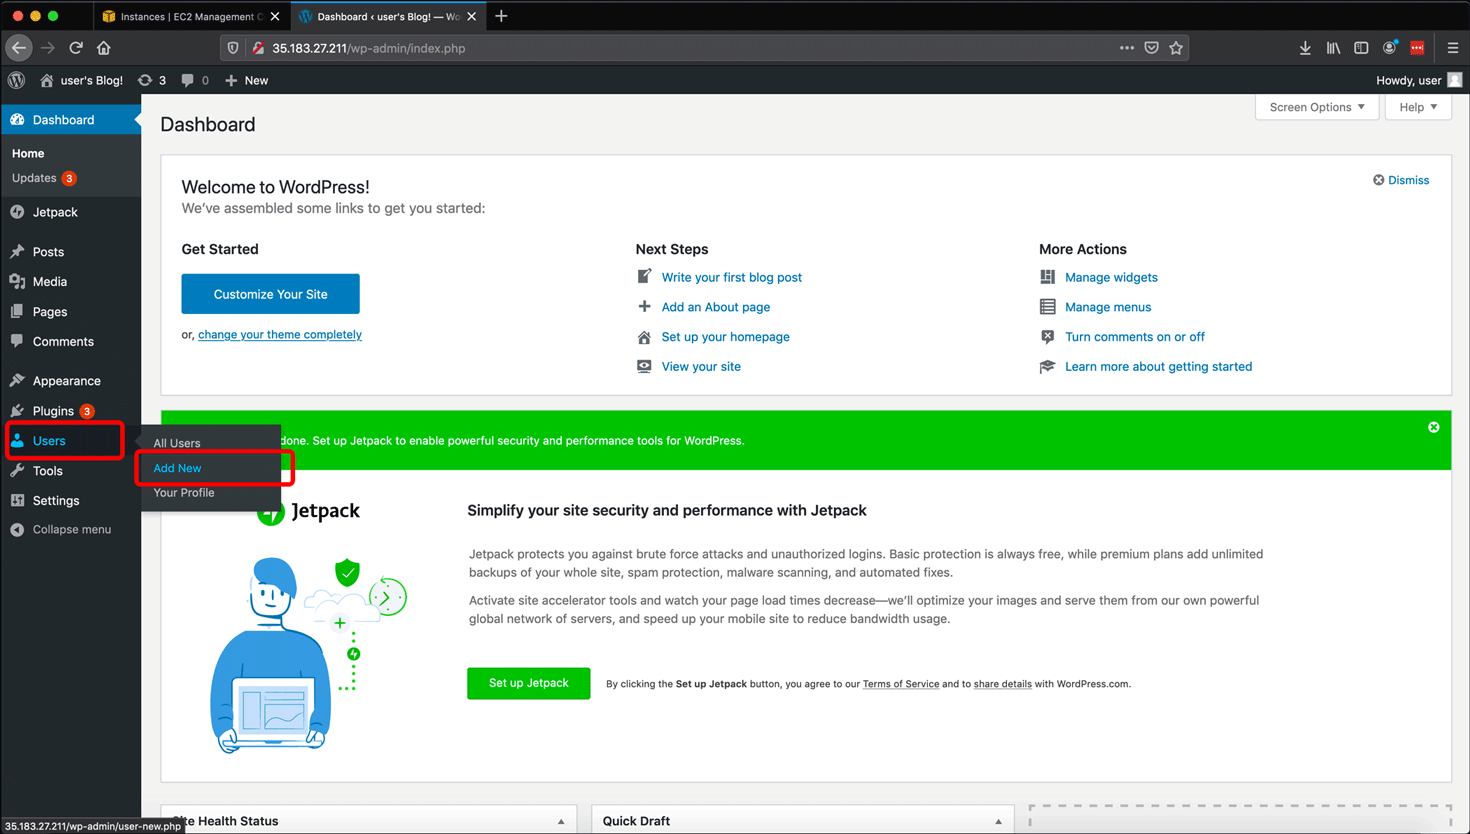
- You are now logged in to the WordPress site’s WP admin section. You can start building a new website, or migrate content from an existing WordPress site. However, the first thing I would do is click Users > Add New and create a new administrator account so you do not need to keep using the instance’s admin credentials created by the EC2 instance.
Now that you have an EC2 instance running a WordPress installation, see Managing an Amazon Web Services (AWS) EC2 Instance: Naming Practices for some tips on how to name and easily identify your instances and the volumes associated with them.