Update: May 2020
This article was originally created in December 2018. I will not be updating it going forward.
Although the instructions remain valid, if you are using the WordPress Certified by Bitnami and Automattic Amazon Machine Image to create an EC2 instance to host a WordPress site, Bitnami has more recently integrated its own Let’s Encrypt certificate client into the Bitnami Helper Tool, which you can read more about in WordPress on Amazon EC2: Connect to an Instance via SSH.
This is part of my Introduction to Installing Let’s Encrypt Certificates for WordPress on Amazon Web Services (AWS) tutorial.
This post shows you to use your EC2 instance’s command-line interface to download and install Lego, a Let’s Encrypt client written in the Go programming language. Lego will allow you to create and manage SSL/TLS certificates from the Let’s Encrypt Certificate Authority.
In this example I am installing a Let’s Encrypt certificate on a LAMP-stack virtual server (in this case an EC2 instance from Amazon Web Services) over Secure Shell (SSH). After that, I’ll show you how to download a copy of your certificates and account information using an FTP client. I am using the macOS Terminal, which is Unix-based, but the Linux commands will be the same regardless of what command-line interface you are using. I am also using the Cyberduck FTP client, but any FTP client should work.
- Install an SSL/TLS Certificate from Let’s Encrypt on Your EC2 Instance
- Download a Copy of Your Certificate Information from the Server
Warning
- When working with SSL/TLS certificates, be very careful. If you are planning on adding, renewing, or removing an SSL/TLS certificate, make sure you create a complete backup of your website before trying anything.
- If you are working with AWS EC2 instances, always take a snapshot of the instance’s storage volume before you try any of these steps. If anything goes wrong, you can use the snapshot as part of your recovery plan.
Install an SSL/TLS Certificate from Let’s Encrypt on Your EC2 Instance
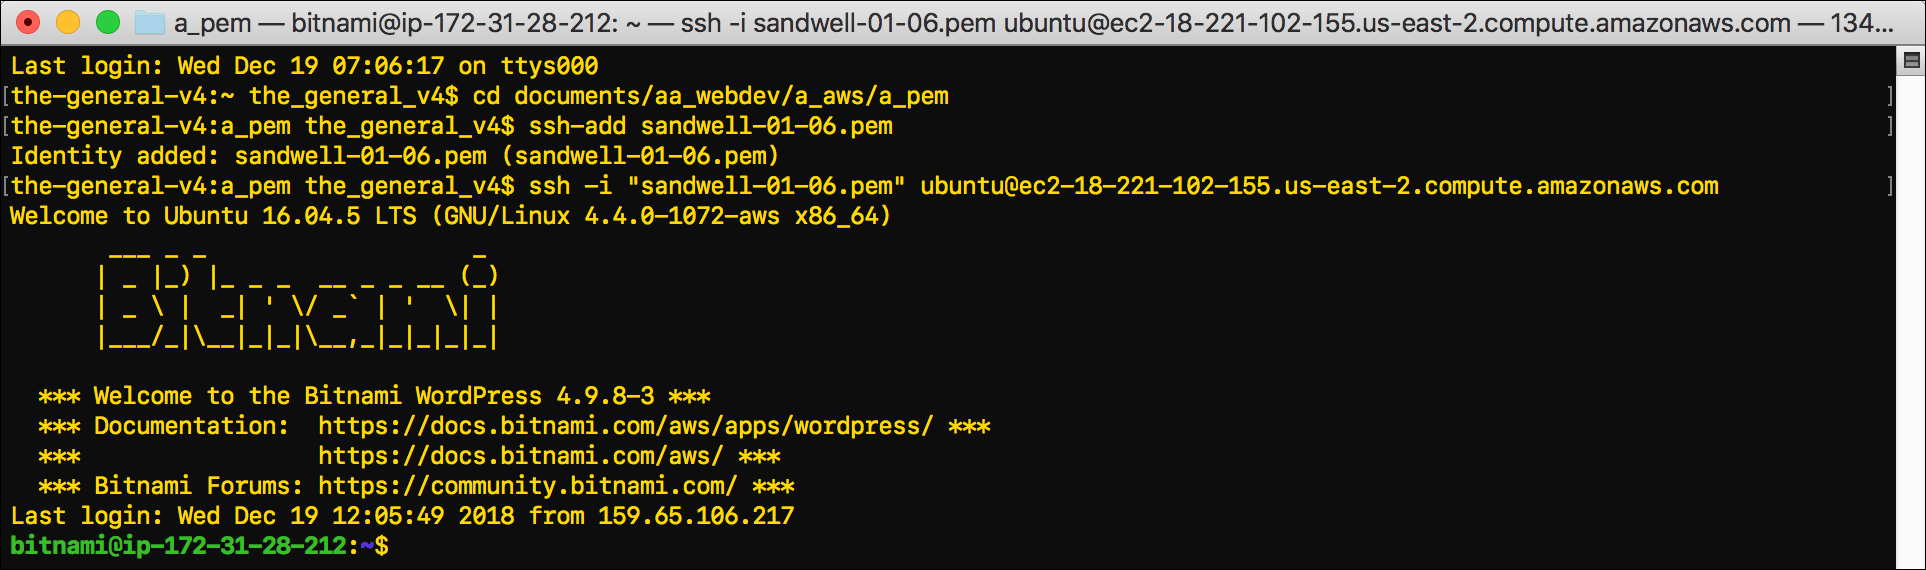
- Connect to your EC2 instance by following the steps in WordPress on Amazon EC2: Connect to an Instance via SSH.

- Type
cd /tmpand pressEnter.tmpis the temporary directory where you can install the Lego client.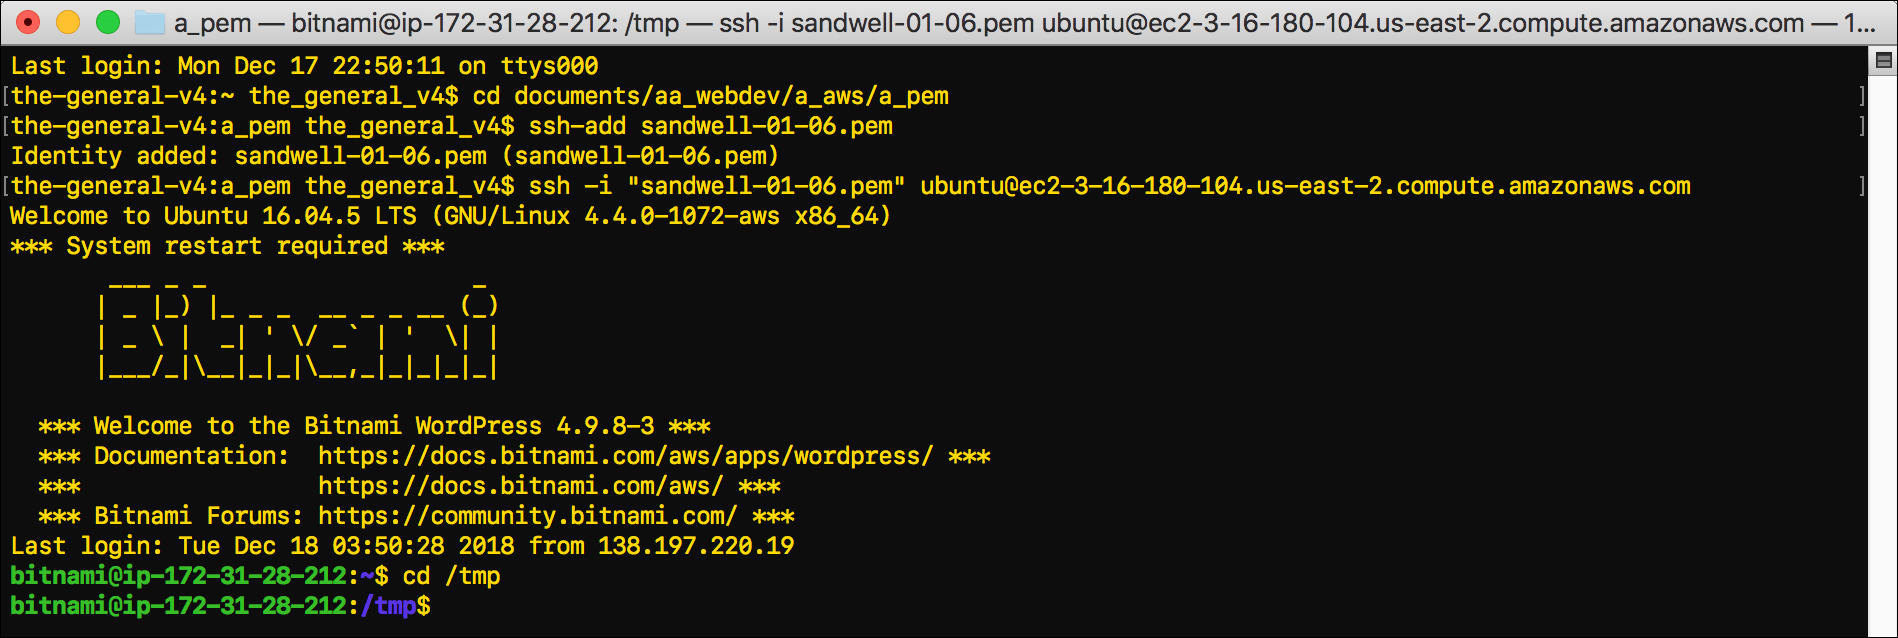
- Use the
curlcommand to download the correct version of Lego from Github:
$ curl -s https://api.github.com/repos/xenolf/lego/releases/latest | grep browser_download_url | grep linux_amd64 | cut -d '"' -f 4 | wget -i -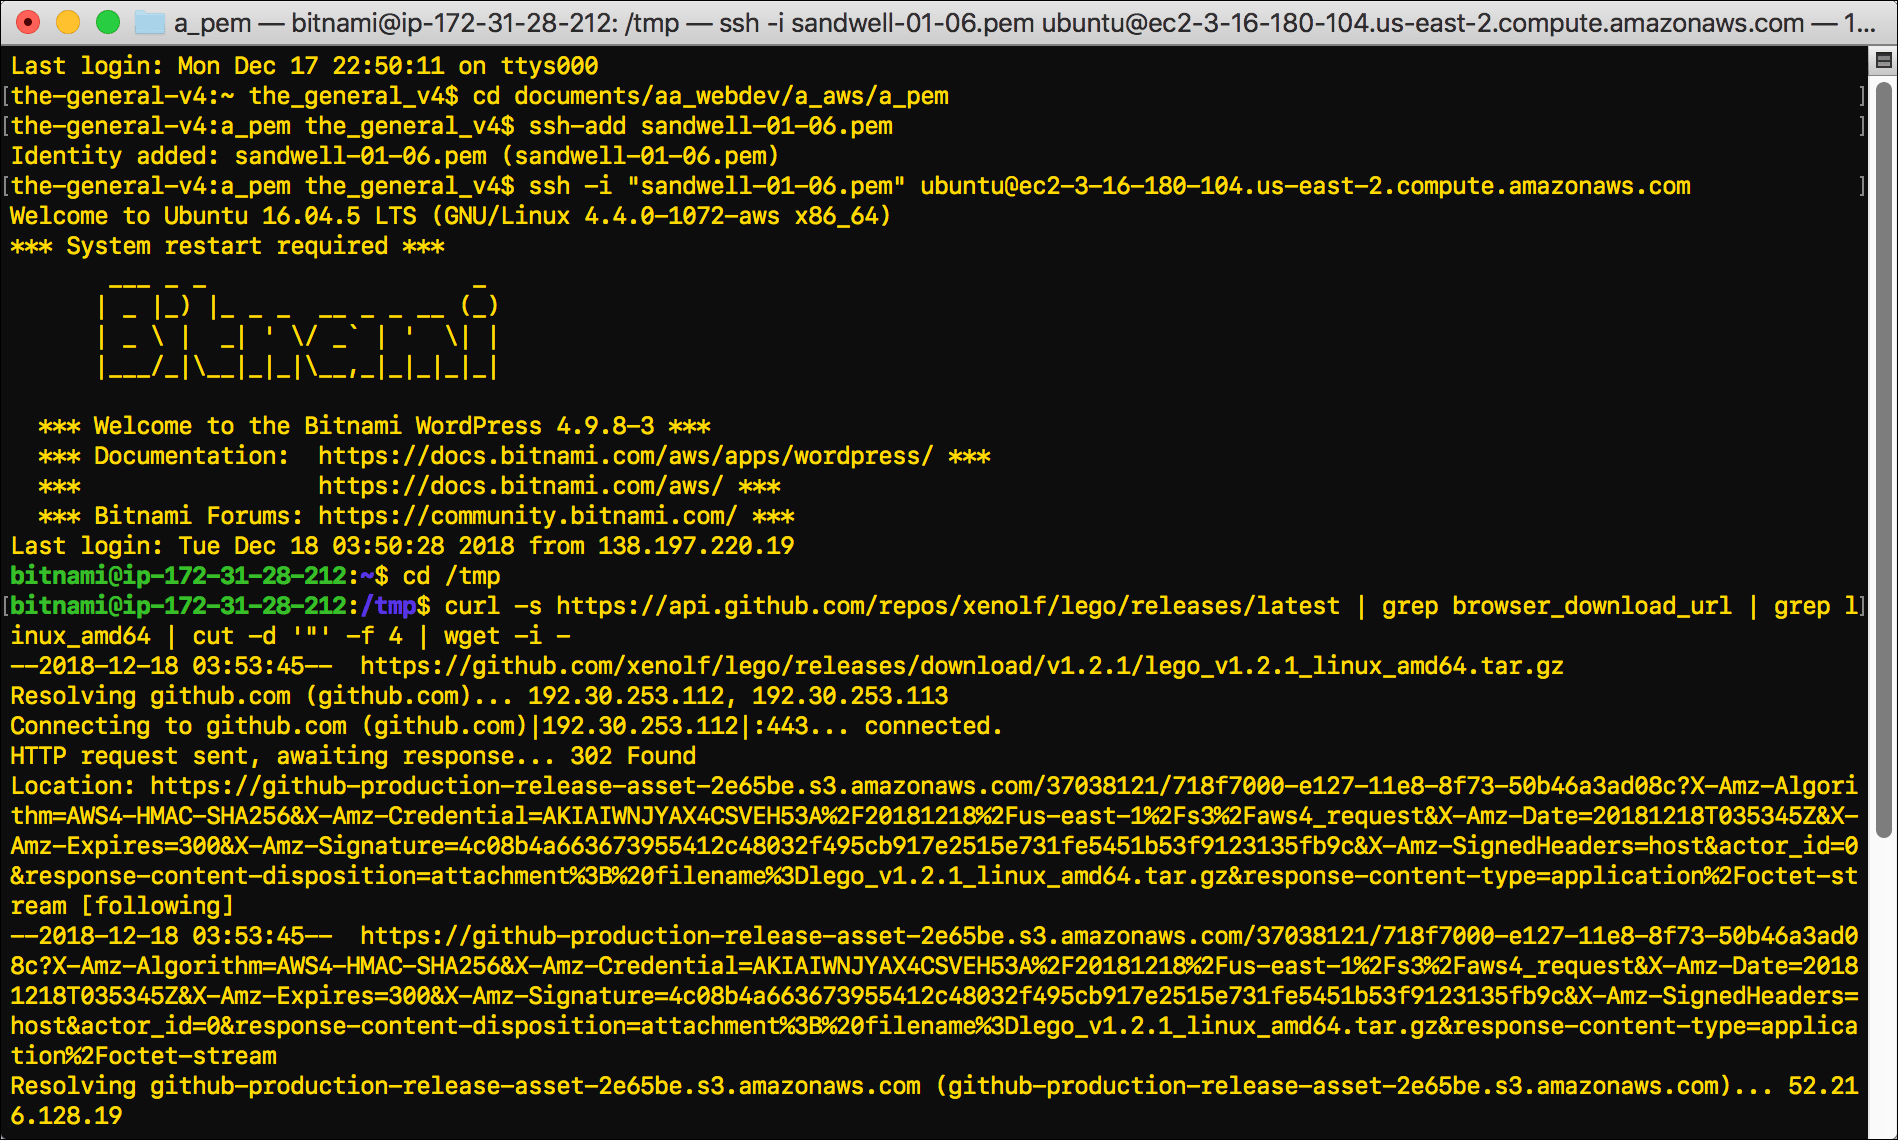
- Terminal will output a lot of text. Towards the bottom of it, look for
Saving to:and the name of the gzip file that the curl command downloaded. In this example, it saysSaving to: 'lego_v1.2.1_linux_amd64.tar.gz'. Below that, the file name will appear again.
- Take the version number from that file name and enter:
tar xf lego_vX.Y.Z_linux_amd64.tar.gz- The
command tar xfextracts the Lego client. - Replace the
_vX.Y.Z_with the version number from the file name. In this example, that’s_v1.2.1_.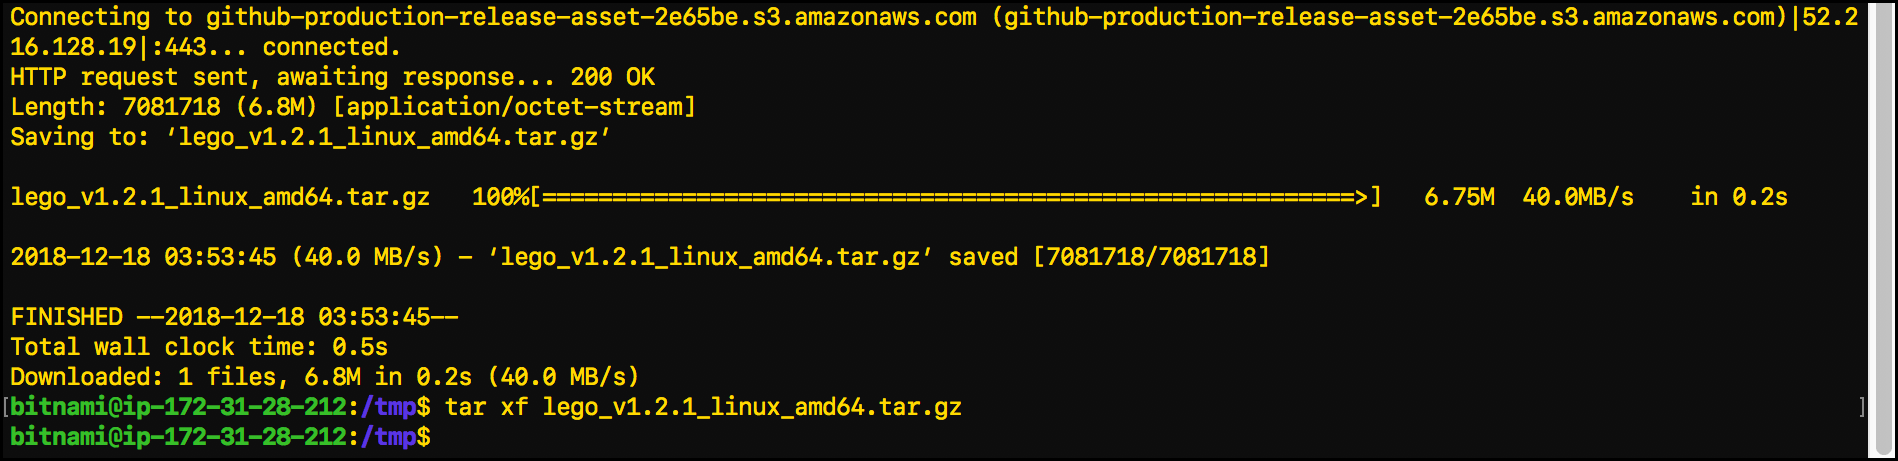
- The
- Use the
mvcommand to move Lego into its own directory:sudo mv lego /usr/local/bin/lego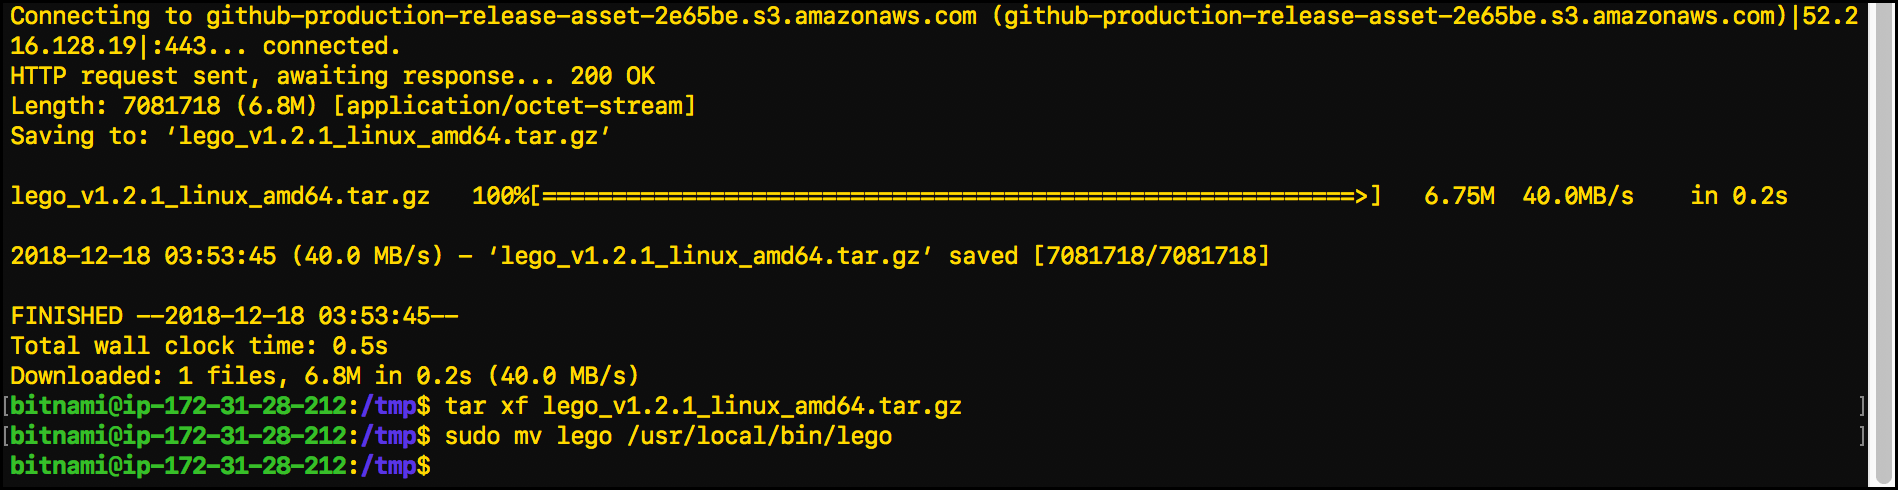
- Stop the httpd service (the Apache server), along with the MySQL and PHP-FPM services:
sudo /opt/bitnami/ctlscript.sh stop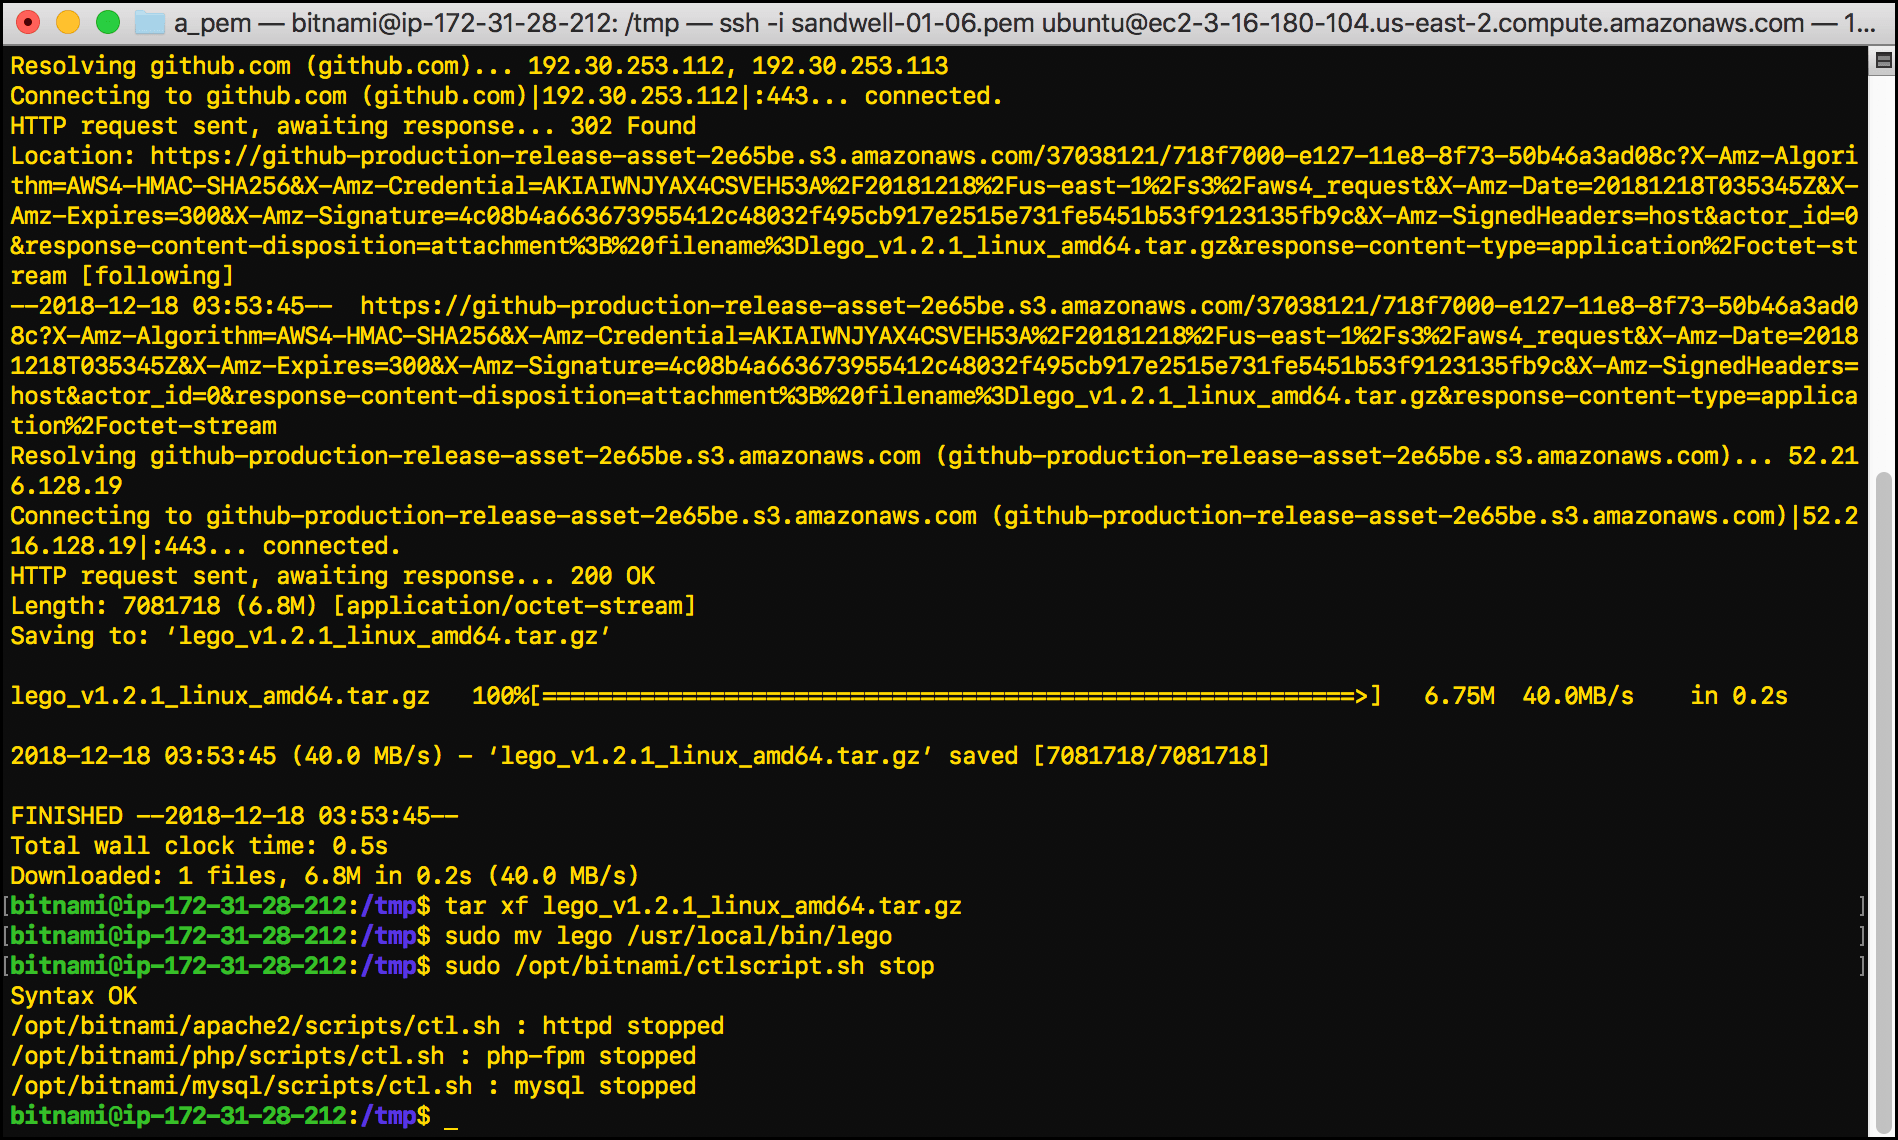
- Enter the following command to run the Lego client and create a certificate on the server:
sudo /usr/local/bin/lego --email="email@email.com" --domains="www.domain.com" --path="/etc/lego" run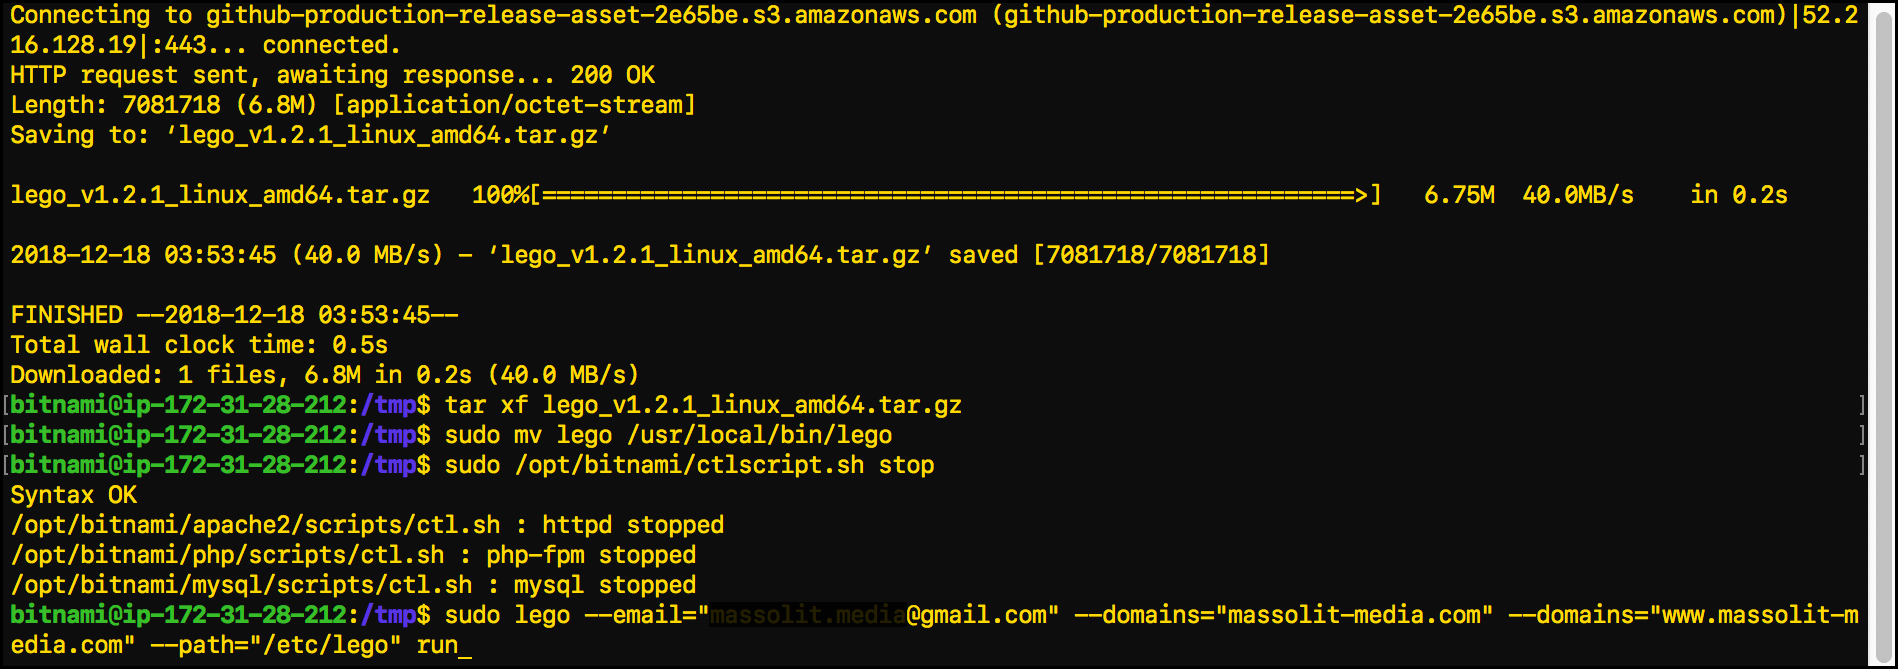
- Replace
email@email.comwith the email address where you want to receive updates about your certificate, including warnings when your certificate is about to expire. - Replace
domain.comwith the domain name for the Let’s Encrypt certificate that you are renewing. Includewww.as needed.
- Replace
- After a few lines of output, the command-line interface displays
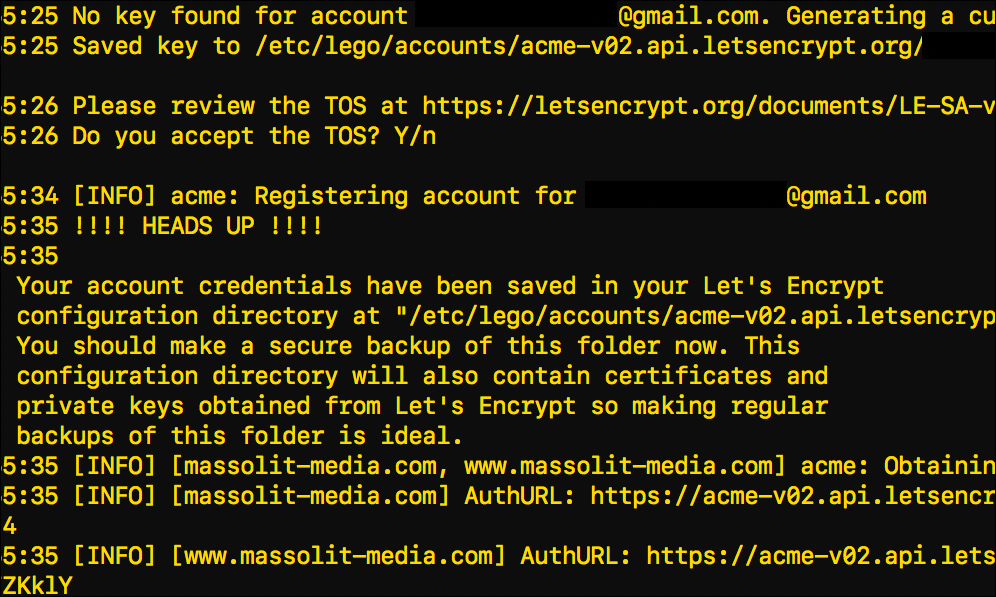
Do you accept the TOS? Y/n. You are being asked to accept the Let’s Encrypt Terms of Service. To continue, typeyand pressEnter.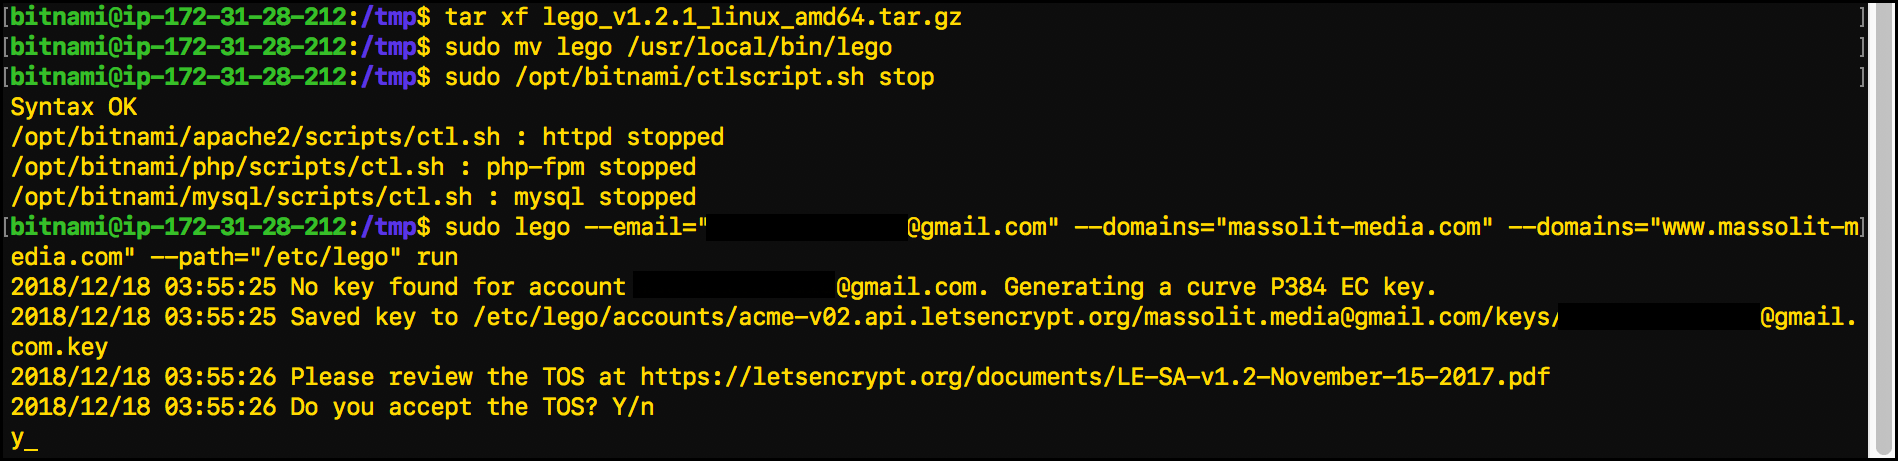
- Enter the following commands. You can copy and paste them directly into Terminal to execute them all at once, or you can enter them one by one. These commands are specific to servers using Apache, which my EC2 instance does.
sudo mv /opt/bitnami/apache2/conf/server.crt /opt/bitnami/apache2/conf/server.crt.old: This renames the existingserver.crtfile that already existed on the instance (a self-signed internal certificate) asserver.crt.oldso that it stops being used. The.crtextension identifies the certificate itself, which contains the public key for the server.sudo mv /opt/bitnami/apache2/conf/server.key /opt/bitnami/apache2/conf/server.key.old: This renames the existing, self-signedserver.keyfile that already existed on the instance asserver.key.oldso that it stops being used. The.keyextension identifies the server’s private key.sudo mv /opt/bitnami/apache2/conf/server.csr /opt/bitnami/apache2/conf/server.csr.old: This renames the existingserver.csrfile that already existed on the instance asserver.csr.oldso that it stops being used. The.csrextension identifies the certificate signing request.sudo ln -s /etc/lego/certificates/massolit-media.com.key /opt/bitnami/apache2/conf/server.key: This creates a symbolic link (like an alias or shortcut) between the certificate’s private key (.key) that you just created in/etc/lego/certificates/and theapache2/confdirectory and renames it as server.key so that it can start being used for HTTPS purposes.sudo ln -s /etc/lego/certificates/massolit-media.com.crt /opt/bitnami/apache2/conf/server.crt: This creates a symbolic link between the certificate file (.crt) that you just created in/etc/lego/certificates/to theapache2/confdirectory and renames itserver.crtso that it can start being used for HTTPS purposes.sudo chown root:root /opt/bitnami/apache2/conf/server*: This command will chown any files with the file nameserver(in this caseserver.keyandserver.crt) to root so that the system’srootuser owns them.sudo chmod 600 /opt/bitnami/apache2/conf/server*: Now thatrootowns theserver*files, we are using thechmodcommand to change it so that only the owner (root) can read or write to these files.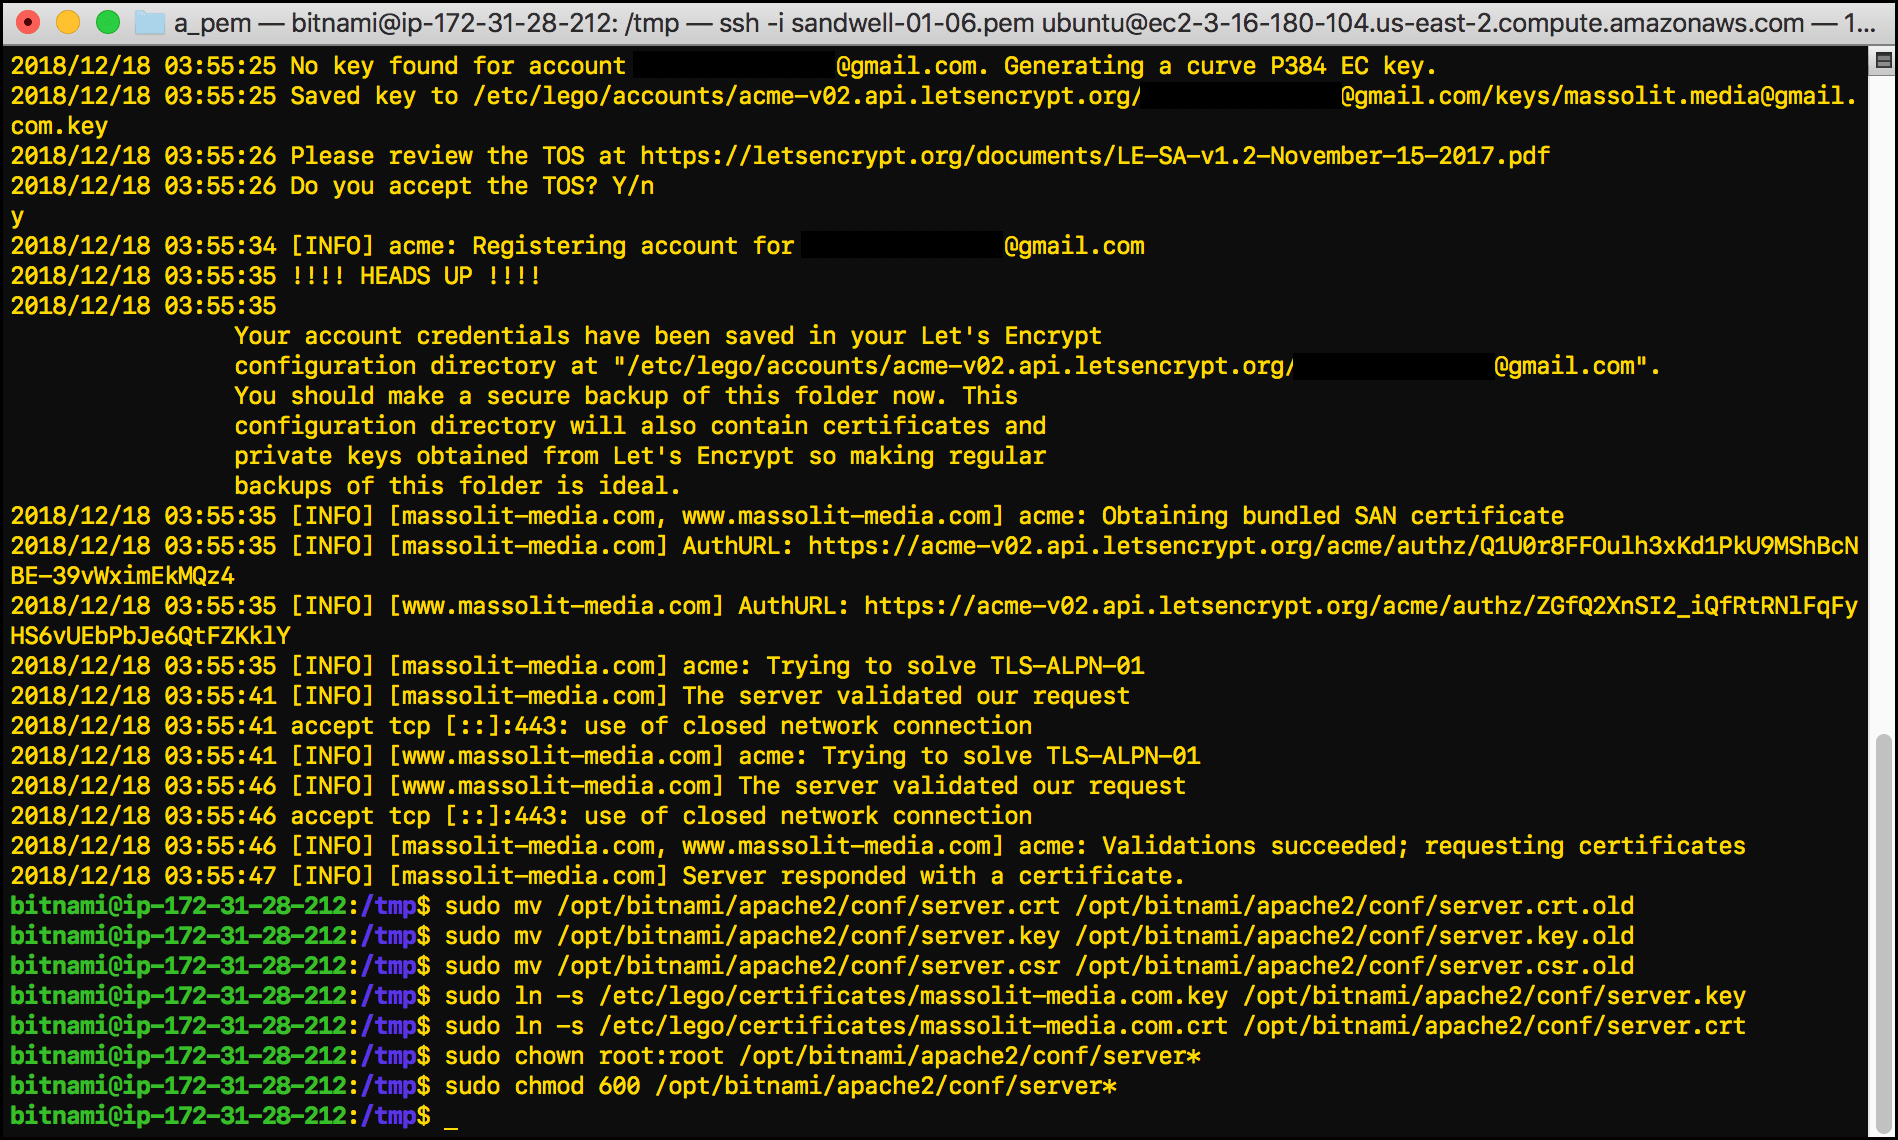
- Use your FTP client to navigate to the
/opt/bitnami/apache2/conf/directory after executing these commands and you will see both the newserver.keyandserver.crtfiles, as well as the original files with.oldappended as a file extension.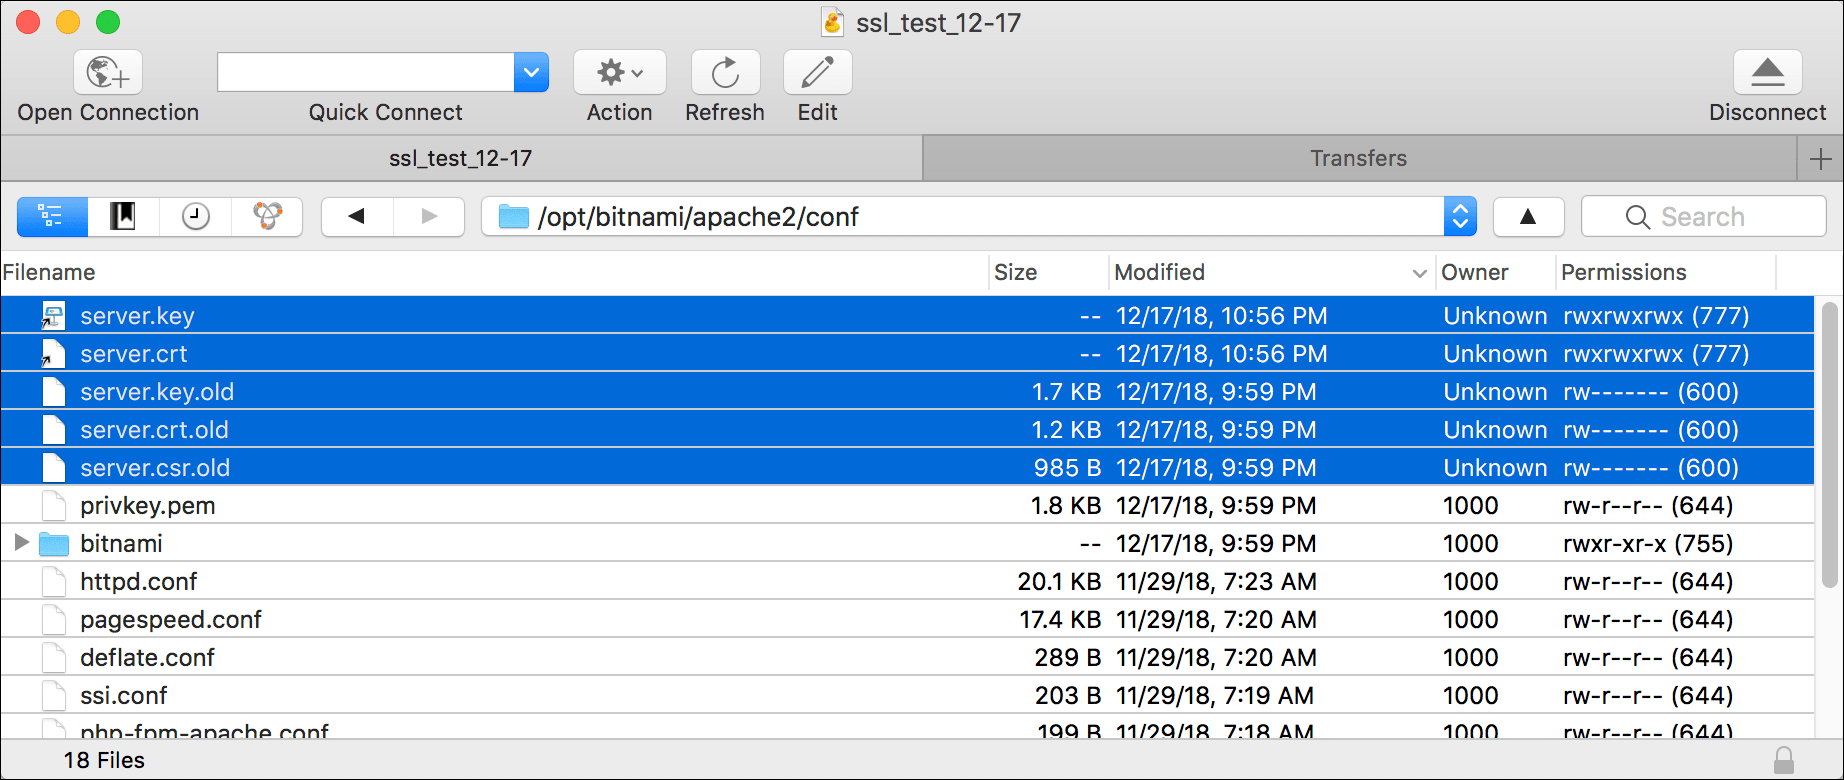
- Restart the Apache server, MySQL, and PHP:
sudo /opt/bitnami/ctlscript.sh start
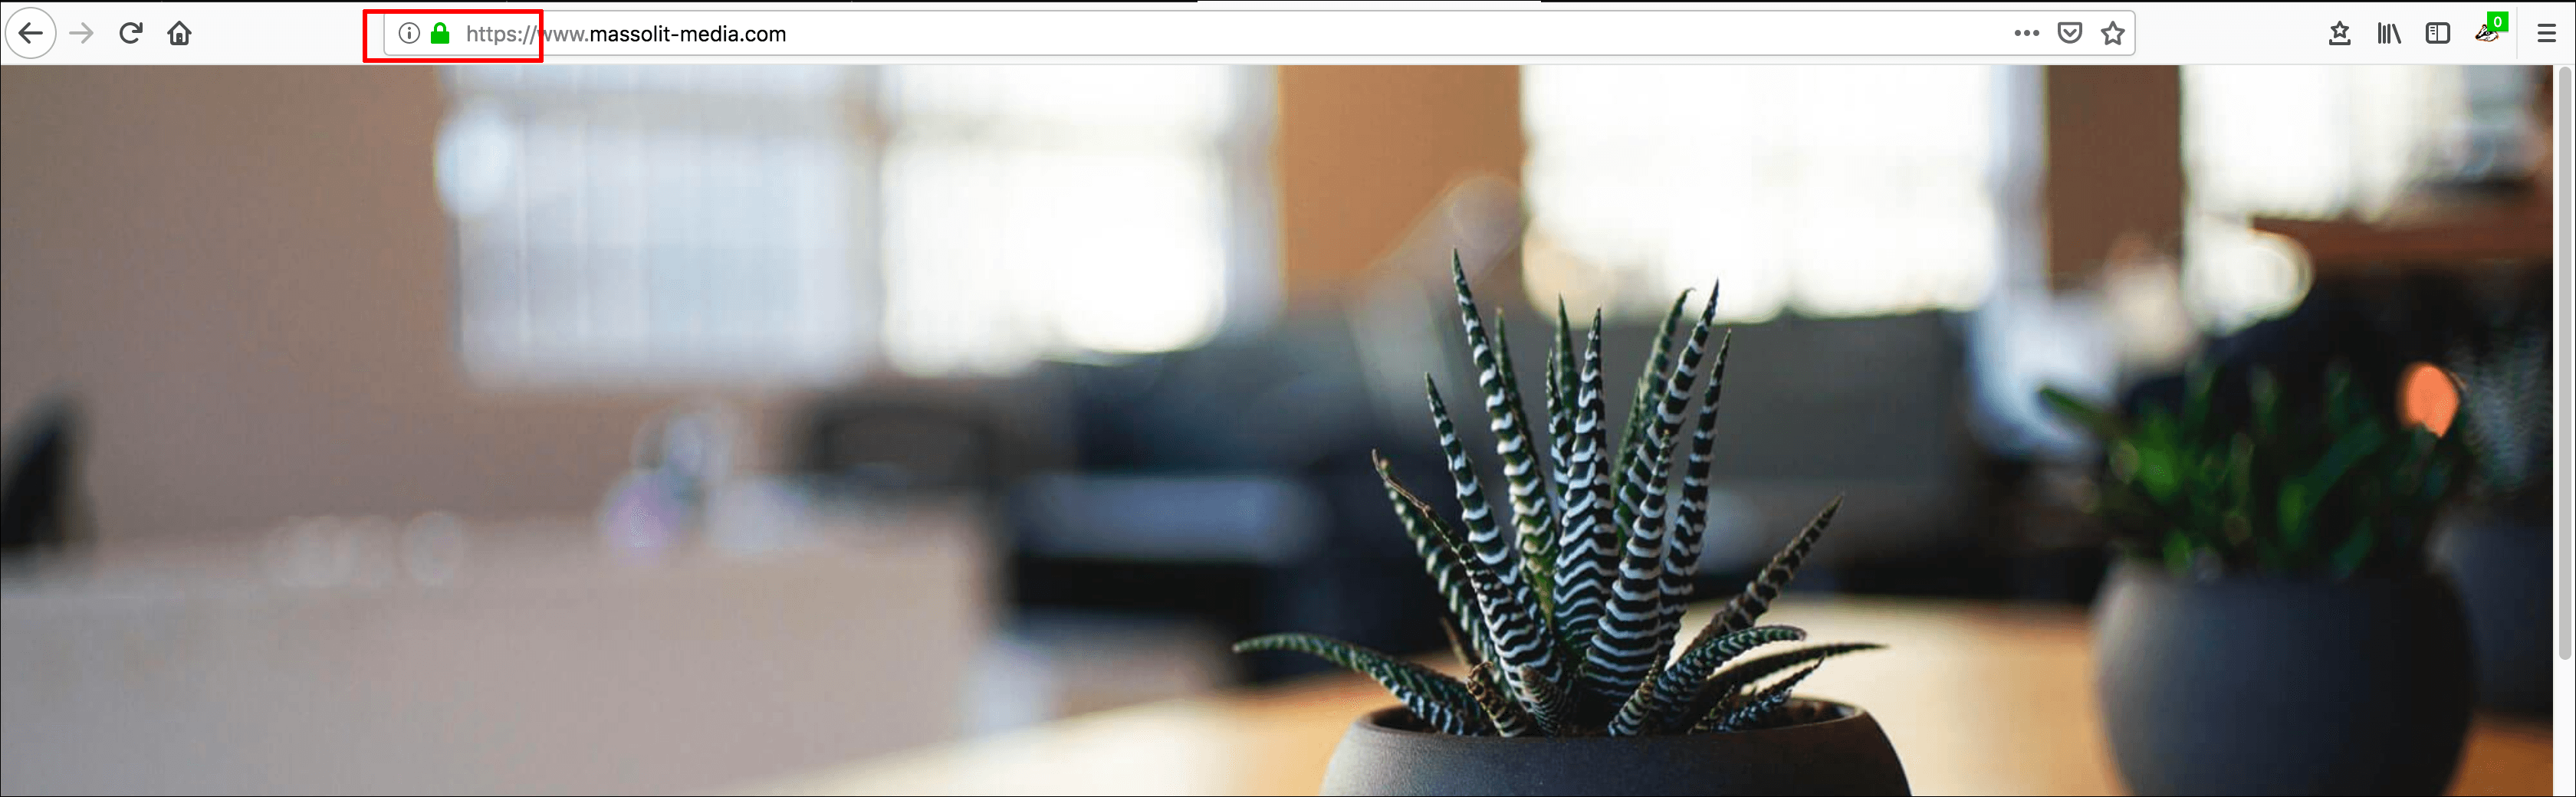
- Now it is time to see if the certificate installation succeeded and your website is now running over HTTPS. Go to your browser of choice.
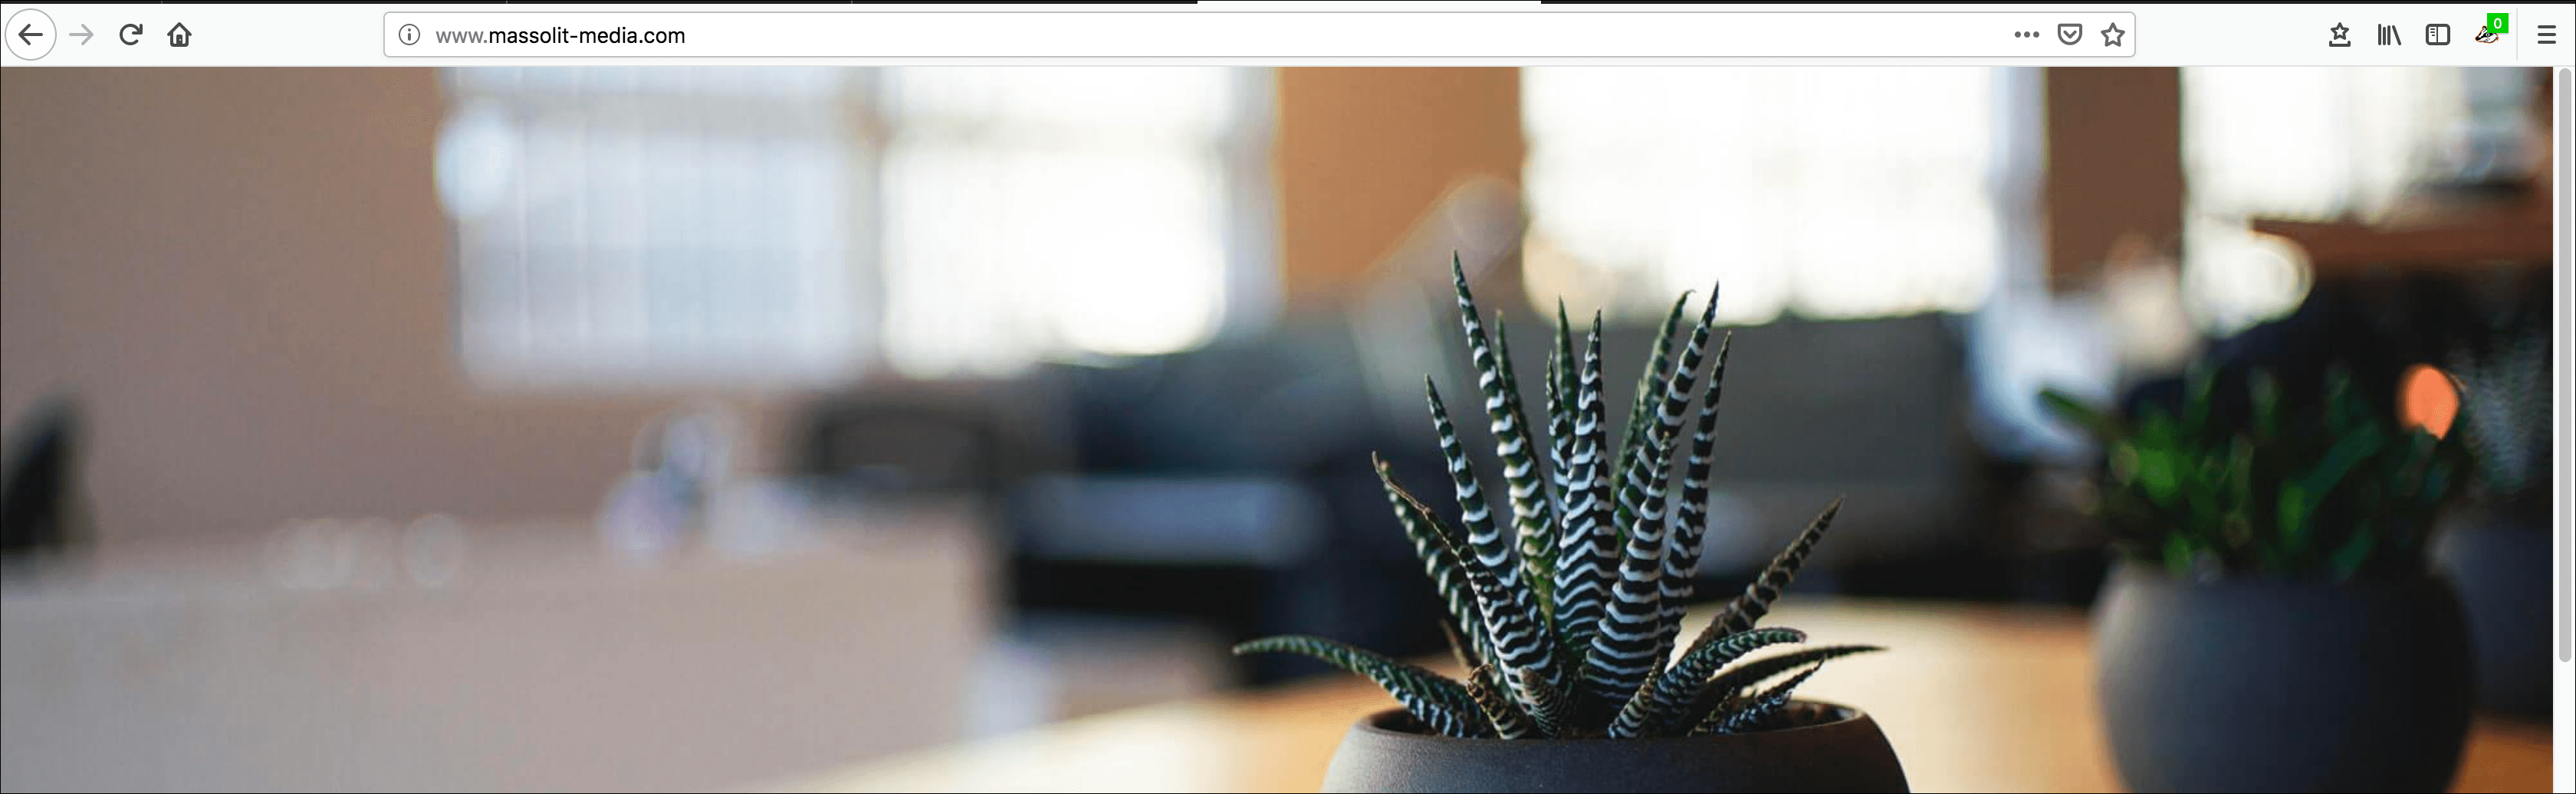
- The first time you visit the site after installing your SSL certificate, you will need to type
https://before the domain name so that the browser tries to connect using HTTPS. PressEnterto go to your website over HTTPS.
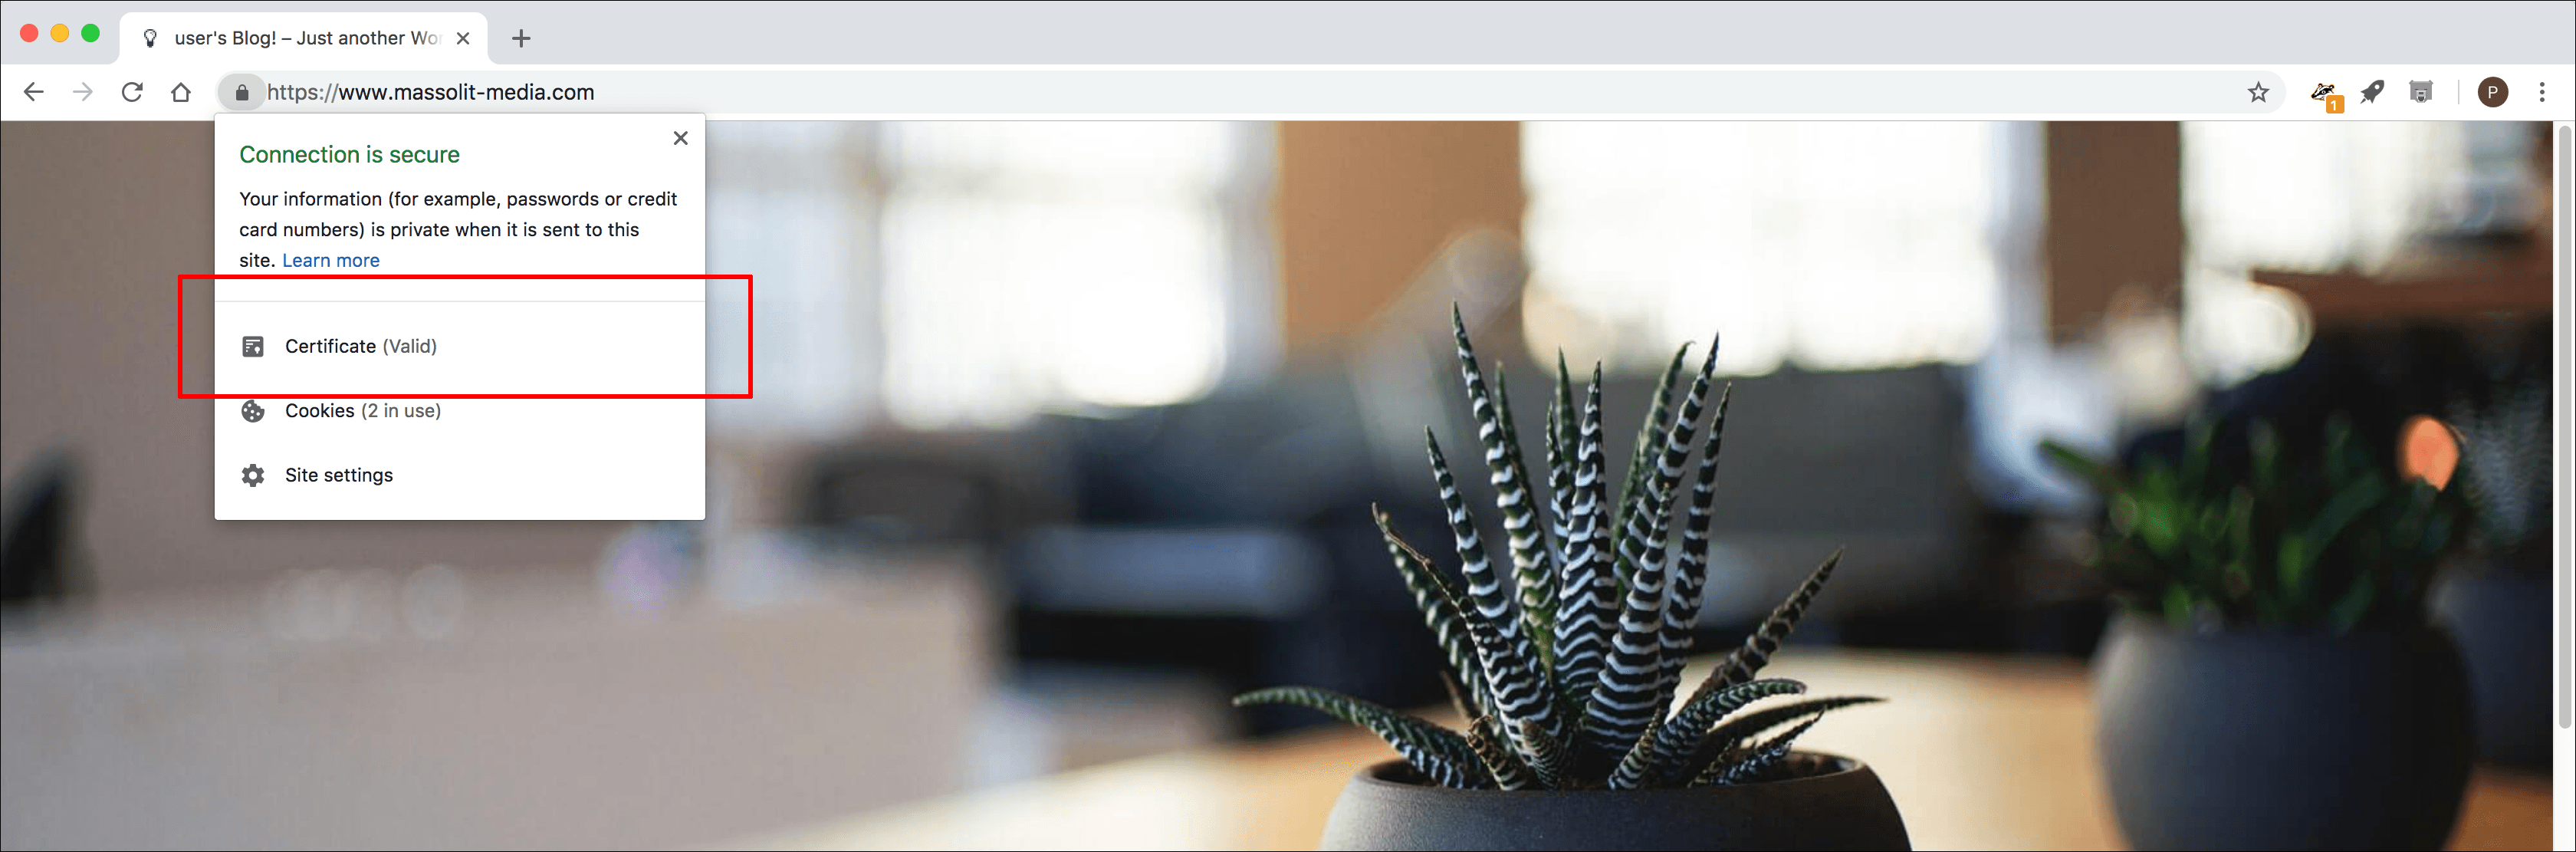
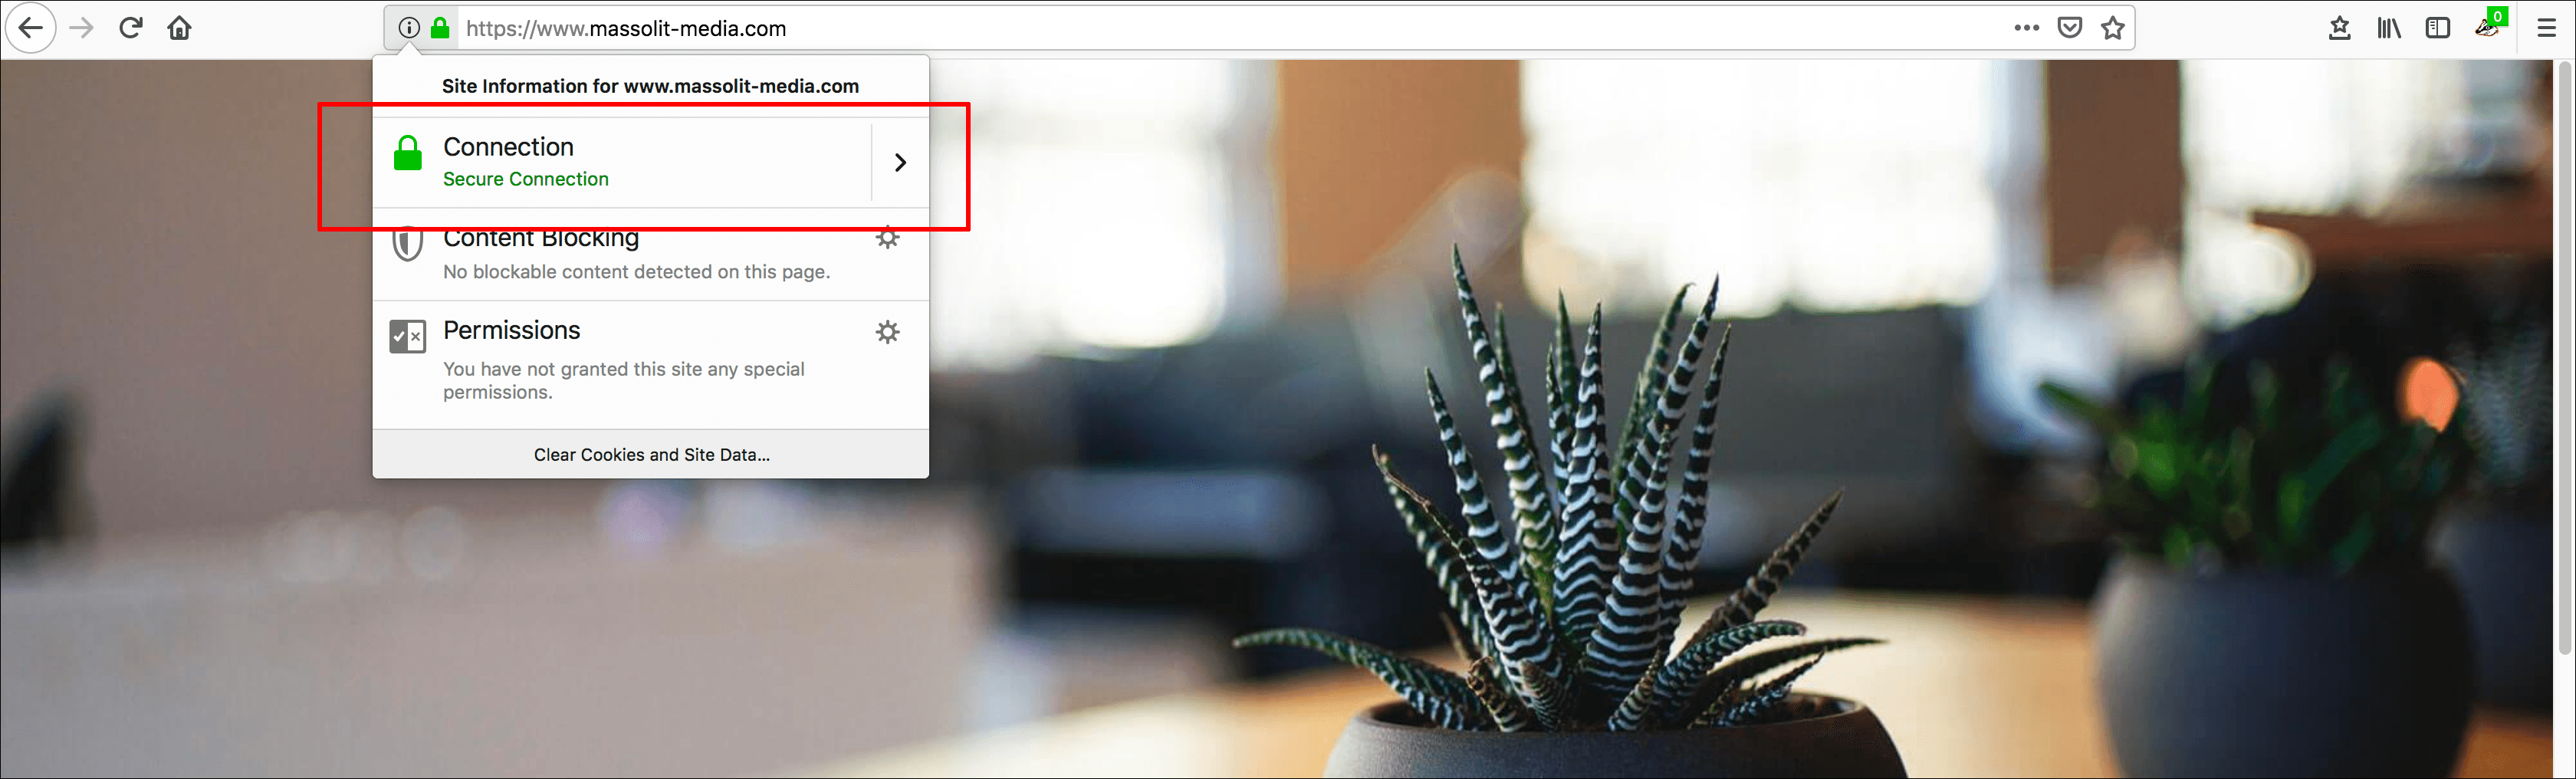
- Your website should load as usual, and your browser’s address bar should display the icon it uses to identify an HTTPS connection (usually a green lock icon). To see information about the certificate, click the green lock or the information icon (i) to the left of the URL in the address bar.
- What you see will vary based on your browser.
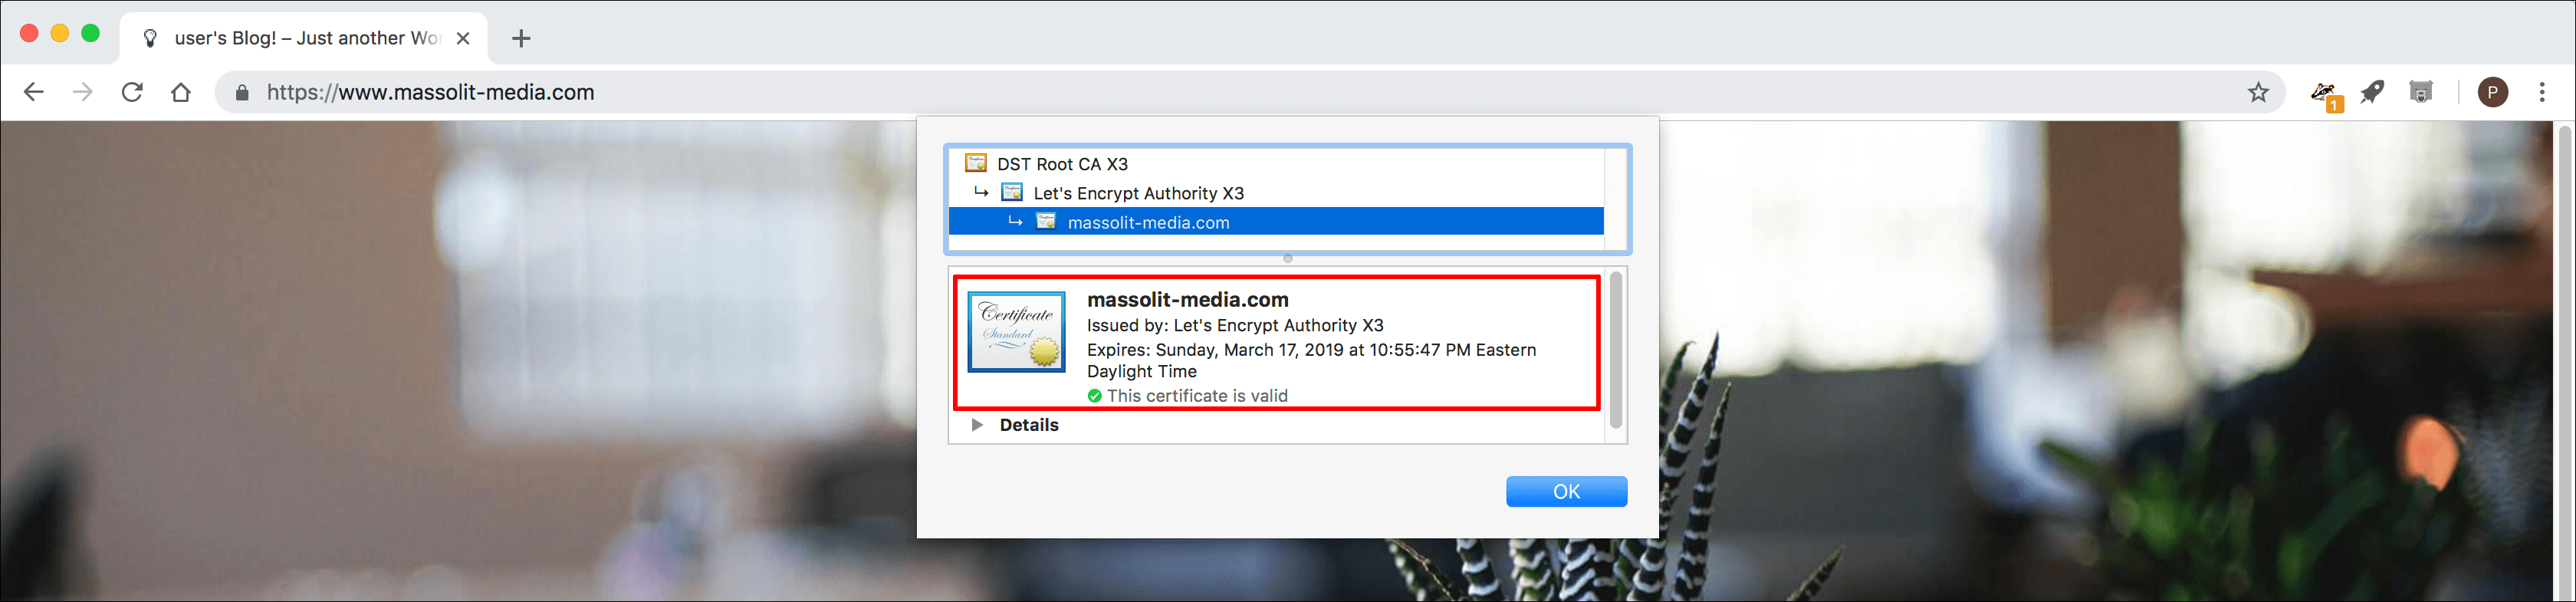
- Chrome will display a link for Certificate. Click it.
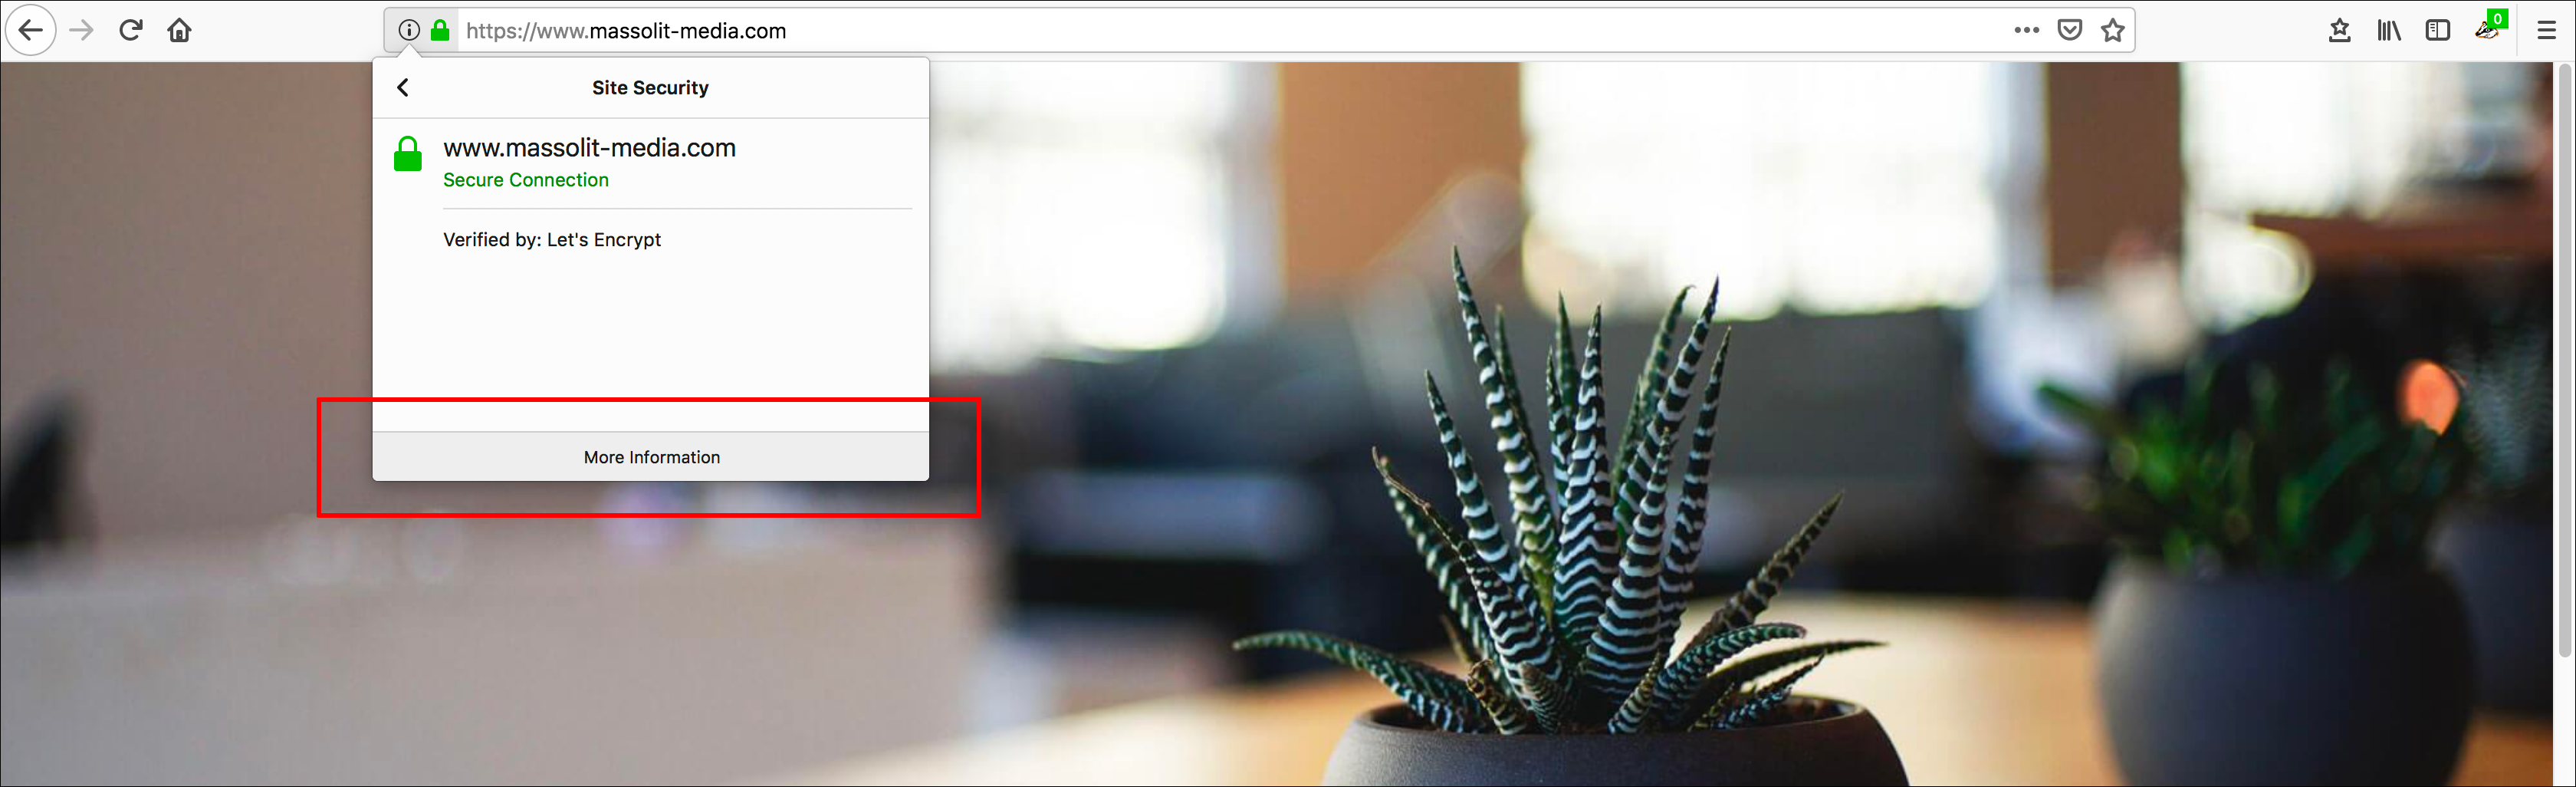
- Firefox will display an icon of a green lock. Click the right arrow next to it.
- Chrome will display a link for Certificate. Click it.
- The details of the SSL certificate will display.
- Chrome will show the details of the certificate, including the expiration date. You can also expand the window and twirl down the arrows to see more information about the certificate.
- In Firefox you will need to click More Information.
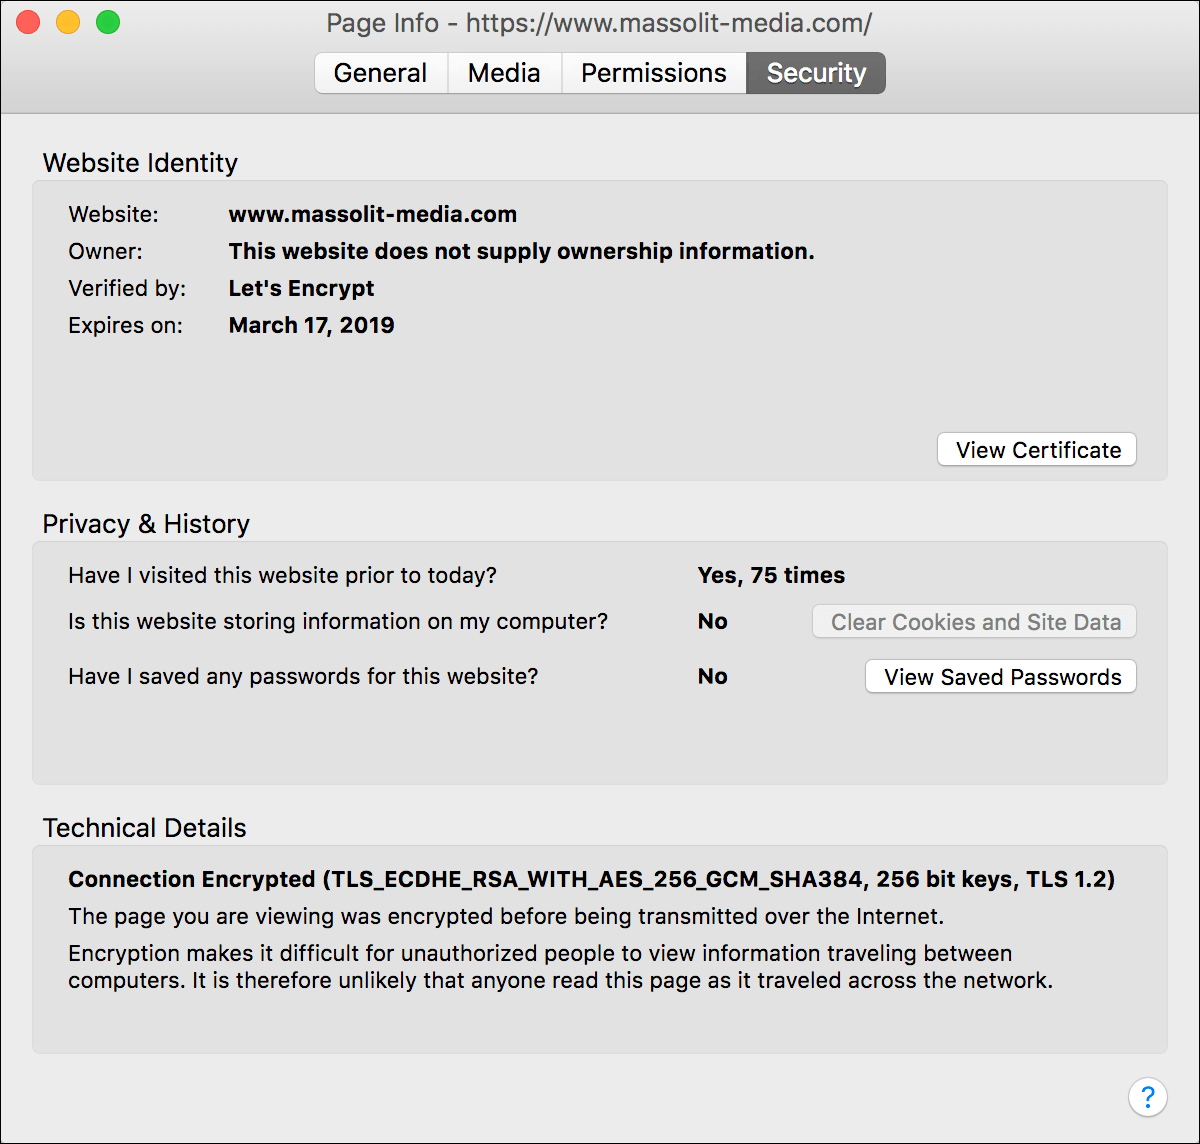
- Firefox will display the Security tab of a Page Info pop-up, including the some details about the certificate and its expiration date. Click View Certificate to see more information about the TLS/SSL certificate.
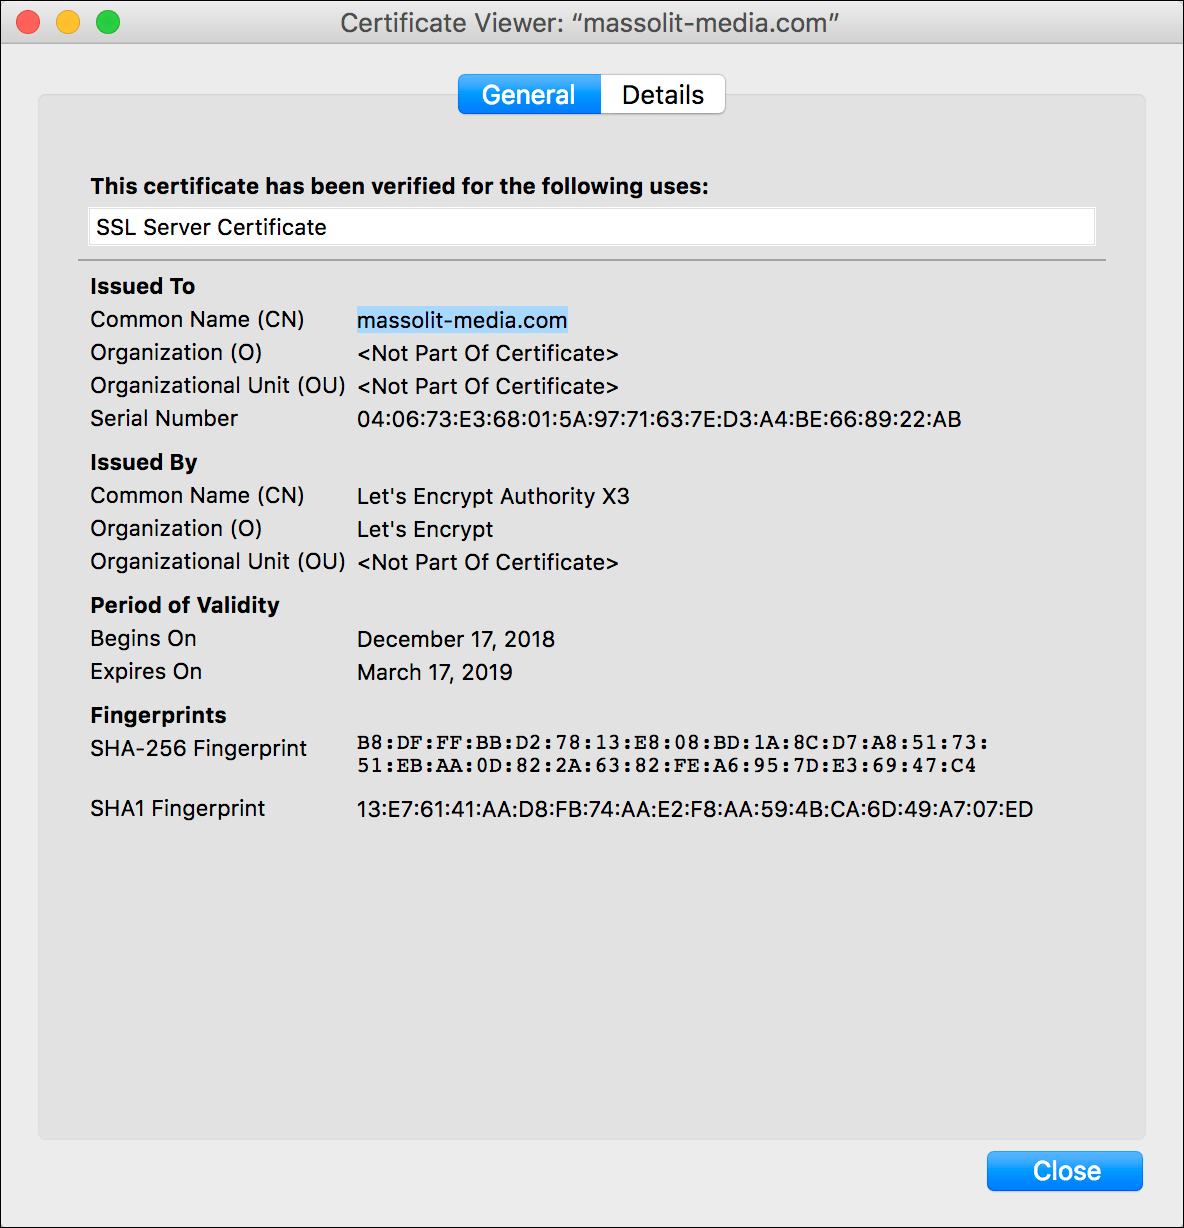
- The Certificate Viewer pop-up will display the complete information about your new SSL/TLS certificate.
- Firefox will display the Security tab of a Page Info pop-up, including the some details about the certificate and its expiration date. Click View Certificate to see more information about the TLS/SSL certificate.
- Chrome will show the details of the certificate, including the expiration date. You can also expand the window and twirl down the arrows to see more information about the certificate.
Download a Copy of Your Certificate Information from the Server
While installing your Let’s Encrypt certificate, you may have noticed these directions display in Terminal:
Your account credentials have been saved in your Let's Encrypt configuration directory at "/etc/lego/accounts/acme-v02.api.letsencrypt.org/email@email.com". You should make a secure backup of this folder now. This configuration directory will also contain certificates and private keys obtained from Let's Encrypt so making regular backups of this folder is ideal.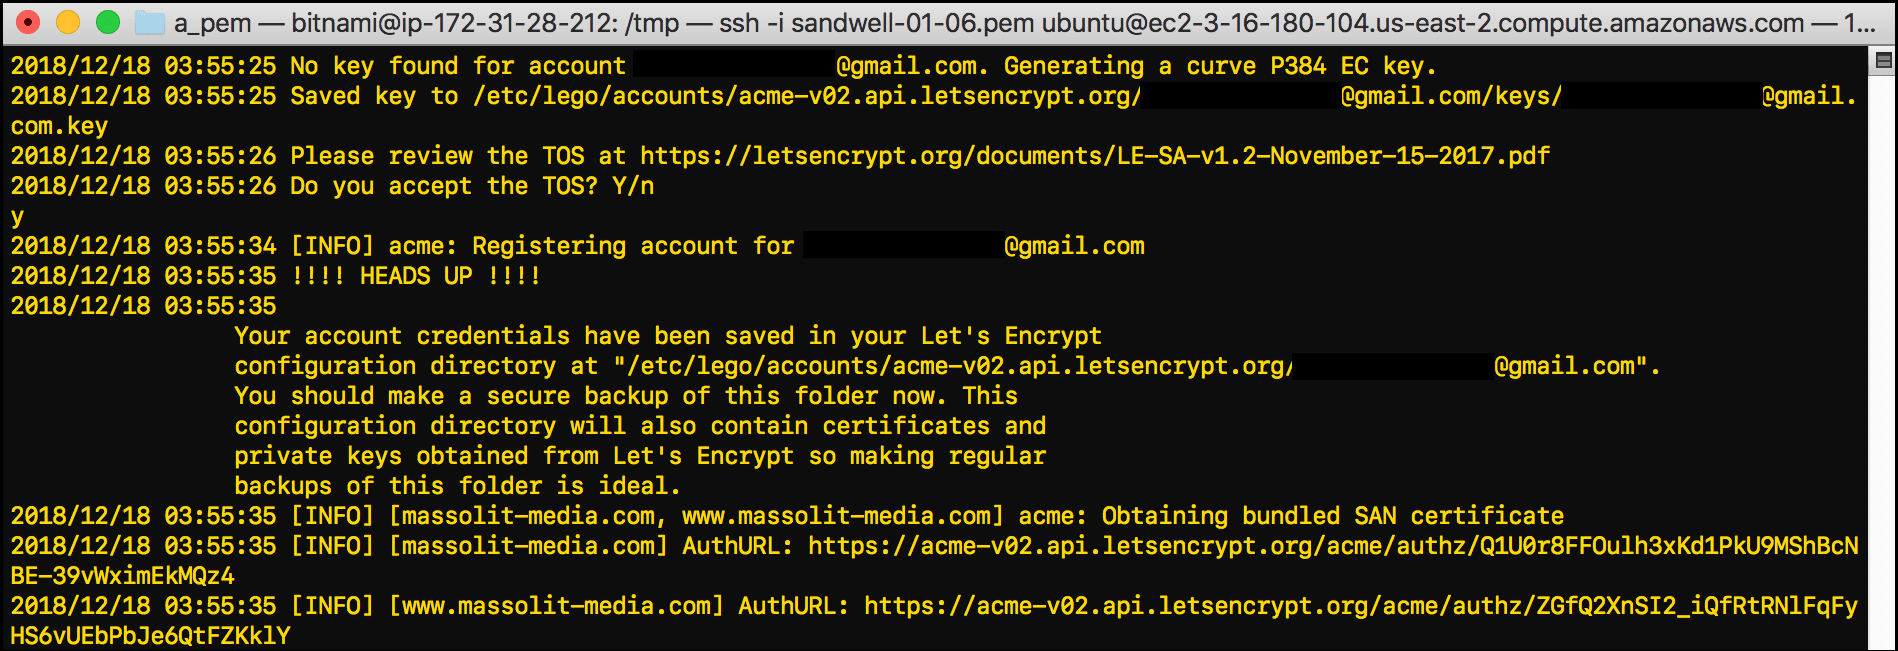
To grab a copy of the Let’s Encrypt certificates off of your EC2 Instance, we’ll need to connect to the instance using our FTP client, find the certificates, and then download them.
- Connect to your EC2 instance by following the steps in WordPress on Amazon EC2: Connect to an Instance via FTP and navigate to the top of the directory structure for your instance (
/).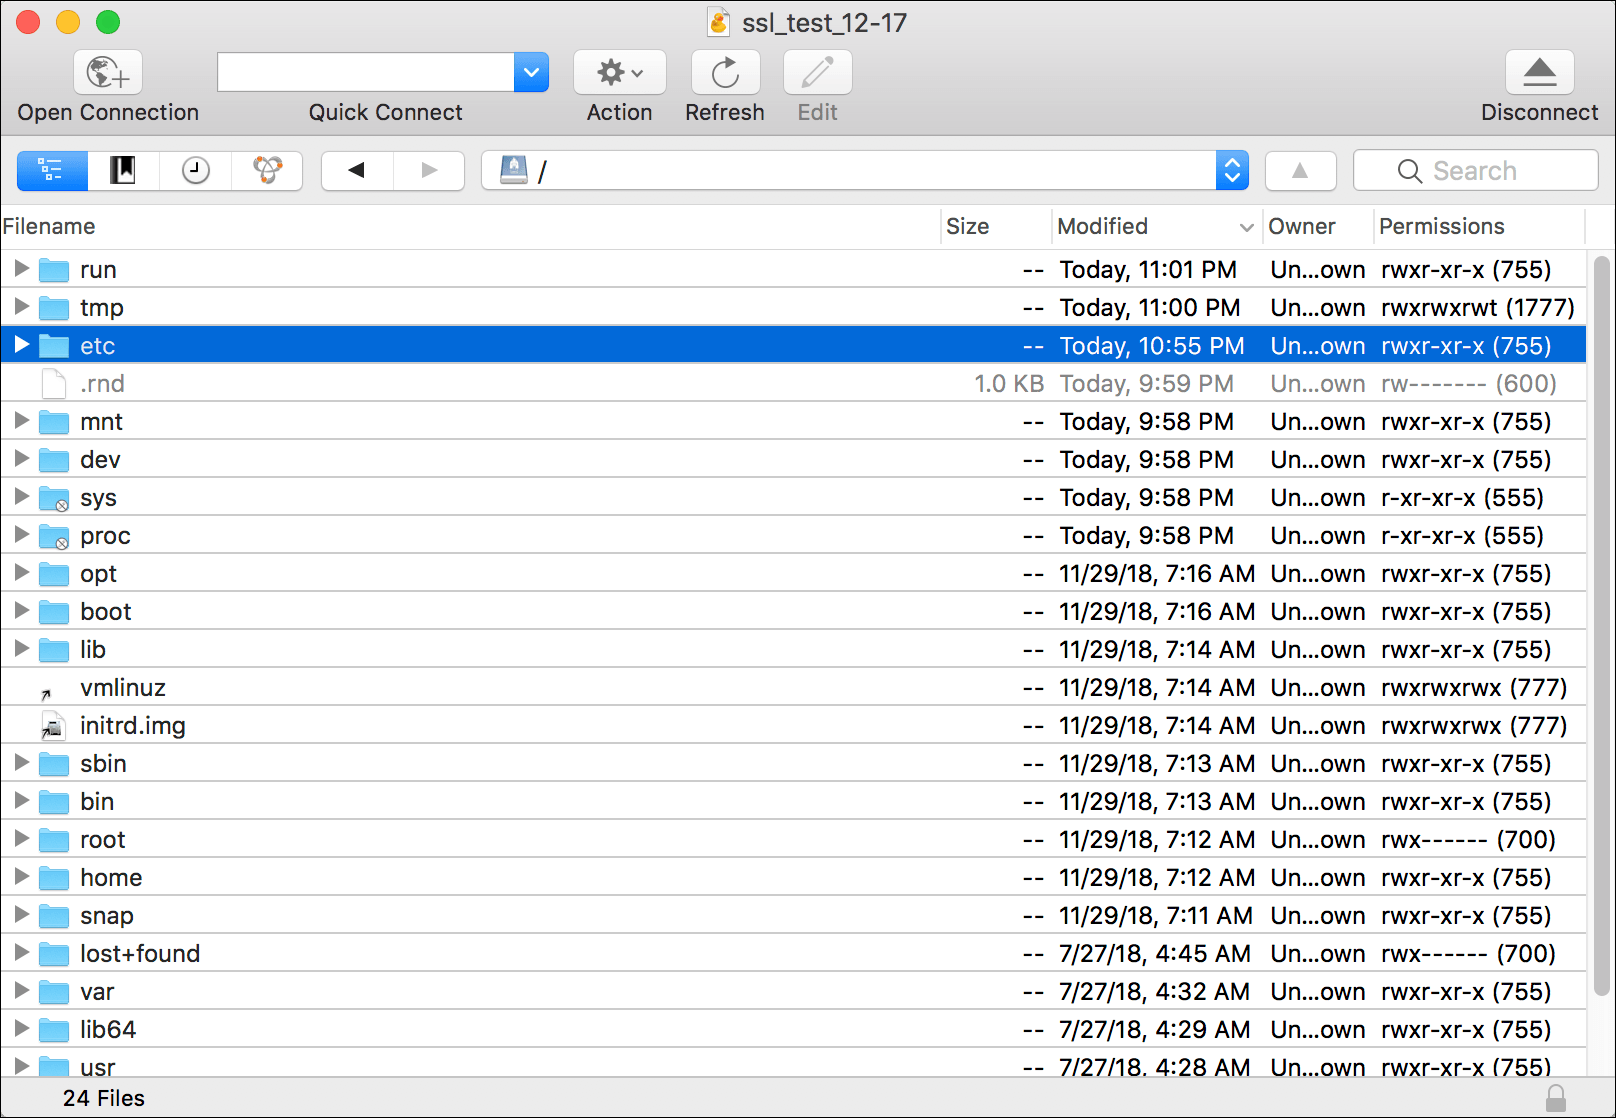
- Find the lego directory at /etc/lego.
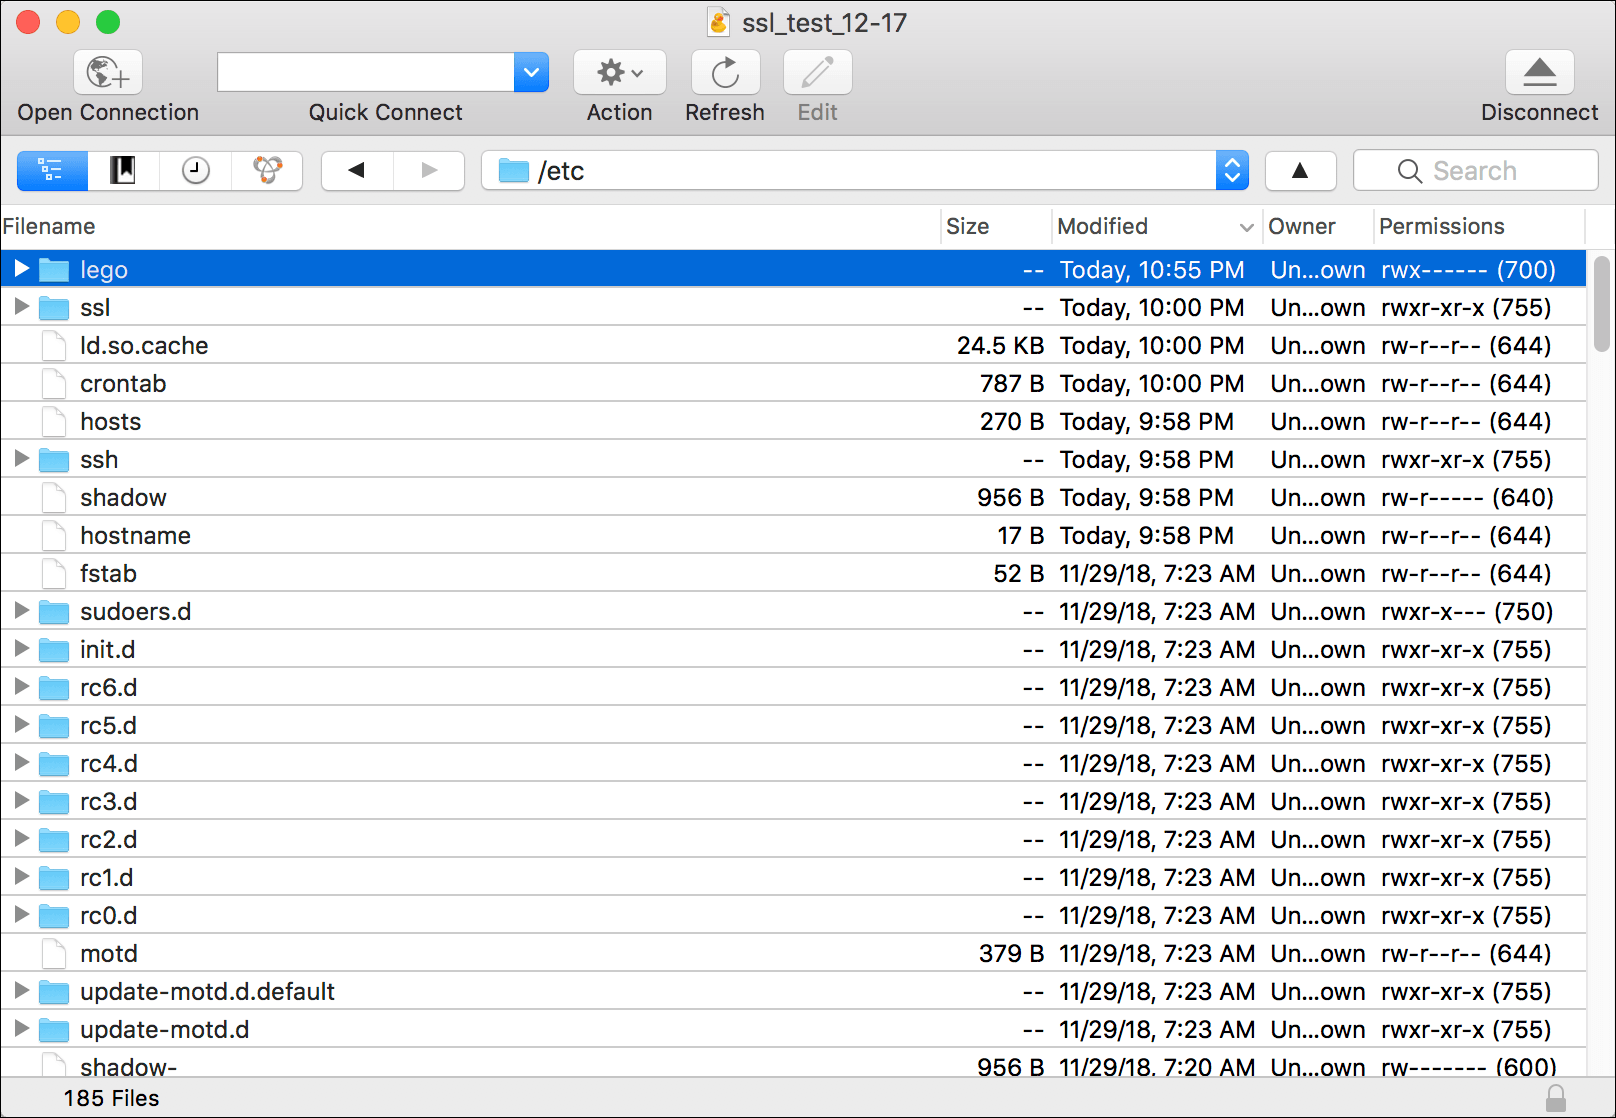
- If you try to open lego, you will get a Permission denied pop-up. This is the same issue that I explained in WordPress on Amazon EC2: Permission Denied Error Message and the solution is very similar.
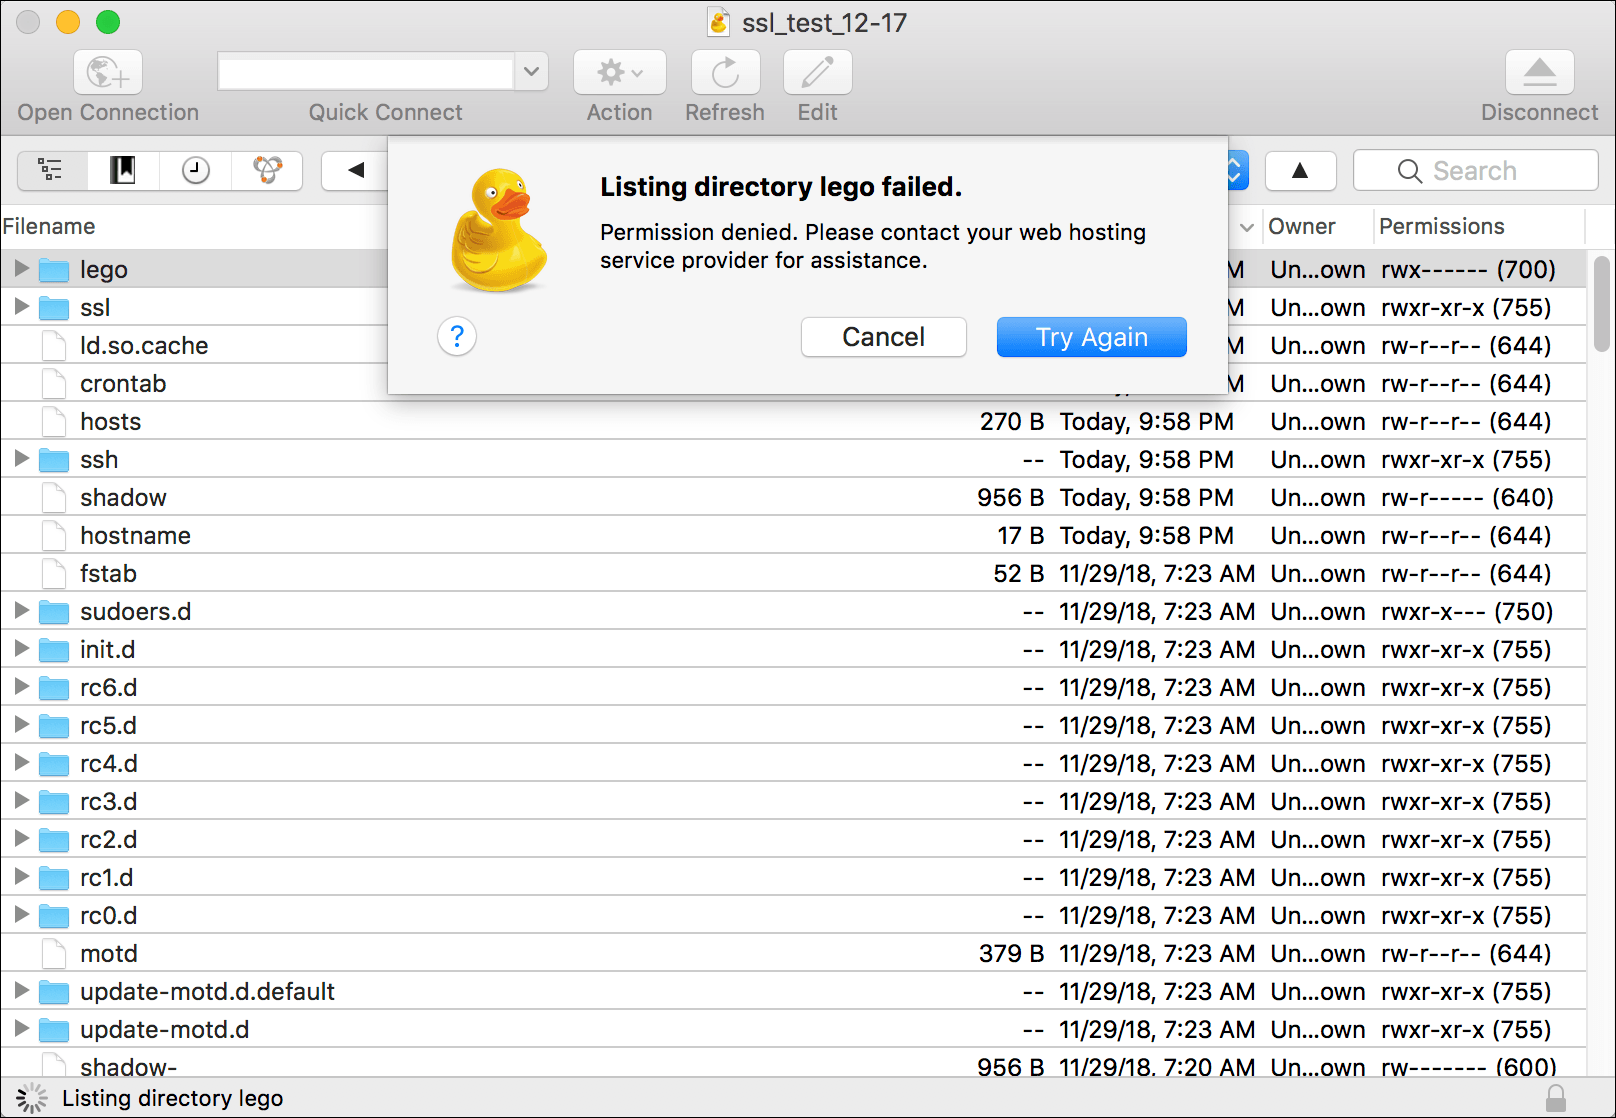
- Open Terminal and connect to your EC2 instance by following the steps in WordPress on Amazon EC2: Connect to an Instance via SSH.
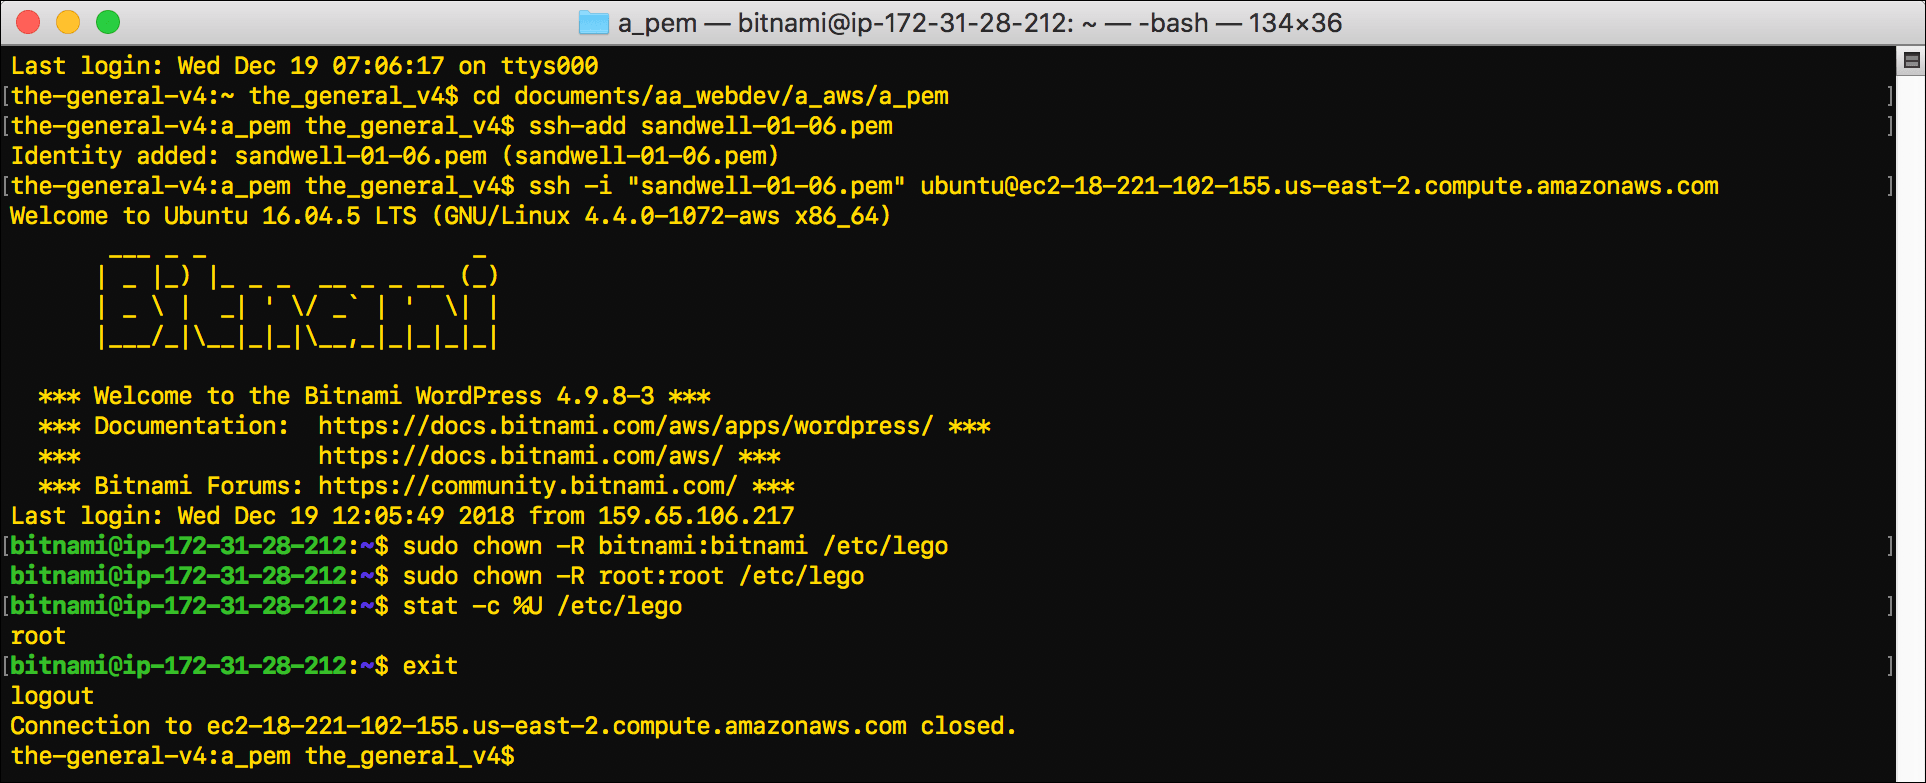
- Use
chownto change ownership of the/etc/legodirectory to thebitnamiuser:sudo chown -R bitnami:bitnami /etc/lego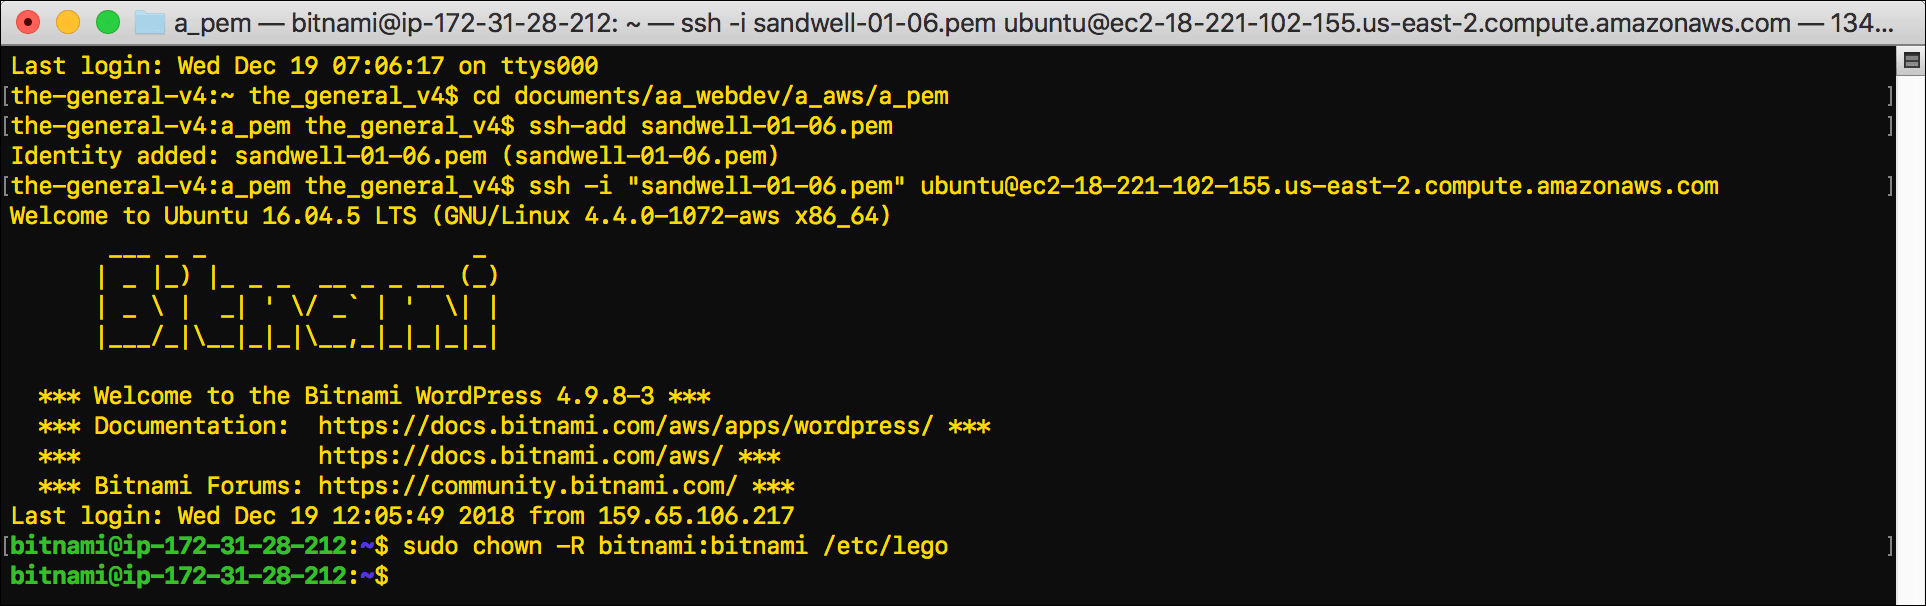
- Go back to your FTP client and try to access
/etc/legoagain. This time it should open and you should see two directories:certificatesandaccounts. Click the arrows next to the folder icons to twirl down the directories.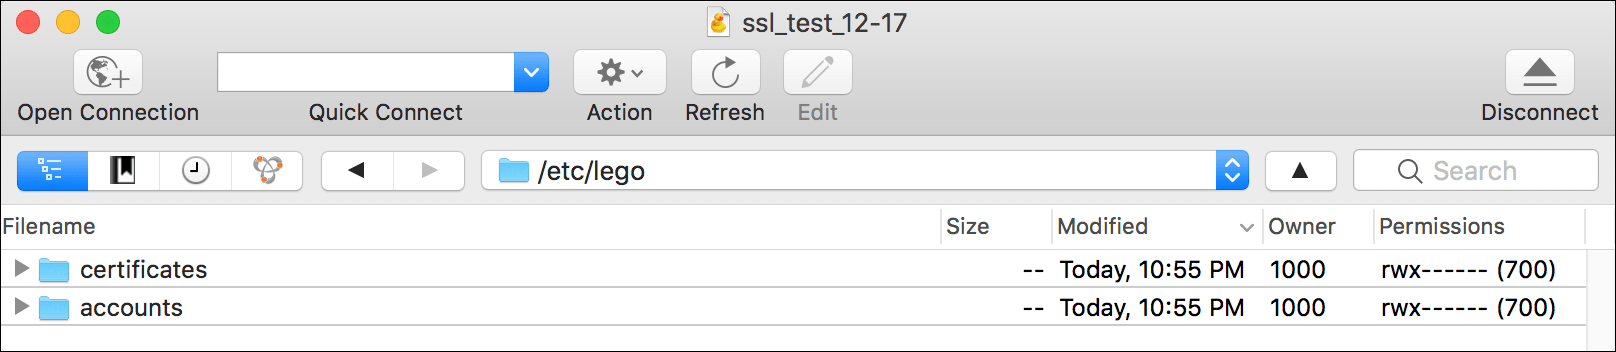
- The
certificatesdirectory contains the certificates and keys, identified by the domain name, while theaccountsdirectory has information about the account, identified by the email address. You can select these directories and drag them to a location on your computer to save a copy as suggested by the on-screen prompt.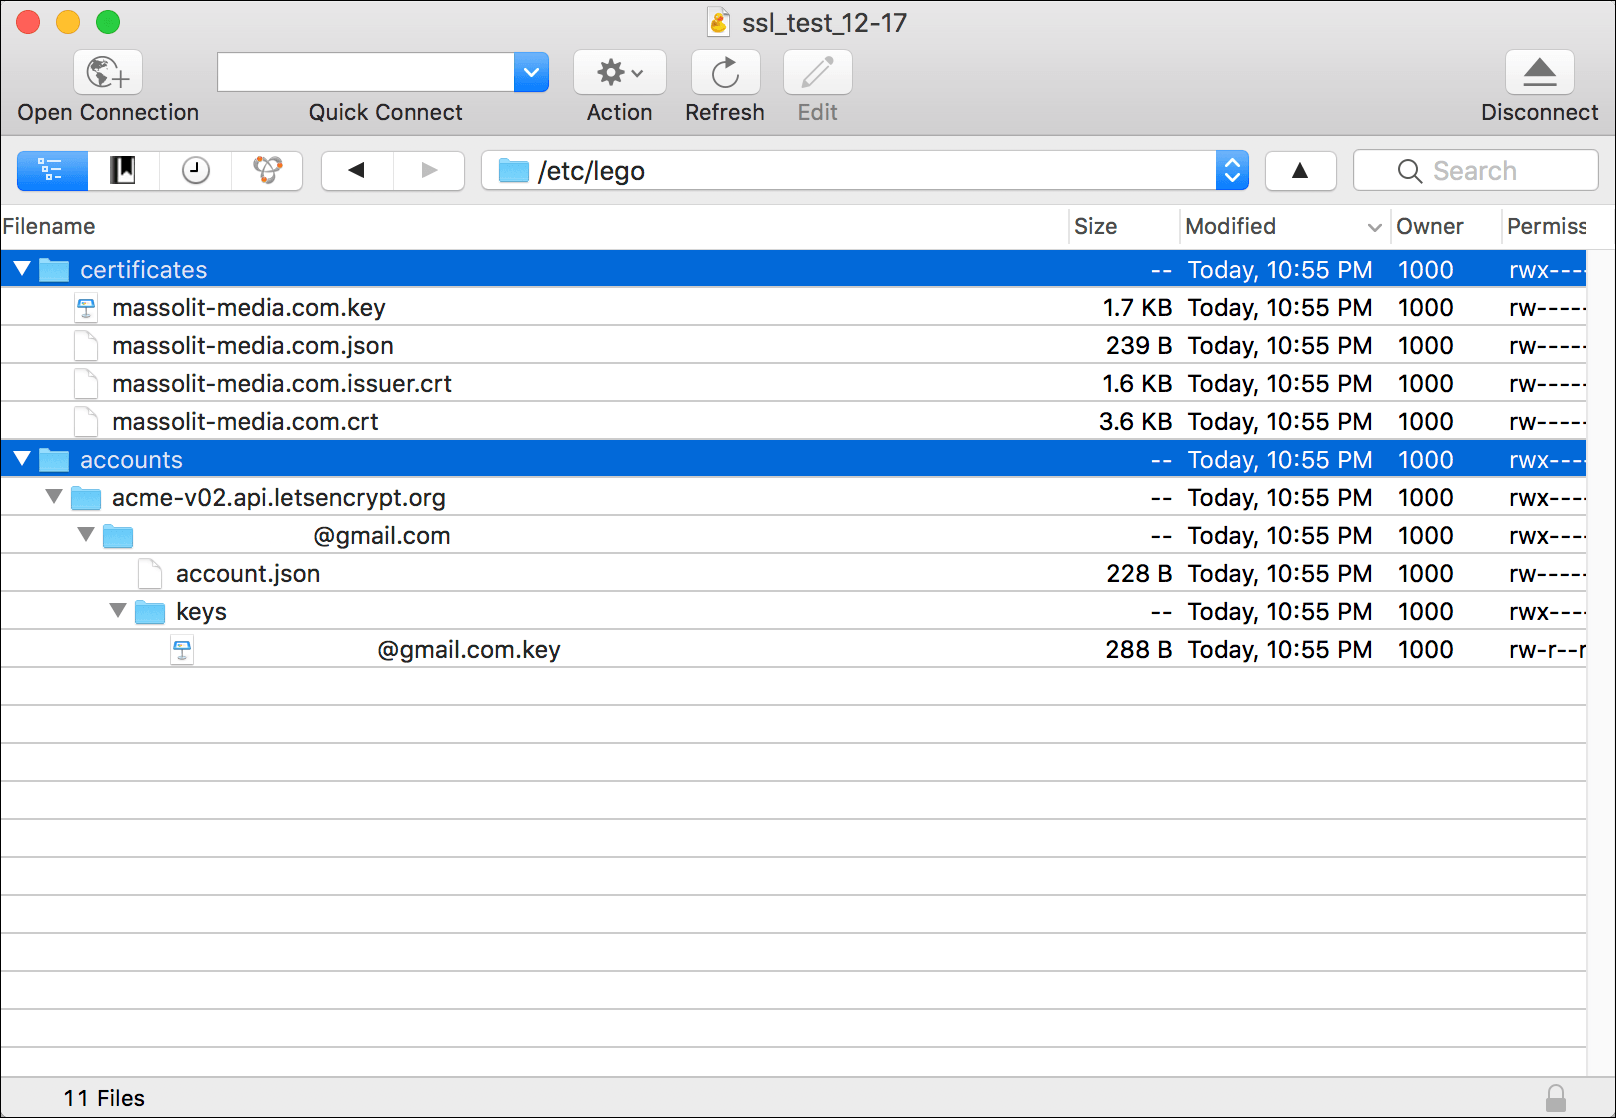
- Chown the
/etc/legodirectory back to therootuser:sudo chown -R root:root /etc/lego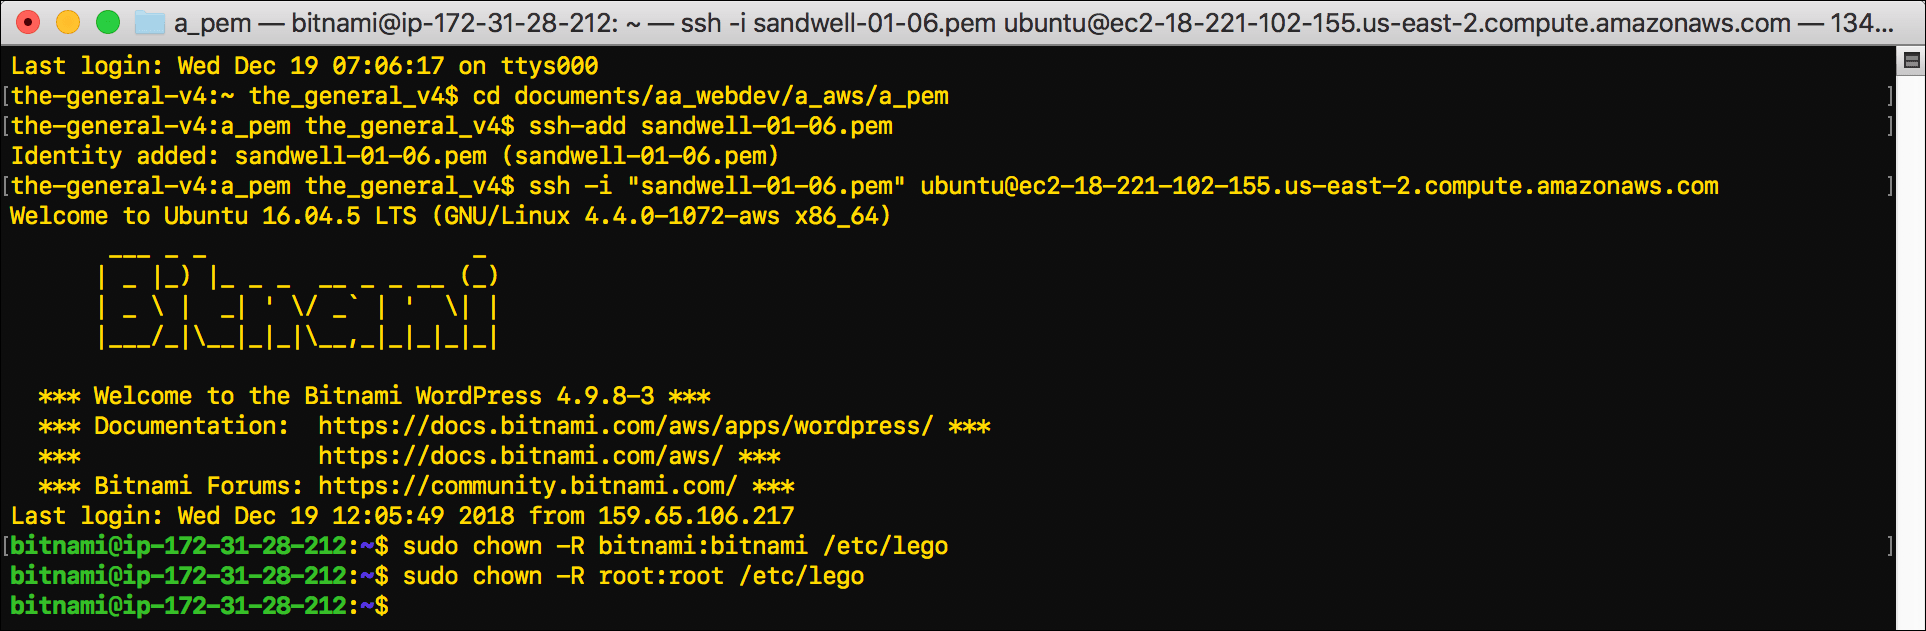
- Confirm that your chown command changed the ownership of lego back to root:
stat -c %U /etc/lego
- When
rootdisplays you have confirmed the ownership change, typeexitand pressEnterto disconnect from the EC2 instance.